Best Backpacking Flashlight: Ultralight & Durable
Shedding Light on the Trail: Your Guide to the Best Backpacking Flashlights
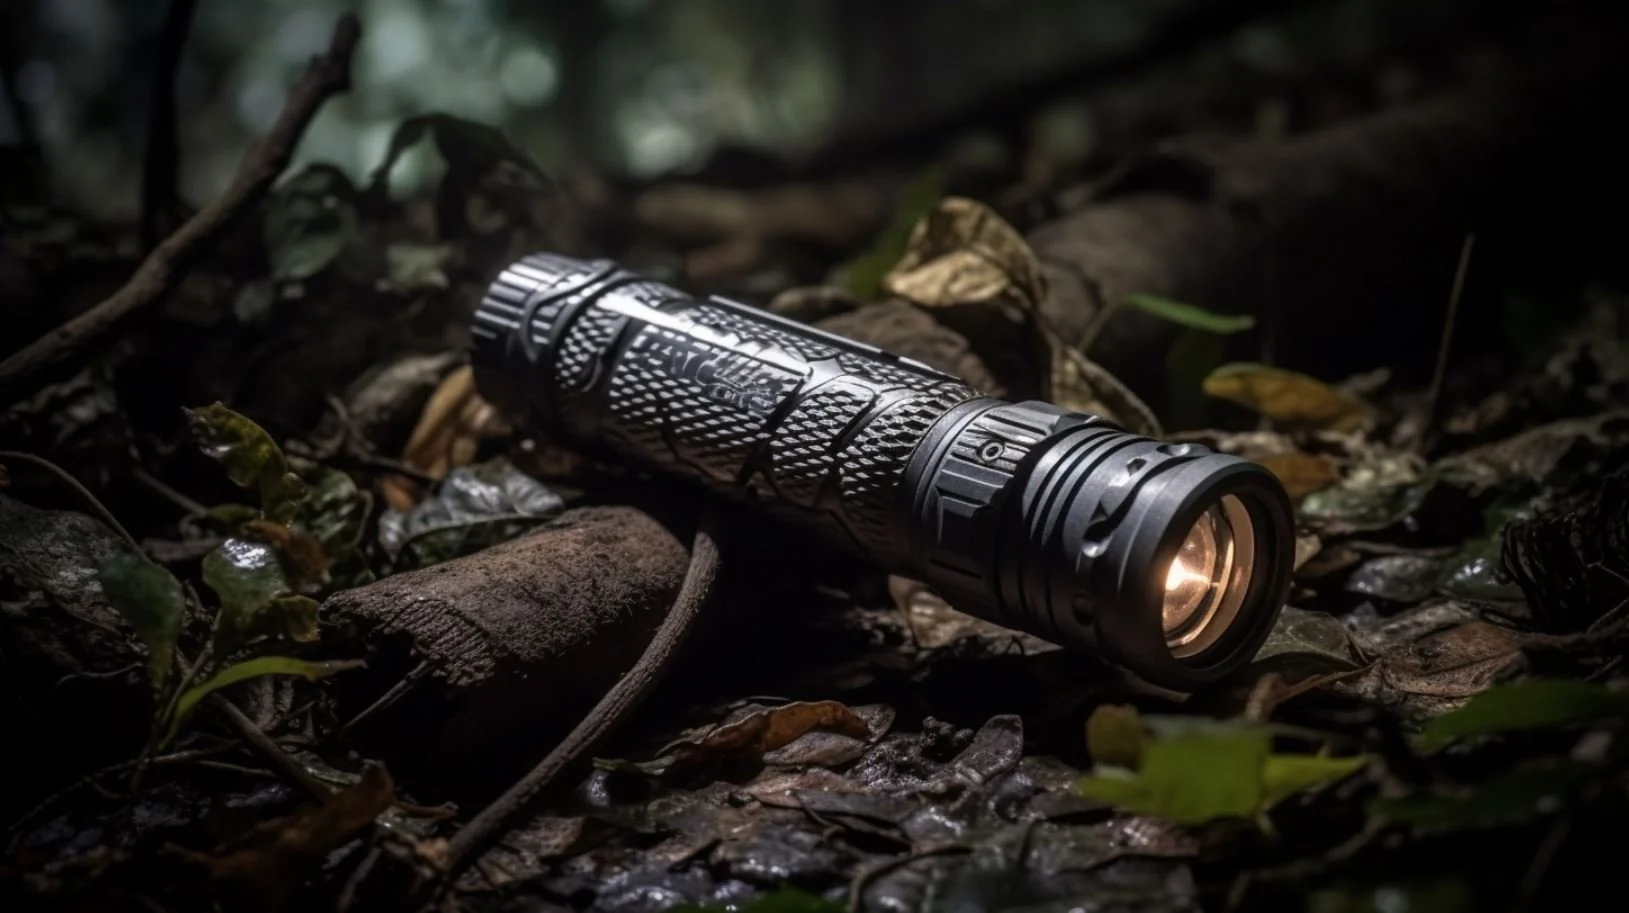
Venturing into the great outdoors as twilight approaches is a thrilling experience, but it demands more than just the spirit of adventure—it requires the right gear.
A flashlight, in this context, is not just a tool but a trusted companion.
Whether you're embarking on a serene weekend getaway or challenging treks, the flashlight you tuck into your backpack can transform your nocturnal experiences.
In this comprehensive guide, we spotlight six exceptional flashlights tailored for different backpacking preferences.
And for those eager to understand the intricacies of selecting the ultimate flashlight, our in-depth buyer's guide awaits.
Quick Links:
Below you’ll find our top 6 picks for the best backpacking flashlights and a short description for each highlighting their best use.
Ultralight: Fenix EOR2 - Compact and featherlight with durable aluminum construction, offering waterproof capabilities.
Top All-Rounder: Streamlight Wedge XT - Strikes a balance in weight and offers commendable battery longevity, waterproof properties, and a safety lock.
Brightest: Nitecore EK4 - Stands out for its luminosity, with superior battery durations across varying brightness settings.
Most Advanced: Nitecore Tini 2 - A featherweight keychain flashlight teeming with functionalities such as a lockout feature, five luminosity levels, and an LED screen.
Red Light Mode: Nitecore Thumb - Distinguished as the sole ultralight flashlight equipped with a red LED, ideal for maintaining nocturnal visibility.
Optimal for Pocket Storage: Surefire Stiletto Pro - Designed with a sleek profile for pocket clipping, though it's slightly weightier than its counterparts.
Best Backpacking Flashlight
(sorted by best use)
Lightest Weight
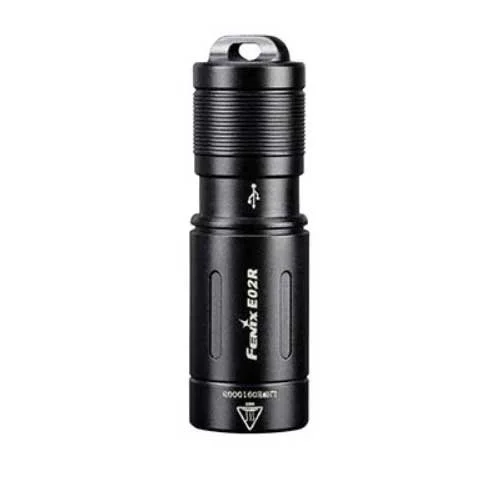
Fenix EOR2
Small, ultralightweight flashlight with solid aluminum construction and waterproof performance.
| Weight | 0.52 oz |
| Max Lumens | 200 |
| Safety Lock | No |
| Waterproof | Yes |
| Material | Aluminum |
| Battery | Rechargeable |
| Lumens | Runtime |
|---|---|
| 200 | 25 minutes |
| 15 | 6.5 hours |
Best Overall
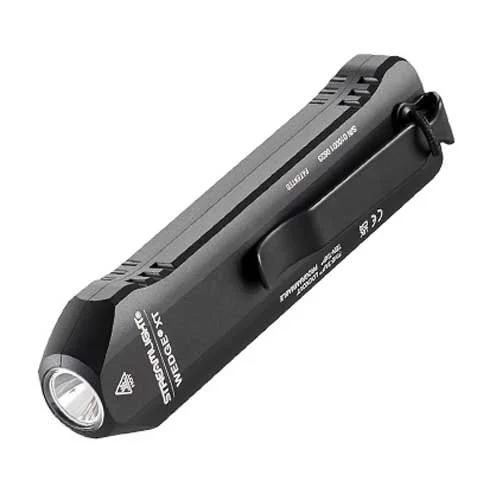
Streamlight Wedge XT
Best blend of features: lightweight, respectable battery life, waterproof, and safety lock.
| Weight | 2.62 oz |
| Max Lumens | 500 |
| Safety Lock | Yes |
| Waterproof | Yes |
| Material | Aluminum |
| Battery | Rechargeable |
| Lumens | Runtime |
|---|---|
| 500 | 2 hours |
| 50 | 11 hours |
Brightest
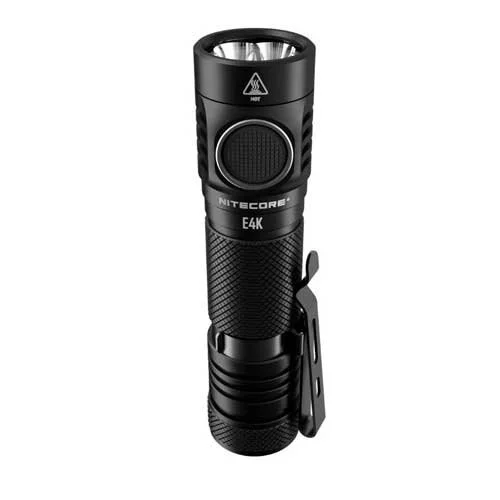
Nitecore EK4
The highest-power backpacking flashlight with the best battery run times across all brightness levels.
| Weight | 2.82 oz |
| Max Lumens | 4,400 |
| Safety Lock | No |
| Waterproof | Yes |
| Material | Aluminum |
| Battery | Rechargeable |
| Lumens | Runtime |
|---|---|
| 4,400 | 30 minutes |
| 1,050 | 3 hours |
| 320 | 7.5 hours |
| 50 | 45 hours |
| 2 | 700 hours |
Most Advanced
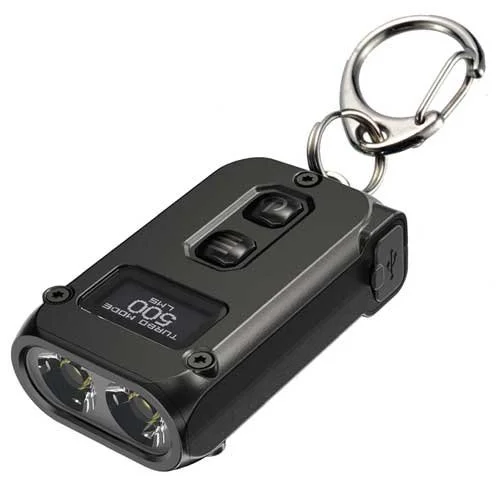
Nitecore Tini 2
Ultralightweight keychain flashlight loaded with features. Lockout mode, 5 brightness settings, and LED display.
| Weight | 0.66 oz |
| Max Lumens | 500 |
| Safety Lock | Yes |
| Waterproof | No (Resistant) |
| Material | Aluminum, Stainless Steel, Titanium |
| Battery | Rechargeable |
| Lumens | Runtime |
|---|---|
| 500 | 15 minutes |
| 200 | 45 minutes |
| 65 | 2.5 hours |
| 15 | 8 hours |
| 1 | 60 hours |
Red Light Mode
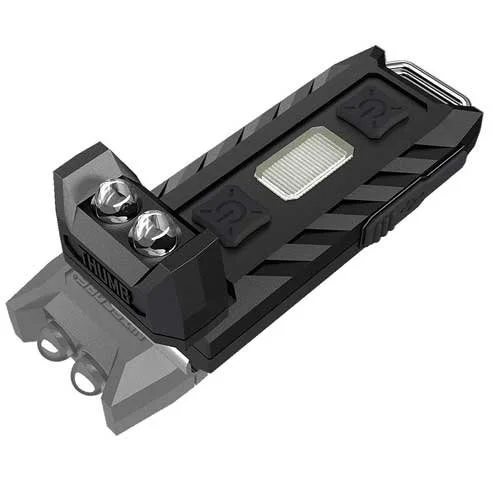
Nitecore Thumb
The only ultralight backpacking flashlight with a red LED to preserve your night vision.
| Weight | 0.88 oz |
| Max Lumens | 85 |
| Safety Lock | No |
| Waterproof | No (Resistant) |
| Material | Polycarbonate |
| Battery | Rechargeable |
| Lumens | Runtime |
|---|---|
| 85 | 45 minutes |
| 30 | 2 hours |
| 2 | 22 hours |
Best for Pockets

Surefire Stiletto Pro
Slim design for clipping into a pocket. Boasts fully-loaded features, but is slightly heavier than other options.
| Weight | 4.0 oz |
| Max Lumens | 1,000 |
| Safety Lock | Yes |
| Waterproof | Yes |
| Material | Aluminum |
| Battery | Rechargeable |
| Lumens | Runtime |
|---|---|
| 1,000 | 1 hour |
| 300 | 1.5 hours |
| 25 | 23.5 hours |
Buyer’s Guide
Backpacking demands equipment that is efficient, durable, and reliable. Among the essentials, a flashlight stands out for its significance in ensuring safety and convenience.
This guide provides an in-depth look at the criteria for selecting the best flashlight for backpacking, emphasizing features such as waterproofing, safety locks, and the utilization of durable materials.
1. Why a Flashlight is Essential for Backpacking
When embarking on a backpacking adventure, nighttime navigation, setting up camp after sunset, or facing unforeseen circumstances like poor visibility due to weather, requires a reliable light source. Beyond mere illumination, a good flashlight can signal for help, scare away animals, or assist in first aid situations.
2. Criteria for Selection
2.1 Size and Weight
For backpacking, every ounce matters. Look for a flashlight that is compact yet effective. Typically, flashlights between 3 to 6 inches are ideal, balancing the convenience of portability with the power of illumination.
-
When it comes to backpacking, the adage "every ounce counts" holds significant truth.
The choice of gear, especially items like flashlights, should be based on a balance of functionality and the weight they add to your pack.
In this guide, we delve deeply into understanding the importance of size and weight for backpacking flashlights, helping you make informed decisions on your next purchase.
2. Why Size and Weight Matter
2.1. Mobility and Comfort
Carrying heavy equipment can cause strain over long hikes. The more weight you can shed from your gear, the faster and longer you can move, making your overall experience more enjoyable.
2.2. Space Constraints
Backpack space is always at a premium. Opting for a compact flashlight ensures you have ample room for other essentials.
2.3. Balance of Functionality
While it's tempting to go for the lightest flashlight, it's crucial that the flashlight still serves its primary purpose—providing adequate illumination. Striking this balance is the core challenge.
3. Understanding Size and Weight Ranges
3.1. Ultralight Flashlights
Typically weighing in at under 2 ounces (56 grams) and measuring less than 3 inches in length. Ideal for minimalist backpackers. However, they might compromise on brightness and battery life.
3.2. Mid-weight Flashlights
Weighing between 2 to 4 ounces (56 to 113 grams) and measuring between 3 to 5 inches. These offer a good balance between brightness, battery life, and weight.
3.3. Heavier Flashlights
Generally weigh over 4 ounces (113 grams) and can measure over 5 inches. They might provide extra features or extended battery life but will add to pack weight.
4. Factors Influencing Size and Weight
4.1. Material Construction
The material from which the flashlight is made will directly influence its weight. Materials such as aluminum are lightweight yet sturdy, while stainless steel is denser but offers more ruggedness.
4.2. Battery Type and Size
The kind of batteries the flashlight requires will play a significant role in its weight. For instance, flashlights powered by AAA batteries will be lighter than those needing AA batteries. Additionally, the number of batteries required will affect weight.
4.3. Additional Features
Flashlights with multiple modes, adjustable beams, or other specialized features might weigh more due to the extra components. Consider what features are essential for your journey.
5. Practical Tips for Selection
5.1. Determine Your Priorities
If you're on a short trip or a route with many nighttime stops, a heavier flashlight with more features might be acceptable. For longer treks, an ultralight option could be best.
5.2. Test Before Purchase
If possible, handle the flashlight before buying. This gives a tactile sense of its weight and size, helping you gauge its suitability.
5.3. Consider Your Total Pack Weight
While the weight of a flashlight might seem negligible, it's essential to view it in the context of your total pack weight. Even small reductions in weight can make a significant difference over extended hikes.
5.4. Review Technical Specifications
Always check the product's technical specifications. This section provides precise measurements and weight, helping you compare various options effectively.
2.2 Lumens (Brightness)
Lumens measure the total amount of visible light emitted. For backpacking:
50-100 lumens: Suitable for general tasks around the campsite.
100-300 lumens: Ideal for navigating trails and hiking at night.
300+ lumens: Necessary for search and rescue or other specialized tasks.
-
Brightness is one of the most critical factors in determining the effectiveness of a backpacking flashlight.
The capacity to illuminate effectively can drastically impact a traveler's experience and safety.
This guide dives into the significance of brightness, offering insights into lumens, beam types, and battery life, all of which influence a flashlight's performance.
2. Understanding Lumens
2.1. What are Lumens?
Lumens measure the total amount of visible light emitted by a source. It provides a standardized measure, making it easier to compare the brightness levels of different flashlights.
2.2. Lumens Range for Backpacking
50-100 lumens: Suitable for basic tasks around the campsite, such as cooking, reading, or sorting gear.
100-300 lumens: Adequate for most trail navigation at night or early morning. It ensures safe footing and helps in identifying landmarks.
300+ lumens: Essential for challenging conditions, such as dense forests, foggy environments, or rough terrains, where visibility is a priority. Also useful for signaling in emergencies.
3. Beam Type and Adjustability
3.1. Spot (or focused) Beam:
This type of beam directs light onto a specific area, making it ideal for distant viewing. Spot beams can be useful for navigating trails during night hikes or spotting distant objects.
3.2. Flood (or wide) Beam:
Flood beams spread light across a broad area, making them perfect for up-close tasks. They're especially handy inside tents or when gathering things around the campsite.
3.3. Adjustable Beam:
Some flashlights allow users to transition between spot and flood beams. This feature offers versatility, enabling the user to adapt to different scenarios without needing multiple light sources.
4. Brightness Modes and Controls
4.1. Multiple Modes:
Most modern flashlights come with various brightness modes. This feature not only allows the user to choose the most appropriate brightness level for their situation but also helps in conserving battery life.
4.2. Intuitive Controls:
Easy-to-use controls are essential. Whether it's a simple button or a twist function, the ability to switch modes or adjust brightness quickly, even in the dark or with gloves on, enhances user experience.
5. Battery Life and Brightness
5.1. Power Drain:
Higher brightness levels will drain batteries faster. While a flashlight may boast high lumens, it's crucial to note how long it can sustain that brightness.
5.2. Regulated Output:
Some flashlights offer a regulated output, ensuring a consistent brightness level as long as the battery has charge. Once the battery drops below a certain level, the brightness might decrease to conserve energy.
5.3. Battery Type:
The kind of battery (alkaline, lithium, or rechargeable) can influence the brightness stability and duration. For instance, lithium batteries tend to perform well in cold conditions, ensuring consistent brightness.
6. Additional Considerations
6.1. Red Light Feature:
Red light is less harsh on the eyes, preserving night vision. While it's not as bright as white light, it is sufficient for tasks that don't require full illumination, such as reading maps or navigating a tent.
6.2. Impact of Temperature:
Cold environments can affect battery performance, potentially diminishing brightness. Considering this, if you're heading to colder regions, ensure that the flashlight and its battery can maintain optimal brightness in such conditions.
6.3. Waterproofing and Brightness:
Water intrusion can impact the LED and battery performance, potentially reducing brightness. Look for flashlights with appropriate waterproof ratings to ensure consistent brightness in wet conditions.
2.3 Battery Life
For extended trips, it's crucial to consider how long the flashlight will operate on a full charge or set of batteries. Having a light with various modes (e.g., high, medium, low, and SOS) can extend battery life by using only the necessary brightness level.
-
Battery life stands as a pillar of consideration when choosing a backpacking flashlight.
In the midst of nature, the reliability and duration of your flashlight's power source can be the difference between a comfortable evening and a challenging night.
This guide delves into battery life's significance and the factors that influence it in backpacking flashlights.
2. Why Battery Life Matters
2.1. Consistent Illumination:
Long-lasting battery life ensures that you have a reliable light source throughout your trip, from setting up camp to nighttime navigation.
2.2. Safety Considerations:
In emergencies, a flashlight with an enduring battery can serve as a beacon for rescuers or help in signaling for assistance.
2.3. Resource Management:
Knowing your flashlight's battery lifespan helps in planning and rationing usage, so you're never left in the dark unexpectedly.
3. Understanding Battery Types
3.1. Alkaline Batteries:
Commonly used in many devices, they're readily available but might not offer as long-lasting performance as other types. They can also degrade over time, especially in cold conditions.
3.2. Lithium Batteries:
Lighter than alkaline and known for their consistent performance, even in cold environments. They have a longer shelf life, making them suitable for extended trips.
3.3. Rechargeable Batteries (NiMH, Li-ion):
While they might have a higher initial cost, they can be recharged multiple times, making them cost-effective in the long run. However, they may require access to a power source for recharging.
3.4. Integrated Rechargeable Units:
Some flashlights come with built-in rechargeable batteries, often charged via USB. These are convenient but limit you to the built-in battery's lifespan.
4. Factors Influencing Battery Life
4.1. Brightness Levels and Modes:
Using a flashlight on its highest brightness setting will deplete the battery faster. Many flashlights offer multiple modes, allowing users to balance brightness with battery conservation.
4.2. Regulated Output:
Flashlights with regulated output maintain a consistent brightness level until the battery is nearly depleted. Others might gradually diminish in brightness as the battery drains.
4.3. Usage Frequency:
Intermittent use, as opposed to continuous operation, can influence how long the battery lasts. Turning the flashlight off when not in use, even briefly, can extend battery life.
4.4. External Conditions:
Temperature, particularly cold conditions, can affect battery performance. Some batteries might not provide consistent power in colder environments.
5. Practical Tips for Maximizing Battery Life
5.1. Carry Spares:
Always have spare batteries on hand, especially if venturing into remote areas. This ensures you're prepared if your primary set depletes.
5.2. Use Low Modes When Possible:
For tasks like reading or searching within the tent, lower brightness modes can be adequate and will conserve battery life.
5.3. Store Properly:
When not in use, especially for extended periods, remove batteries from the flashlight to prevent any potential leakage or corrosion.
5.4. Monitor Battery Health:
Periodically check the health of rechargeable batteries. Over time, their capacity to hold a charge can diminish, requiring replacement or more frequent recharging.
5.5. Consider Solar Charging:
If you're on a long expedition, consider carrying a solar charger. While it adds to your gear weight, it can recharge your flashlight's batteries during the day, ensuring you have light at night.
2.4 Waterproofing
For a flashlight to be truly backpacking-ready, it should be resistant to water. Ratings based on the IPX system are helpful:
IPX4: Splash resistant from all angles.
IPX7: Can be submerged up to 1 meter for 30 minutes.
IPX8: Suitable for continuous submersion deeper than 1 meter.
-
When backpacking, nature remains unpredictable. Rainstorms can suddenly appear, river crossings might be on your route, or morning dew might settle heavily.
Ensuring your flashlight remains functional despite moisture is pivotal, making waterproofing a crucial feature.
This guide delves deep into the significance of waterproofing, standards, and related factors for backpacking flashlights.
2. Why Waterproofing Matters
2.1. Unpredictable Weather Conditions:
Whether it's an unforeseen downpour or mist from a waterfall, water exposure is often unexpected, and a waterproof flashlight ensures functionality is maintained.
2.2. Protection from Accidents:
Drops in puddles or temporary submersions can happen. A flashlight with robust waterproofing can withstand such incidents.
2.3. Extended Lifespan:
Water damage is a common cause of electronic failures. Waterproofing not only ensures the flashlight remains functional during wet conditions but also potentially extends its overall lifespan.
3. Understanding Waterproof Ratings
The International Protection (IP) rating system is commonly used to define levels of sealing effectiveness against intrusion from foreign bodies and moisture.
3.1. IPX0:
No special protection against water.
3.2. IPX1:
Protects against vertically falling drops of water.
3.3. IPX2:
Protects against water drops when tilted up to 15 degrees.
3.4. IPX3:
Protects against spraying water, up to 60 degrees from vertical.
3.5. IPX4:
Resistant to water splashes from any direction.
3.6. IPX5:
Protects against water jets from any direction.
3.7. IPX6:
Can withstand powerful water jets.
3.8. IPX7:
Protection against temporary immersion, typically up to 1 meter for 30 minutes.
3.9. IPX8:
Protection against extended immersion under pressure, usually specified by the manufacturer, often beyond 1 meter.
4. Factors to Consider Beyond Ratings
4.1. Seals and Gaskets:
High-quality seals and gaskets ensure that the flashlight's internal components remain dry. Over time, these may wear out, so it's vital to check and replace them as necessary.
4.2. Material Durability:
Materials like aluminum, stainless steel, and titanium not only provide structural durability but can also enhance the flashlight's resistance to corrosion from water exposure.
4.3. Design Considerations:
A flashlight's design, such as the placement of buttons or twist mechanisms, can influence its waterproof capabilities. Recessed buttons, for instance, can offer added protection against water ingress.
5. Practical Tips for Ensuring Waterproof Integrity
5.1. Regular Inspections:
Periodically inspect seals, gaskets, and the flashlight body for signs of wear, tear, or damage that might compromise its waterproofing.
5.2. Avoid Prolonged Submersion:
Even if a flashlight has a high IP rating, it's advisable to avoid unnecessary prolonged submersion. While it may resist water ingress, extended exposure can challenge its limits.
5.3. After Exposure Care:
After exposure to saltwater or muddy conditions, rinse the flashlight with fresh water and dry it thoroughly. Salt and debris can degrade seals over time.
5.4. Storage Considerations:
When not in use, store the flashlight in a dry place, ensuring that any residual moisture does not compromise its components or waterproofing capabilities.
2.5 Safety Lock
To prevent unintentional battery drain or the accidental turning on of the flashlight inside a pack or pocket, a safety lock or lockout mode is invaluable.
-
In the realm of backpacking flashlights, the safety lock feature, sometimes referred to as a "lockout mode," plays an essential role in ensuring efficient battery usage and avoiding unintentional illumination.
A safety lock prevents the flashlight from turning on accidentally, which is crucial in preserving battery life and avoiding potential disruptions or mishaps.
This guide offers insights into the significance, mechanisms, and considerations surrounding the safety lock feature in flashlights.
2. Why the Safety Lock Matters
2.1. Preventing Unwanted Illumination:
Accidental activations, especially inside a packed bag, can lead to unexpected battery drain, leaving the user without a functional flashlight when needed.
2.2. Maintaining Stealth:
In scenarios where maintaining a low profile or preventing light pollution is important, an unintentional flashlight activation could be disruptive or even risky.
2.3. Avoiding Heat Build-Up:
Flashlights can get warm or even hot with prolonged use. An unintended activation, especially in a confined space, could lead to excessive heat build-up, potentially damaging the flashlight or other items in the vicinity.
3. Mechanisms of Safety Locks
3.1. Physical Locks:
These often come in the form of a twist mechanism. By slightly unscrewing the head or tail cap of the flashlight, the electrical circuit breaks, preventing it from turning on.
3.2. Electronic Locks:
Implemented through button presses, a user might, for example, need to press and hold the power button for an extended period or press it multiple times in succession to activate or deactivate the lock.
3.3. Hybrid Locks:
Some flashlights combine both physical and electronic mechanisms, offering an extra layer of security against accidental activation.
4. Factors to Consider
4.1. Intuitiveness:
The safety lock mechanism should be easy to engage and disengage, even in the dark or when wearing gloves. It should be straightforward enough that the user doesn't struggle to recall how to unlock the flashlight in a pinch.
4.2. Reliability:
The lock mechanism should consistently work, ensuring that when engaged, the flashlight remains off, and when disengaged, the flashlight can be powered on without issues.
4.3. Feedback:
An ideal safety lock provides some feedback, whether tactile, visual, or auditory, to confirm its engagement or disengagement. This could be in the form of a distinct click, a blinking LED, or a vibration.
5. Practical Tips
5.1. Familiarity:
Always familiarize yourself with the safety lock mechanism of your flashlight before heading out. Practice engaging and disengaging it multiple times to ensure you're comfortable with its operation.
5.2. Regular Checks:
Periodically check the safety lock's functionality, especially if it's a physical twist mechanism, to ensure it's not wearing out or compromised due to dirt or debris.
5.3. Backup Planning:
Even with a safety lock, it's a good practice to carry spare batteries. If an accidental activation does occur and goes unnoticed, depleting the battery, you'll have backups to rely on.
5.4. Storage Considerations:
When storing the flashlight for extended periods, engage the safety lock and consider removing the batteries altogether to prevent any accidental activation and to protect the flashlight's internals.
2.6 Durability and Materials
Look for flashlights made of durable materials:
Aluminum: Lightweight and corrosion-resistant, often with a type III hard-anodized coating to resist scratches.
Stainless Steel: Heavier than aluminum but extremely robust and corrosion-resistant.
Titanium: Combines the best of both aluminum and steel. It's lightweight, corrosion-resistant, and highly durable.
-
When backpacking, equipment durability is paramount. A flashlight, often seen as a lifeline when night falls or in emergencies, should be able to withstand the challenges of outdoor adventures.
The durability of a flashlight is heavily influenced by the materials from which it's constructed.
This guide aims to shed light on the materials used in backpacking flashlights and their implications for durability.
2. Why Durability Matters
2.1. Rough Conditions:
Backpacking often leads to exposure to elements like rain, dirt, and sand. A durable flashlight can resist these without compromising functionality.
2.2. Physical Impacts:
Accidental drops, being stored in tightly packed bags, or occasional knocks are part and parcel of outdoor adventures. Durability ensures the flashlight can handle such incidents.
2.3. Longevity and Cost-Effectiveness:
A durable flashlight, while possibly more expensive initially, can be more cost-effective in the long run, eliminating frequent replacements.
3. Materials Commonly Used
3.1. Aluminum:
Pros: Lightweight and offers a good strength-to-weight ratio. Often features an anodized finish, which enhances its resistance to corrosion and wear.
Cons: Can dent or scratch relatively easily if not anodized.
3.2. Stainless Steel:
Pros: Extremely strong and resistant to corrosion. Less likely to show wear and tear compared to other materials.
Cons: Heavier than aluminum, potentially adding to backpack weight.
3.3. Titanium:
Pros: Combines the best of both aluminum and steel. It's lightweight, exceptionally durable, and highly resistant to corrosion.
Cons: Typically more expensive due to its premium nature and the costs of processing.
3.4. Plastic or Polymer:
Pros: Lightweight and can be made to be impact-resistant. Often less expensive than metal counterparts.
Cons: Generally less durable than metal flashlights, especially when exposed to high heat or extreme cold.
3.5. Rubber:
Pros: Often used as an outer coating or grip, providing shock absorption and preventing slippage.
Cons: Can degrade over time, especially with exposure to the sun or harsh chemicals.
4. Features Enhancing Durability
4.1. Type III Hard-Anodized Coating:
Commonly used on aluminum flashlights, this finish not only provides color but also significantly increases scratch and abrasion resistance.
4.2. O-rings and Gaskets:
Often made of rubber or silicone, these are used to prevent moisture and dust ingress, protecting the flashlight's internals and further enhancing durability.
4.3. Reinforced Bezels:
The front end (or bezel) of the flashlight can be reinforced to withstand impacts, making it useful for breaking glass in emergencies or for self-defense.
4.4. Impact Resistance Ratings:
Some flashlights come with specific ratings (usually in meters) indicating the height they can be dropped onto concrete without suffering damage. This can provide a practical benchmark for durability.
5. Practical Tips for Ensuring Longevity
5.1. Regular Maintenance:
Clean the flashlight periodically, especially the lens and contact points, to ensure optimal performance.
5.2. Storage:
When not in use, store the flashlight in a cool, dry place. If it's going to be stored for extended periods, remove the batteries to prevent potential leakage.
5.3. Use Protective Accessories:
Consider using holsters, cases, or protective pouches, especially when the flashlight is not in use, to protect it from external elements.
5.4. Be Mindful of Temperature Extremes:
While many materials resist temperature changes, prolonged exposure to extreme heat or cold can potentially compromise the flashlight's durability.
2.7 Beam Type and Adjustability
Flashlights can produce different types of beams:
Spot (or focused): For distant viewing.
Flood (or wide): For up-close tasks.
Adjustable: Can transition between spot and flood.
For backpacking, having adjustability can be highly beneficial.
-
In the context of backpacking flashlights, beam type and adjustability are essential considerations. The way a flashlight casts its light can drastically affect its utility in various situations encountered while backpacking.
From navigating trails to setting up camp or reading maps, understanding beam types and their adjustability can help backpackers choose the right flashlight for their needs.
2. Understanding Beam Types
2.1. Spot Beam (or Focused Beam):
Description: Concentrates light in a tight circle, making it ideal for long-distance viewing.
Best Used For: Navigating trails during night hikes, spotting distant landmarks or animals, and other scenarios where focusing on distant objects is crucial.
2.2. Flood Beam (or Wide Beam):
Description: Casts a wide circle of light, illuminating a broader area but not as distant.
Best Used For: General camp tasks like cooking or setting up tents, reading, and other close-up activities where peripheral vision is beneficial.
2.3. Adjustable Beam:
Description: Allows the user to transition between spot and flood beams, providing versatility in light delivery.
Best Used For: Varied backpacking activities where both focused and wide illumination might be needed.
3. Factors Influencing Beam Type and Adjustability
3.1. Reflector Design:
The reflector sits around the flashlight's bulb and influences how light is dispersed. Smooth reflectors tend to produce a more focused beam, while textured or "orange peel" reflectors spread light more evenly, creating a flood effect.
3.2. Lens Shape:
A flashlight's lens can further influence beam type. Some designs can focus or disperse light more than others.
3.3. Mechanical Adjustments:
Certain flashlights come equipped with mechanisms (like sliding or twisting parts) that allow physical alteration of the beam from spot to flood.
3.4. Electronic Adjustability:
Some modern flashlights allow users to adjust beam types electronically via button presses, offering varying degrees of focus or spread without physically modifying the flashlight.
4. Practical Benefits of Adjustability
4.1. Versatility in Different Scenarios:
Being able to adjust the beam means one flashlight can serve multiple purposes, from distant viewing to close-up tasks.
4.2. Battery Conservation:
Using a more focused beam when full illumination isn't required can conserve battery life.
4.3. Adapting to Group Settings:
When backpacking in groups, an adjustable beam can help prevent blinding fellow backpackers. A broader beam is less intense at close range compared to a highly focused beam.
5. Key Considerations When Evaluating Beam Type and Adjustability
5.1. Primary Use:
Consider the main scenarios in which you'll be using the flashlight. If you mainly hike at night, a flashlight with a strong spot beam might be ideal. For general camp tasks, a flood or adjustable beam could be more beneficial.
5.2. Adjustability Mechanism Durability:
For flashlights with mechanical adjustability, it's essential to consider the durability of the adjustment mechanism, as these moving parts can wear out or break.
5.3. Intuitiveness and Ease of Use:
Adjusting the beam type should be straightforward, especially in dark or challenging conditions. Whether mechanically or electronically adjustable, the transition between beam types should be smooth and easy to execute.
5.4. Consistency:
Regardless of adjustability, the flashlight should provide a consistent beam without dark spots or irregular patterns, ensuring clear vision in all conditions.
2.8 Modes and Controls
Multiple modes (like strobe or SOS) can be beneficial for emergencies. Controls should be intuitive and easily operated, even with gloves on.
-
The versatility of a backpacking flashlight often hinges on its available modes and the ease with which users can access them.
Different situations call for different levels or types of illumination, and a flashlight's modes and controls facilitate this adaptability.
This guide provides insights into the various modes available in flashlights and the importance of intuitive controls.
2. Understanding Common Modes
2.1. High or Turbo Mode:
Description: Provides maximum brightness, useful for situations that require intense light.
Considerations: Typically consumes battery power more quickly and can generate significant heat.
2.2. Medium Mode:
Description: A balanced mode offering decent brightness without draining the battery too quickly.
Considerations: Ideal for general tasks and navigation during night hikes.
2.3. Low or Eco Mode:
Description: Delivers minimal brightness but conserves battery life. Suitable for close-up tasks in the dark, like reading.
Considerations: Extends flashlight runtime significantly, often used when conserving battery is a priority.
2.4. Strobe or Flashing Mode:
Description: Emits rapid flashes of light.
Considerations: Useful for signaling during emergencies or for deterring threats.
2.5. SOS Mode:
Description: The light flashes in the SOS Morse code pattern.
Considerations: Specifically designed for emergency situations to signal for help.
2.6. Red Light Mode:
Description: Uses red LEDs to produce light that's less harsh on the eyes and helps in preserving night vision.
Considerations: Often used in situations where maintaining night vision is crucial, such as stargazing or map reading at night.
3. Controls and Their Importance
3.1. Button or Switch Controls:
Pros: Easy to operate, even with gloves on. They can offer tactile feedback, ensuring the mode has been changed.
Cons: Potential for accidental activation if not adequately recessed or if there's no lockout feature.
3.2. Twist Controls:
Pros: Reduce the chance of accidental activation. Simple and intuitive to use.
Cons: Might be challenging to operate with one hand or with gloves.
3.3. Touch or Swipe Controls:
Pros: Offer a sleek design without protruding buttons. Can be intuitive for those familiar with touch interfaces.
Cons: Potential for reduced responsiveness in wet conditions or with gloved hands.
3.4. Memory Function:
Description: Allows the flashlight to remember the last mode used, so it returns to that mode upon being switched on again.
Considerations: Especially useful if a specific mode is frequently used, eliminating the need to cycle through modes each time.
4. Factors to Consider
4.1. Number of Modes:
While having multiple modes adds versatility, it's essential to consider if you'll realistically use all of them. Too many modes can sometimes complicate operation.
4.2. Mode Cycling:
Consider how you switch between modes. Is it easy and intuitive? Can you quickly access the most commonly used modes?
4.3. Mode Indicators:
Some flashlights provide visual or auditory indicators (like LED color changes or beeps) when switching modes, offering clarity, especially in the dark.
4.4. Safety and Lockout Features:
To prevent accidental activation or mode changes, some flashlights come with lockout features. This is particularly useful during transit or storage.
5. Practical Tips
5.1. Familiarization:
Before heading out, get familiar with the flashlight's modes and controls to ensure smooth operation in the field.
5.2. Regular Checks:
Periodically check the controls for wear, especially if they are physical mechanisms, to ensure they function reliably.
5.3. Backup Knowledge:
In case the primary mode or control fails, have knowledge of backup modes or alternative control mechanisms if available.
3. Additional Considerations
3.1 Power Source
Consider if you prefer rechargeable batteries, standard batteries, or a built-in rechargeable unit. Each has its advantages. For instance, standard batteries might be easier to replace in remote locations, while rechargeable units can be more economical in the long run.
-
The power source of a backpacking flashlight is the heart of its operation. Depending on the duration of the trip, environmental conditions, and individual preferences, the choice of power source can significantly impact the performance and convenience of the flashlight.
This guide delves into the different power sources available for backpacking flashlights and their respective considerations.
2. Common Power Sources
2.1. Alkaline Batteries (AA, AAA, etc.):
Pros: Widely available, making them easy to replace in various locales.
Cons: Heavier than other options, shorter lifespan in high-drain devices, performance can decrease in cold temperatures.
2.2. Lithium Batteries (Non-rechargeable):
Pros: Longer shelf life compared to alkaline, better performance in cold conditions, and lighter in weight.
Cons: Typically more expensive, not as readily available in remote areas.
2.3. Rechargeable Batteries (NiMH, Li-ion, etc.):
Pros: Can be recharged multiple times, making them cost-effective in the long run. Li-ion batteries can offer high energy output.
Cons: Require access to a power source or charger for recharging, may have a memory effect (especially older NiMH versions), which can reduce their overall capacity over time.
2.4. Integrated Rechargeable Battery Packs:
Pros: Often designed specifically for the flashlight, ensuring optimal performance. Many come with USB charging options.
Cons: If the battery pack fails, the entire flashlight might be rendered useless unless the pack is replaceable. Dependence on a power source for recharging.
2.5. Solar Charging:
Pros: Sustainable and ideal for long trips where access to electricity is limited. Can be paired with rechargeable batteries.
Cons: Dependent on sunlight for recharging, which can be inconsistent. Solar panels can add weight and bulk.
3. Factors Influencing Choice of Power Source
3.1. Trip Duration:
For short trips, primary (non-rechargeable) batteries might suffice. For extended journeys, rechargeable options or solar charging might be more appropriate.
3.2. Accessibility to Power Sources:
If you'll have regular access to electricity, rechargeable options become viable. For more remote adventures, primary batteries or solar charging may be preferable.
3.3. Weight and Space Considerations:
For those keen on minimizing pack weight, lithium batteries or integrated rechargeable packs, which tend to be lighter than alkaline counterparts, might be ideal.
3.4. Environmental Concerns:
Rechargeable batteries produce less waste over time, making them a more eco-friendly choice. Solar charging further reduces environmental impact.
4. Practical Tips
4.1. Carry Spares:
Regardless of your primary power source, always carry spare batteries or an alternative charging method.
4.2. Battery Storage:
When not in use, store batteries in a cool, dry place. For longer storage, consider removing batteries from the flashlight to prevent potential leakage.
4.3. Monitor Battery Health:
Regularly check rechargeable batteries for signs of wear or reduced capacity. Replace them if they no longer hold a satisfactory charge.
4.4. Be Prepared for Varied Conditions:
Remember that some battery types, like alkaline, can underperform in extreme cold. If you're heading into such conditions, plan your power source accordingly.
3.2 Red Light Feature
Red light preserves night vision and is less disturbing to wildlife. Some flashlights offer this feature, which can be helpful for nighttime reading or tasks without blinding fellow campers.
-
The red light feature in backpacking flashlights is a distinctive yet vital characteristic that serves specific purposes in outdoor environments.
Beyond merely casting a different hue, the red light holds practical advantages that can be instrumental in various scenarios.
This guide offers an in-depth exploration of the red light feature and its significance.
2. Why the Red Light Feature Matters
2.1. Preservation of Night Vision:
Human eyes adjust to low-light conditions after a certain period. Using standard white light can reset this adaptation, causing temporary blindness in the dark. Red light, however, minimally impacts this adaptation, allowing individuals to switch off the light and still see in the dark.
2.2. Less Disruptive in Group Settings:
In group camping or hiking situations, using a red light is less blinding and disruptive to others than white light, making it ideal for communal settings.
2.3. Wildlife Consideration:
Many animals perceive red light less than white light, making it less likely to disturb or attract wildlife during nocturnal activities.
2.4. Stealth and Low Profile:
In situations where maintaining a low profile is essential, the red light is less conspicuous from a distance than traditional white light.
3. Key Features to Consider
3.1. Ease of Access:
The method to activate the red light should be simple. Some flashlights allow direct access to the red light mode without cycling through white light modes, ensuring that night vision isn't unintentionally compromised.
3.2. Variability:
Some flashlights offer varying intensity levels for the red light, allowing users to adjust based on their needs.
3.3. Additional Colors:
Beyond red, some flashlights incorporate other colored LEDs, such as green or blue, each serving specific purposes. While not a necessity, they can add versatility.
4. Practical Applications of Red Light
4.1. Map Reading at Night:
Red light offers enough illumination to read maps without producing glare or reflecting too much light back into the eyes.
4.2. Camp Activities:
From cooking to searching for items in the tent, the red light provides sufficient light without disturbing fellow campers.
4.3. Night Photography:
For those interested in nighttime or astrophotography, the red light allows for equipment adjustments without affecting the surrounding light conditions or the photographer's night vision.
4.4. Fishing or Hunting:
For anglers or hunters active during dawn, dusk, or night, red light can be less disruptive to marine or terrestrial life.
3.3 Attachment Features
Look for flashlights with clips, lanyards, or the ability to be mounted on a headband. This increases versatility in how the flashlight can be used or carried.
-
The utility of a backpacking flashlight isn't limited solely to its illumination capabilities. How one can wear, carry, or attach the flashlight to objects or oneself often influences its convenience and functionality.
Attachment features, therefore, play a crucial role in determining the versatility and adaptability of the flashlight in various scenarios.
This guide offers insights into these features and their implications for backpackers.
2. Common Attachment Features
2.1. Pocket Clip:
Description: A simple metal or plastic clip attached to the flashlight body.
Benefits: Enables users to securely fasten the flashlight to a pocket, belt, or the edge of clothing. Can provide quick access, especially beneficial for tasks requiring frequent use of the flashlight.
2.2. Lanyard Hole:
Description: A small hole or loop, typically at the base or tail end of the flashlight.
Benefits: Allows for the attachment of lanyards, carabiners, or cords. Ideal for securing the flashlight to a wrist or backpack, reducing the risk of loss.
2.3. Magnetic Base:
Description: A magnet incorporated into the flashlight's base.
Benefits: Facilitates hands-free operation by attaching the flashlight to metal surfaces. Particularly useful when both hands are needed for tasks like repairs or cooking.
2.4. Tripod Mount:
Description: A threaded hole designed to fit standard tripod screws.
Benefits: Enables the flashlight to be mounted on tripods or other stands, useful for stationary tasks that need directed light over an extended period.
2.5. Headband or Headlamp Attachment:
Description: Allows the flashlight to be secured on the forehead, turning it into a headlamp.
Benefits: Provides hands-free illumination, ideal for activities like night hiking, climbing, or reading.
3. Factors Influencing Choice of Attachment Features
3.1. Activity Type:
The nature of the backpacking activity heavily influences the attachment features required. For instance, mountaineers might prefer headband attachments, while casual campers might find pocket clips or lanyard holes more beneficial.
3.2. Frequency of Use:
For those who anticipate frequent flashlight usage, easily accessible attachment methods like pocket clips or headbands might be preferred. Conversely, for intermittent use, a lanyard hole or magnetic base could suffice.
3.3. Hands-Free Needs:
Activities that require both hands, such as setting up tents, cooking, or climbing, necessitate attachment features that enable hands-free flashlight operation.
3.4. Security and Loss Prevention:
For treacherous terrains or activities with high movement, secure attachment features like lanyard holes or headbands can help prevent the flashlight from being dropped or lost.
4. Practical Considerations
4.1. Material and Build Quality:
Ensure that attachment features, especially pocket clips or lanyard holes, are made of durable materials and are securely attached to the flashlight body.
4.2. Ergonomics:
The presence of attachment features shouldn't compromise the flashlight's comfort in hand. For example, a pocket clip shouldn't create uncomfortable pressure points when the flashlight is held.
4.3. Versatility:
Opt for flashlights that offer multiple attachment features or the ability to switch between them. This provides adaptability for varied needs.
4.4. Weight and Balance:
Consider how attachment features, especially when utilized (e.g., when a flashlight is attached to a tripod or metal surface), might impact its weight distribution and balance.
Top Recommendations:
Below you’ll find our top 6 picks for the best backpacking flashlights and a short description for each highlighting their best use.
Ultralight: Fenix EOR2 - Compact and featherlight with durable aluminum construction, offering waterproof capabilities.
Top All-Rounder: Streamlight Wedge XT - Strikes a balance in weight and offers commendable battery longevity, waterproof properties, and a safety lock.
Brightest: Nitecore EK4 - Stands out for its luminosity, with superior battery durations across varying brightness settings.
Most Advanced: Nitecore Tini 2 - A featherweight keychain flashlight teeming with functionalities such as a lockout feature, five luminosity levels, and an LED screen.
Red Light Mode: Nitecore Thumb - Distinguished as the sole ultralight flashlight equipped with a red LED, ideal for maintaining nocturnal visibility.
Optimal for Pocket Storage: Surefire Stiletto Pro - Designed with a sleek profile for pocket clipping, though it's slightly weightier than its counterparts.
Conclusion
The journey to finding the perfect backpacking flashlight is as crucial as plotting your trail.
With the options and detailed insights provided in this article, you're poised to make a choice tailored to your specific requirements.
The ideal flashlight not only casts a beam on your path but also ensures safety, efficiency, and a heightened outdoor experience.
As you gear up for your next expedition, let the knowledge from this guide lead you to a well-lit and memorable adventure. Safe trails!