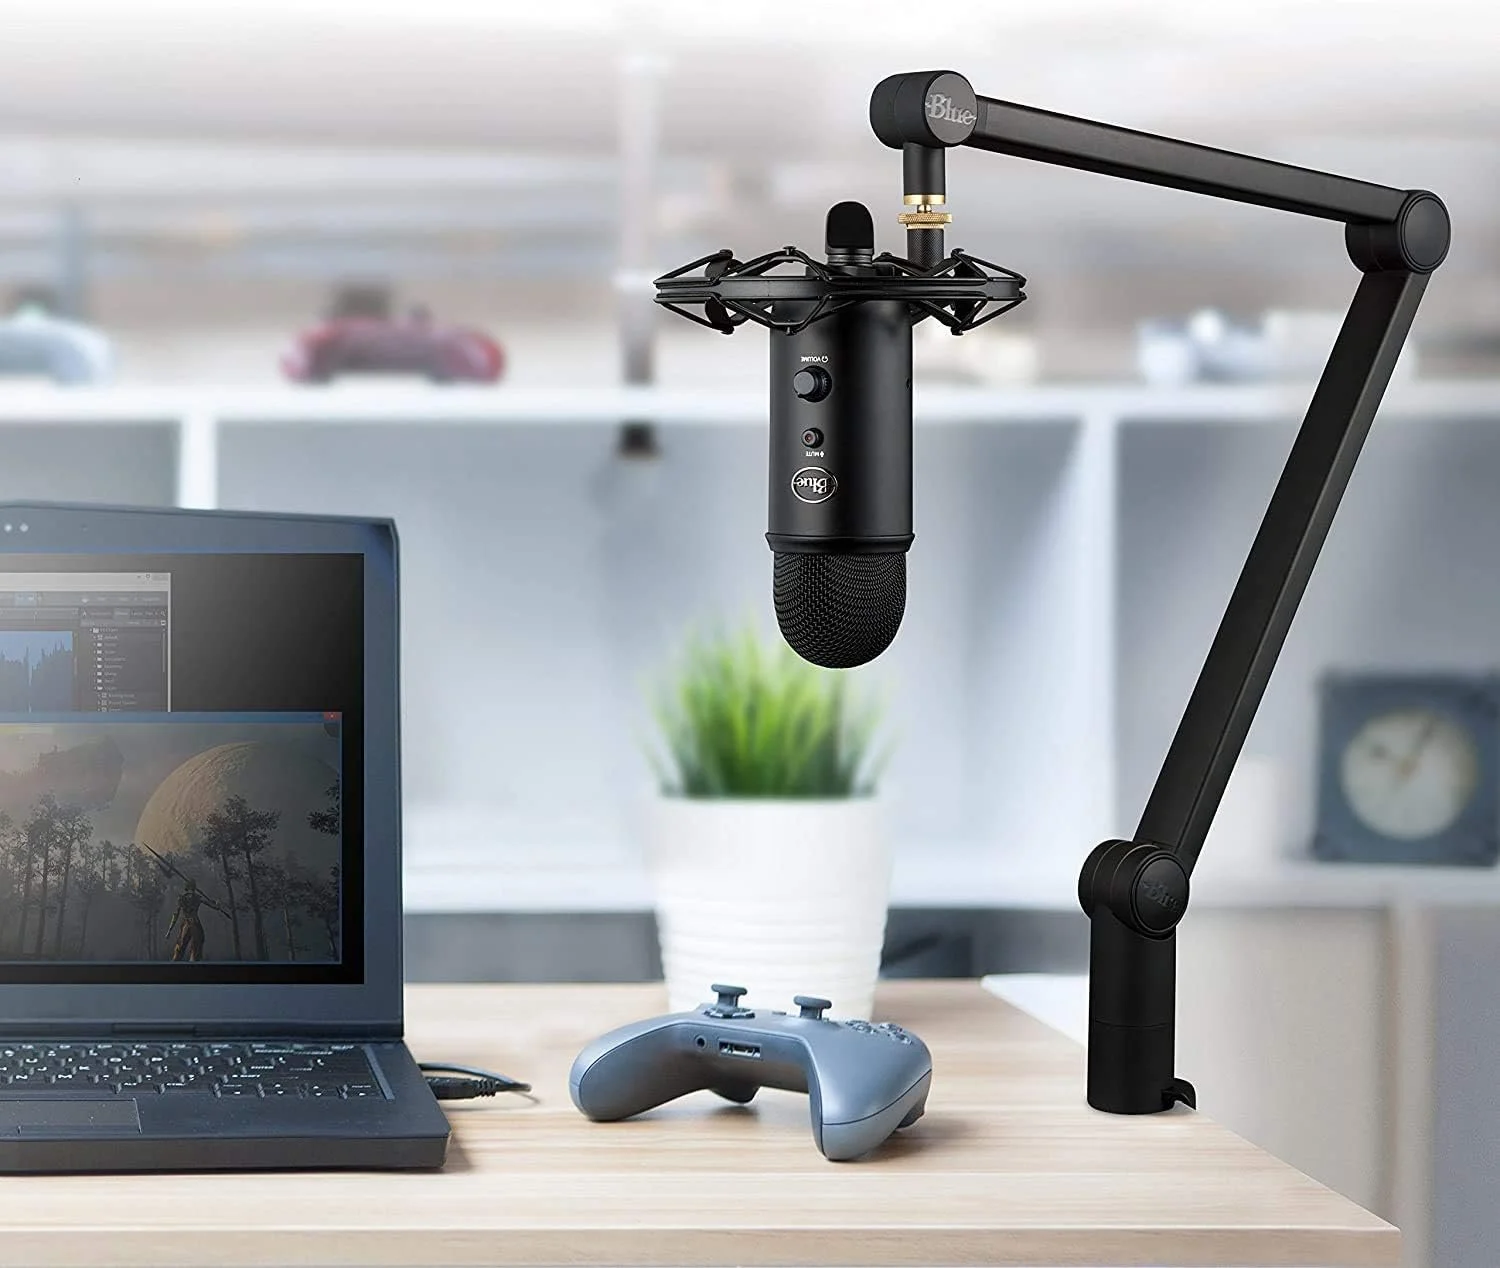
Best Microphone Arm for Blue Yeti
Unveiling the Best Microphone Arms to Amplify Your Blue Yeti Experience
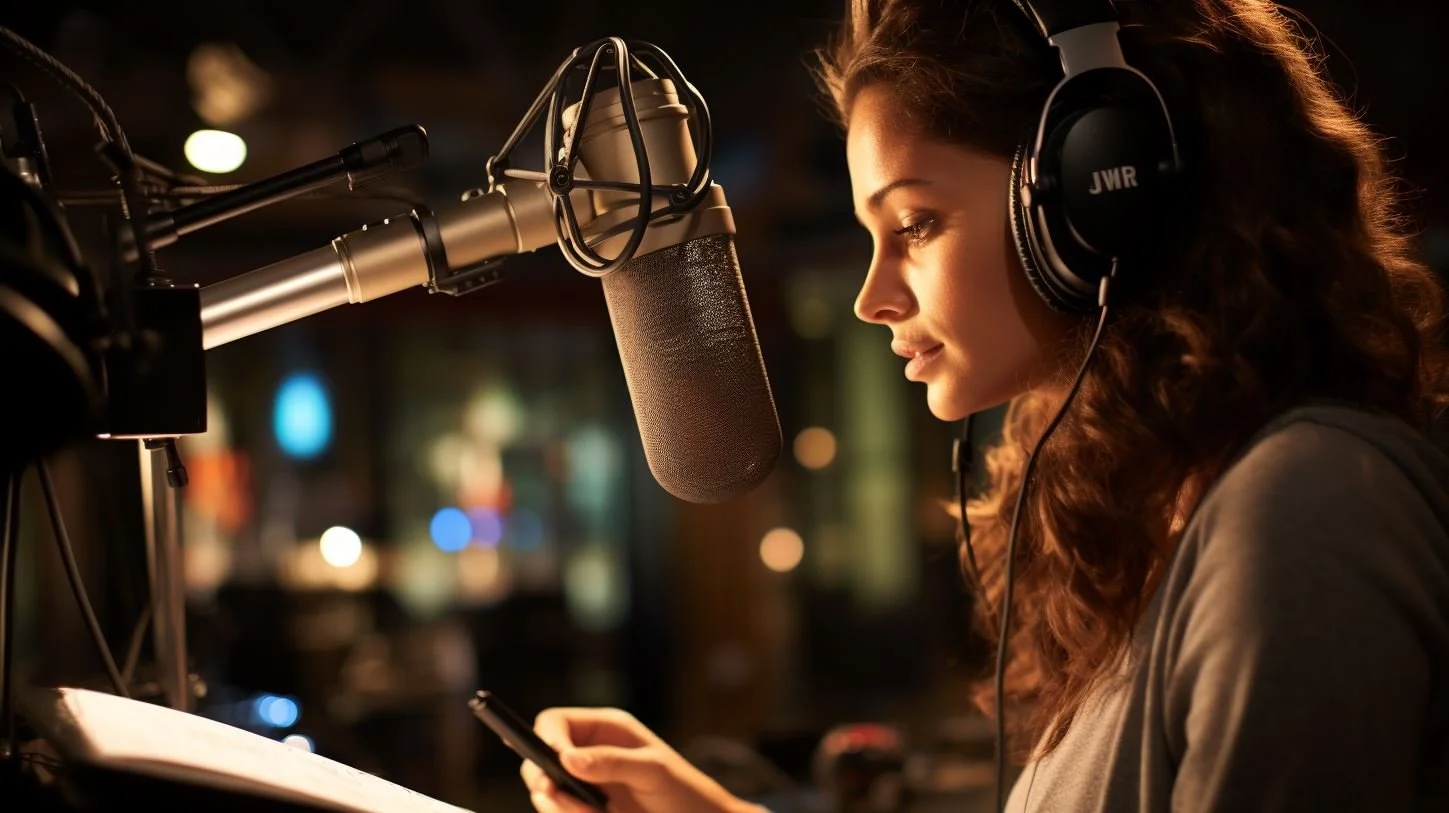
In the dynamic realm of content creation and streaming, the quality of your audio can make or break your audience's experience. For those who have chosen the Blue Yeti microphone as their weapon of choice, enhancing its performance often involves investing in a reliable microphone arm. But with a myriad of options available, how do you discern the best fit for your needs?
In this comprehensive guide, we will delve into the intricacies of selecting the optimal microphone arm for your Blue Yeti setup. From stability and flexibility to ease of installation and overall durability, we'll explore the key factors that matter most to content creators and streamers seeking to elevate their audio game.
Whether you're a seasoned professional or just starting your journey in the world of online content creation, making an informed decision about your microphone arm is crucial. Join us as we dissect the top contenders, providing you with the insights you need to make a well-informed choice and achieve unparalleled audio quality in your streams and recordings. Let's dive in.
Disclaimer: This blog post contains affiliate links. If you purchase through one of these links, we may receive a small commission at no additional cost to you. This helps support our work and allows us to continue providing valuable content. Thank you for your support!
Quick Links:
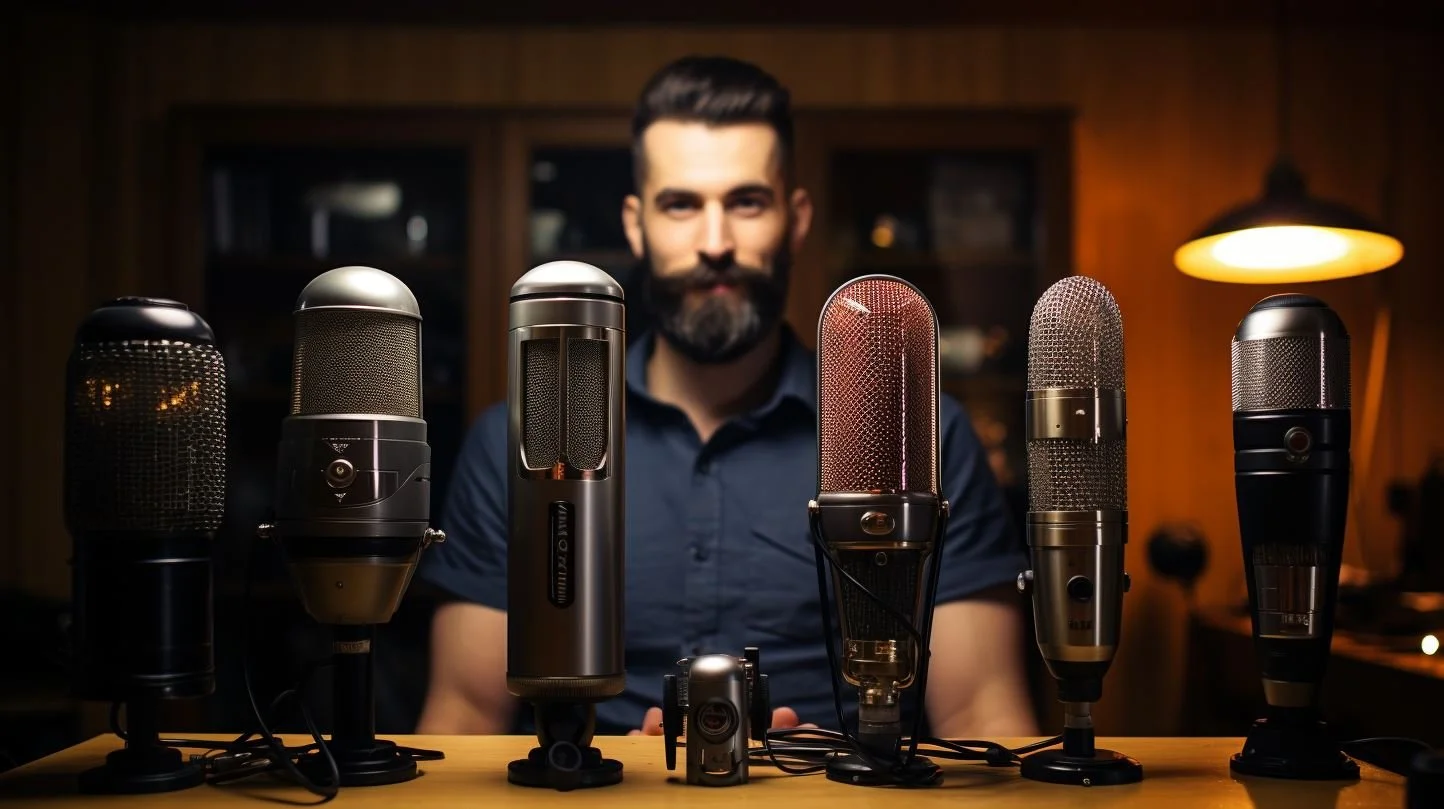
Below are our top picks for the best omnidirectional microphones based on self-noise, price, and popularity:
Microphone Boom Arm Top-Picks:
Best Budget: Samson MBA 28 - Solid aluminum build quality with no frills.
Best Value: Logitech Blue Compass - Elegant design with hidden cable management pathway. Features internal springs and silent 360° performance.
Best Overall: Rode PSA 1+ - Upgraded reach, cable management clips, and silent operation.
Longest Reach: Samson MBA 48 - 48 inches of reach can cover large desks.
Weighted Base: On-Stage DS8100 - Have extra desktop space? This weighted boom arm sits on top of your desk with 12 inches of reach.
Premium Option: Yellowtec MiKA YT3105 - A premium microphone arm renowned for superior sound quality. However, it requires an additional accessory for tablemounting.
Best Microphone Boom Arm
(sorted by best use)
Best Budget
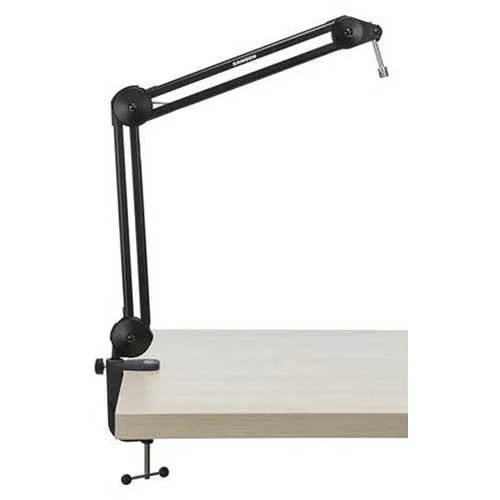
Samson MBA 28
An affordable microphone boom arm with decent reach and a massive support weight capacity.
| Max Reach | 28 inches |
| Max Support Weight | 5 lbs |
| Cable Management | No |
Best Value

Logitech Blue Compass
Slightly longer reach, hidden channel cable management, sleek, elegant design.
| Max Reach | 32 inches |
| Max Support Weight | 2.4 lbs |
| Cable Management | Yes |
Best Overall

Rode PSA 1+
Extended reach, slightly more support weight, cable management clips for easy routing.
| Max Reach | 37 inches |
| Max Support Weight | 2.7 lbs |
| Cable Management | Yes |
Longest Reach

Samson MBA 48
One of the longest-reaching microphone boom arms on the market. Great for large desks.
| Max Reach | 48 inches |
| Max Support Weight | 5 lbs |
| Cable Management | No |
Weighted Base
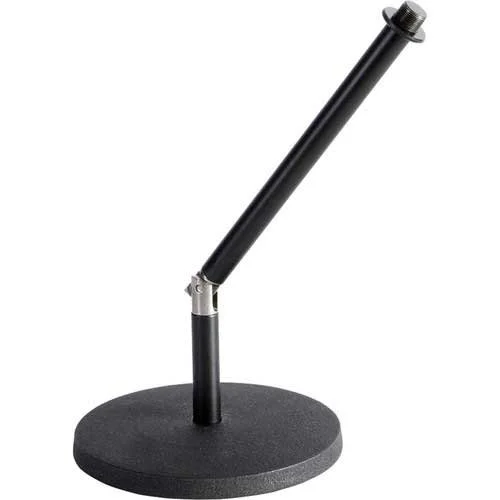
On-Stage DS8100
Good for a lightweight microphone and extra desktop space to accomodate the weighted base.
| Max Reach | 12 inches |
| Max Support Weight | 1 lbs |
| Cable Management | No |
Premium Option
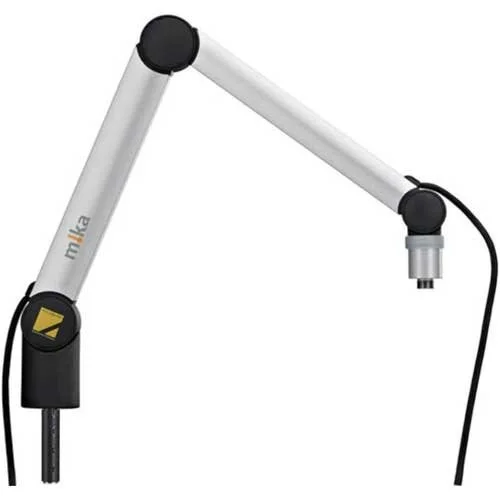
Yellowtec MiKA YT3105
The best-made microphone boom arm on the market. Includes “On Air” LED. Requires table clamp.
| Max Reach | 31 inches |
| Max Support Weight | 4.4 lbs |
| Cable Management | Yes |
Buyer’s Guide to Microphone Boom Arms
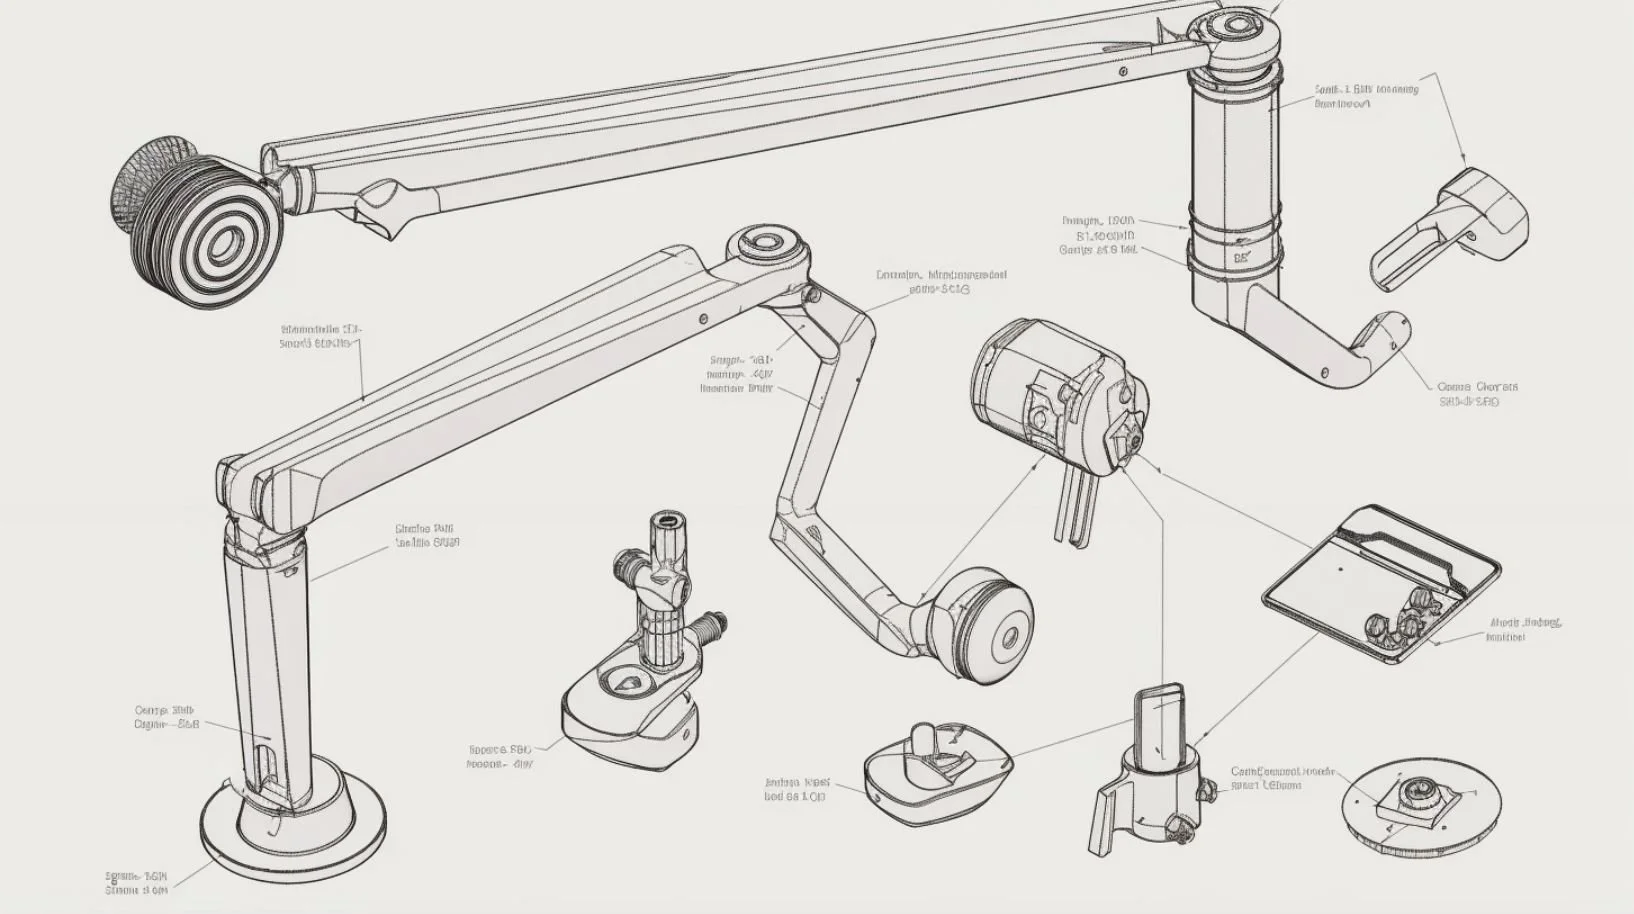
A microphone boom arm, also known as a broadcast arm, is an essential accessory for podcasters, streamers, and recording artists. It allows for hands-free microphone use and optimal microphone placement. This guide aims to provide comprehensive insights into selecting the best microphone boom arm for various needs.
1. Understanding the Basics: What is a Boom Arm?
A boom arm is a mechanical, adjustable arm designed to hold a microphone, allowing the user to position the mic in front of their mouth without having to physically hold the mic.
2. Types of Boom Arms:
Desk-mounted: Attached directly to the edge of a desk using a clamp or grommet. Most suitable for podcasters, streamers, and voice-over artists.
Floor-mounted: Standalone and anchored to the floor, these are used in professional recording studios and broadcasting stations.
Wall-mounted: Attached to the wall, ideal for spaces with limited desk space or for permanent installations.
3. Price Range:
Microphone boom arms can range from $15 to upwards of $500, depending on the build quality, brand reputation, and additional features.
Budget Range (<$50): Suitable for beginners or those who don’t require extensive adjustability.
Mid-Range ($50-$150): Offers a balance of quality and affordability, suitable for semi-professionals or enthusiasts.
High-End (>$150): Aimed at professionals, these boom arms come with enhanced features, better build quality, and often, a more refined aesthetic.
4. Weight Capacity:
Ensure that the boom arm can support the weight of your microphone. A heavy-duty boom arm can hold up to 2.5 lbs, which is suitable for most broadcast microphones.
-
1. Introduction:
Weight capacity is a critical metric when selecting a microphone boom arm. This guide delves deep into understanding weight capacity and how it influences the choice of boom arm for different users.
2. Understanding Weight Capacity:
Definition: Weight capacity refers to the maximum amount of weight a microphone boom arm can safely support without compromising its functionality or structural integrity.
3. Why Weight Capacity Matters:
a. Protecting Your Equipment: Exceeding the weight capacity can lead to equipment damage, as the arm might collapse or the microphone could fall.
b. Optimal Performance: A boom arm designed to hold a specific weight will perform best when within its weight limits.
c. Longevity: Consistently overburdening a boom arm can lead to wear and tear, reducing its lifespan.
4. Types of Microphones and Their Weights:
a. Dynamic Microphones: Typically lighter, often weighing between 0.5 to 1.5 pounds.
b. Condenser Microphones: Can be heavier, especially when they come with shock mounts. Weights range from 0.5 to 2.5 pounds or more.
c. Ribbon Microphones: These are delicate and can vary in weight, but they're generally in the range of 1 to 2 pounds.
d. USB Microphones: These are diverse, with weights ranging from 0.5 to 2 pounds. Some models with built-in stands and additional features might be heavier.
5. How to Determine Your Microphone's Weight:
a. Manufacturer's Specifications: This is the most reliable source. Check the product manual or the manufacturer's website.
b. Using a Kitchen Scale: For a hands-on approach, you can weigh your microphone at home.
c. Online Databases: Some websites and forums provide weights of popular microphones.
6. Identifying the Weight Capacity of Boom Arms:
a. Product Listings: Manufacturers typically list weight capacities in product specifications.
b. User Reviews: Users who have tried heavy microphones on certain arms might give insights on real-world capacity.
c. Professional Reviews: Professional audio equipment reviewers often stress-test equipment and provide insights on weight limits.
7. Factors Influencing Boom Arm Weight Capacity:
a. Material: Boom arms made of steel or aluminum generally offer higher weight capacities than those made of plastic.
b. Arm Length: Longer arms might distribute weight differently, potentially affecting their weight capacity.
c. Mounting Mechanism: A strong and secure mounting mechanism ensures the arm can support more weight without toppling.
d. Joint and Adjustment Mechanisms: The sturdiness of adjustable joints and tension springs plays a role in the weight an arm can handle.
8. Safety Margin:
Always allow for a safety margin. If your microphone weighs 2 pounds, it's advisable to choose a boom arm with a capacity of more than 2 pounds, e.g., 2.5 to 3 pounds. This margin ensures optimal performance and longevity.
5. Adjustability:
A boom arm should have easy-to-adjust tension springs or knobs. Some boom arms offer a full 360-degree rotation, allowing for flexible microphone positioning.
-
1. Introduction:
Adjustability is a crucial feature in microphone boom arms, ensuring optimal microphone placement for clear and consistent audio capture. This guide offers an in-depth exploration of the adjustability factor, helping users identify the best boom arms tailored to their needs.
2. Understanding Adjustability:
Definition: Adjustability refers to the extent to which a microphone boom arm can be altered in terms of length, angle, rotation, and height to position the microphone in the desired orientation.
3. Importance of Adjustability:
a. Ergonomics: Proper microphone placement minimizes strain on the user and facilitates comfortable long recording sessions.
b. Audio Quality: Achieving the best microphone position can enhance voice clarity and reduce ambient noise pickup.
c. Workspace Compatibility: Adjustable arms can fit various workspace layouts, accommodating different desk sizes, heights, and setups.
4. Key Features of Adjustability:
a. Vertical Movement: Enables height adjustments to match the user's mouth level, particularly crucial for standing or adjustable-height desks.
b. Horizontal Extension: The arm's ability to stretch or retract horizontally, allowing users to move the microphone closer or further away.
c. Rotation: A 360-degree rotation feature allows the mic to be positioned in any direction, providing versatility in mic placement.
d. Tilt and Swivel: The capacity to angle the microphone up or down, or to swivel side-to-side, offering precise positioning.
5. Tension Springs vs. Locking Knobs:
a. Tension Springs: These automatically counterbalance the weight of the microphone, making adjustments smooth. However, they might not be as precise.
b. Locking Knobs: Offer manual adjustments and can securely lock the arm in a particular position, ensuring stability once set.
6. Factors Impacting Adjustability:
a. Boom Arm Length: Longer arms provide more reach but might be more challenging to stabilize when fully extended.
b. Segmented vs. Continuous Arms: Segmented arms (with clearly defined sections) might have specific adjustment points, while continuous arms can be more fluid in their adjustability.
c. Mount Type: The type of desk or wall mount can determine the range of movement, especially rotation.
d. Cable Management: Internal or integrated cable pathways ensure that adjustability isn't hindered by tangled or stretched cables.
7. Potential Challenges with Adjustability:
a. Overadjustment: Constantly adjusting the arm can lead to wear and tear, especially at the joints.
b. Stability: Overextending the arm or improper adjustment can compromise stability, risking equipment damage.
c. Complexity: Highly adjustable arms might have a steeper learning curve for users unfamiliar with multiple adjustment points.
6. Build Quality:
Materials matter. Metal constructions, such as stainless steel or aluminum, are generally more robust than plastic ones. These materials ensure durability and resistance to wear over time.
-
1. Introduction:
Build quality stands at the forefront of considerations when investing in a microphone boom arm. It directly impacts durability, functionality, and user experience. This guide aims to shed light on the intricacies of build quality and its implications for potential buyers.
2. Understanding Build Quality:
Definition: Build quality pertains to the materials used, craftsmanship, design, and overall durability of a product. In the context of boom arms, it defines how well the arm is constructed and its potential lifespan.
3. Importance of Build Quality:
a. Durability: A well-built arm can withstand regular adjustments and daily wear and tear, ensuring longevity.
b. Stability: Quality construction guarantees that the arm holds the microphone securely, preventing accidental drops.
c. Aesthetics: High-quality materials and finishes can enhance the overall look and feel of the recording setup.
d. Value for Money: An arm with superior build quality can be a more cost-effective investment in the long run.
4. Key Indicators of Build Quality:
a. Material Used: Premium materials like aluminum or stainless steel typically offer better durability than plastic.
b. Finishing: The finishing touches, be it powder coating or polish, can protect the arm from scratches and rust.
c. Weight: While weight isn't the sole indicator, a heftier arm often signifies the use of denser, durable materials.
d. Tightness of Joints: Joints that move smoothly without wobbling indicate good craftsmanship.
e. Absence of Creaks: Quality arms adjust silently without creaking or producing other noises.
5. Materials Commonly Used:
a. Aluminum: Lightweight, resistant to rust, and offers a good balance between strength and weight.
b. Stainless Steel: Heavier and extremely durable, ideal for premium or heavy-duty boom arms.
c. Plastic: Found in budget-friendly options, it's less durable but can be sufficient for light microphones or infrequent adjustments.
d. Brass: Occasionally used for certain components like fittings or internal parts, adding durability and a premium feel.
6. Craftsmanship and Design:
a. Welds and Joints: Clean, seamless welds and joints indicate meticulous craftsmanship.
b. Integrated Cable Management: A design that incorporates internal cable channels or external clips reflects thoughtful engineering.
c. Balance: A well-designed boom arm maintains balance, whether fully extended or retracted.
7. Recognizing Poor Build Quality:
a. Loose Components: Any parts that feel wobbly or insecure right out of the box.
b. Inconsistent Movement: Joints that are overly stiff in some areas and loose in others.
c. Visible Defects: Scratches, uneven finishes, or misaligned parts.
d. Lack of Stability: The arm doesn't stay in place or droops under the microphone's weight.
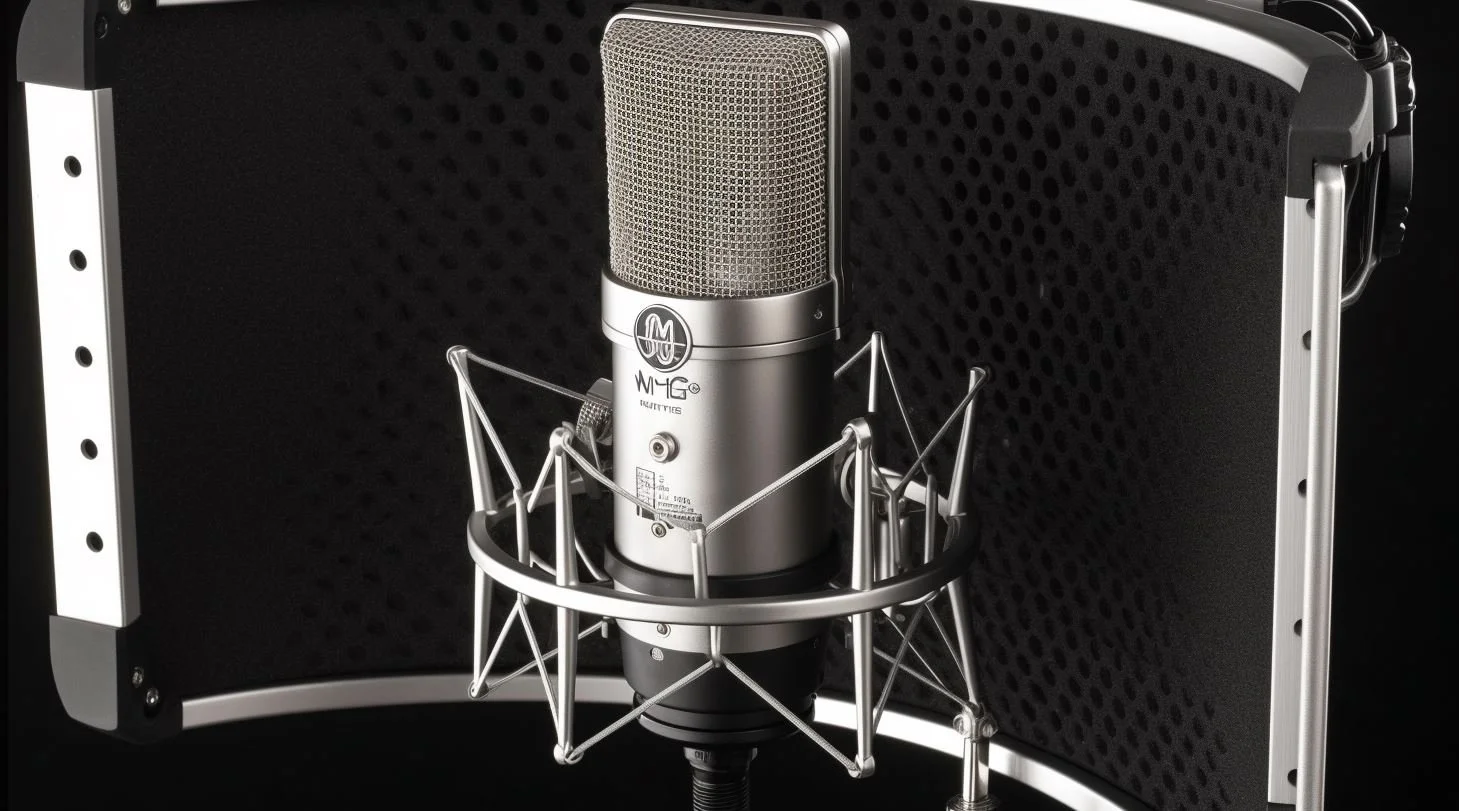
7. Cable Management:
Consider boom arms that feature either internal or external channels for microphone cables. This feature is essential for keeping your setup clean, organized, and free from tangling wires.
-
1. Introduction:
Cable management in microphone boom arms might seem like a minor detail, but it plays a significant role in creating a clutter-free, efficient, and professional recording environment. This guide unpacks the nuances of cable management for those in pursuit of the ideal boom arm.
2. Understanding Cable Management:
Definition: Cable management refers to the design and accessory features of a boom arm that allow for the neat organization, routing, and protection of microphone cables.
3. Why Cable Management Matters:
a. Aesthetic Appeal: A clean setup without tangled or dangling wires creates a professional look.
b. Safety: Proper cable management reduces the risk of tripping over loose cables or pulling equipment off desks.
c. Equipment Longevity: Preventing undue stress on cable connectors can extend the lifespan of both the cables and connected devices.
d. Efficiency: A well-organized setup facilitates quicker adjustments and reduces setup/breakdown time.
4. Key Features of Effective Cable Management:
a. Internal Cable Channels: Some boom arms come with built-in channels, allowing cables to run inside the arm, providing a clean look.
b. External Clips or Ties: Attachments on the boom arm's exterior that hold cables securely against the arm.
c. Flexible Cable Spines: Extensions that can be added to boom arms, housing multiple cables in a tidy, flexible spine.
d. Base Cable Pass-through: Openings or ports at the base of the boom arm that facilitate smooth routing of cables to audio interfaces or computers.
5. Types of Microphone Cables to Manage:
a. XLR Cables: Commonly used for professional-grade microphones; they are thicker and can be quite heavy.
b. USB Cables: Found with many podcasting and streaming mics; they are typically lighter and more flexible.
c. Mini XLR or 3.5mm Jacks: Found in some lapel or smaller microphones, they are thin and lightweight.
6. Solutions for Effective Cable Management:
a. Cable Sleeves: Flexible sleeves that can encase multiple cables, streamlining them into a single bundle.
b. Velcro Ties: Reusable ties that are versatile for bundling and securing cables along the boom arm.
c. Cable Clamps or Clips: Small attachments that can be affixed to the boom arm, ensuring cables run neatly along its length.
d. Cable Reels: Useful for lengthy cables, allowing for easy extension and retraction as needed.
7. Potential Challenges with Cable Management:
a. Over-Tightening: Securing cables too tightly can strain connectors and damage the cable's internal wiring.
b. Interference: Poorly managed cables can interfere with the adjustability of the boom arm.
c. Upgrades: Changing or upgrading microphones might require different cable management solutions due to varied cable types or lengths.
8. Length and Reach:
The arm should be long enough to reach where you need it without overextending. This is particularly crucial for individuals with larger desks or unique studio setups.
-
1. Introduction:
Length and reach are pivotal factors when selecting a microphone boom arm. They determine how flexibly and efficiently you can position your microphone relative to your recording environment. This guide dives into the nuances of length and reach to aid in making an informed purchasing decision.
2. Understanding Length and Reach:
Definition:
Length refers to the end-to-end measurement of the boom arm when fully extended.
Reach pertains to the practical distance a microphone can be placed from the mounting point, factoring in potential obstacles or equipment configurations.
3. Importance of Length and Reach:
a. Workspace Adaptability: Different recording environments, from cozy podcast nooks to expansive studio spaces, require varying lengths and reaches.
b. Ergonomics: Proper reach ensures the microphone can be positioned comfortably close without constraining movement or posture.
c. Microphone Positioning: Achieving the ideal microphone position, whether for voice recording, instrument miking, or broadcasting, depends largely on the arm's reach.
4. Key Factors Influencing Length and Reach:
a. Arm Design: Boom arms can be straight, articulated (having distinct segments), or a hybrid of the two.
b. Mounting Position: The location and angle of the mount can impact the effective reach of the microphone.
c. Desk Thickness: The thickness and design of the desk or surface where the boom arm is clamped can affect the usable length.
5. Types of Boom Arms Based on Length and Reach:
a. Compact: Ideal for smaller workspaces or portable setups. They usually have a shorter length and are perfect for podcasting on-the-go.
b. Standard: Suitable for typical home studios or office desks, offering a balance between length and sturdiness.
c. Extended: Designed for professional studios or unique setups requiring long reach. They might be multi-segmented or have extended single arms.
6. Assessing Your Needs:
a. Workspace Dimensions: Measure the distance from the mounting point to where you intend to position the microphone.
b. Microphone Usage: Consider if you'll be stationary while recording or if you need flexibility to move around.
c. Other Equipment: The presence of monitors, keyboards, or musical instruments can influence the required reach.
7. Potential Challenges with Length and Reach:
a. Stability Issues: Overextending a boom arm can compromise its stability, risking equipment damage.
b. Weight Limitations: The longer the arm, the more critical the weight capacity becomes, especially when fully extended.
c. Adjustability: Longer arms may require more effort to adjust or might have limited adjustability angles.
9. Mounting Mechanism:
Whether it’s a clamp, grommet, or wall mount, ensure it’s sturdy and won't damage surfaces. Stability is vital to prevent accidents or equipment damage.
-
1. Introduction:
The mounting mechanism is a foundational aspect of any microphone boom arm. It determines how the arm attaches to a workspace or environment, ensuring stability, ease of use, and adaptability. This guide delves into the different mounting options available and their respective benefits and considerations.
2. Understanding Mounting Mechanisms:
Definition: The mounting mechanism of a boom arm refers to the apparatus or system that allows the arm to be securely fixed to a surface, such as a desk, wall, or floor.
3. Importance of Mounting Mechanisms:
a. Stability: The primary function of a mounting mechanism is to hold the boom arm (and by extension, the microphone) securely to prevent accidents or equipment damage.
b. Versatility: Different mounts cater to various workspace designs, materials, and configurations.
c. Aesthetic: A well-designed mount can enhance the overall look of a recording setup, providing a clean and organized appearance.
d. Ease of Installation: The right mounting system can simplify the setup and takedown process, saving time and effort.
4. Key Types of Mounting Mechanisms:
a. Clamp Mounts:
These are designed to attach to the edge of a desk or table.
Usually padded to prevent scratches or damage to furniture.
Offer quick installation and are generally portable.
b. Grommet Mounts:
These require a hole in the desk or surface for installation.
They provide a cleaner look as they're often flush with the desk surface.
Typically used in professional or permanent setups.
c. Wall Mounts:
Designed to be affixed to a wall, ideal for studios or spaces where desk mounting isn't feasible.
Often used in broadcast environments or where floor space is at a premium.
d. Floor Stands:
Standalone structures anchored to the floor.
Suitable for recording environments without desks or where wall and desk mounts aren't viable.
e. Ceiling Mounts:
Attached to the ceiling, offering a top-down reach for the microphone.
Used in specific broadcast or studio environments.
5. Factors to Consider When Choosing a Mounting Mechanism:
a. Workspace Material: Some mounts are better suited for wooden desks, while others might be designed for glass or metal surfaces.
b. Portability: Clamp mounts can be easily removed and are thus suitable for portable setups or shared spaces.
c. Permanence: Grommet and wall mounts are more permanent solutions that might require drilling or modifications to the installation site.
d. Adjustment Frequency: If you anticipate frequent adjustments to the boom arm's position, opt for a mount that allows easy repositioning without compromising stability.
6. Installation and Maintenance:
a. Follow Manufacturer Guidelines: Always adhere to the provided installation instructions to ensure safety and stability.
b. Regular Inspection: Check mounts periodically for signs of wear or loosening.
c. Protective Pads: If your mount doesn't come with protective padding, consider adding some to prevent scratches or damage to surfaces.
d. Weight Limitations: Always ensure the mounted boom arm and microphone combination doesn't exceed the weight capacity of the mount.
7. Additional Accessories for Mounts:
a. Swivel Adapters: Allow for greater rotation and adjustability after mounting.
b. Extension Arms: Provide additional reach or height, especially useful for wall and ceiling mounts.
c. Cable Management Attachments: Can be integrated with certain mounts to route cables neatly.
10. Noise Transfer:
Boom arms with built-in shock absorption can significantly minimize vibrations from the desk or other sources. This feature ensures cleaner audio recordings by eliminating unwanted noise.
-
1. Introduction:
Noise transfer, often overlooked, plays a crucial role in the performance of microphone boom arms. It refers to the unintended transmission of vibrations and sounds through the arm, which can negatively impact audio quality. This guide delves deep into understanding noise transfer and how to mitigate it.
2. Understanding Noise Transfer:
Definition: Noise transfer in the context of boom arms pertains to the unintentional conduction of vibrations from the mounting surface or environment to the microphone, which can result in unwanted sounds in the recording.
3. Importance of Minimizing Noise Transfer:
a. Audio Clarity: Reducing noise transfer ensures that the primary sound source is captured without interference.
b. Post-Production: Less noise transfer means fewer post-production edits to clean up the audio.
c. Professionalism: For broadcasters, podcasters, and streamers, minimizing noise transfer is crucial for maintaining a professional sound quality.
4. Common Sources of Noise Transfer:
a. Desk Bumps: Accidentally bumping or moving the desk can send vibrations up the boom arm.
b. Keyboard and Mouse: Typing or clicking can transmit vibrations, especially in setups where the microphone and these peripherals share a surface.
c. External Environment: Vibrations from nearby machinery, footsteps, or even heavy traffic can be picked up if the boom arm isn't isolated well.
d. Arm Adjustments: Moving the arm while recording can introduce noise if the arm isn't designed to mitigate such transfer.
5. Key Features to Mitigate Noise Transfer:
a. Internal Spring Design: Boom arms that house their tension springs internally, as opposed to exposed springs, generally reduce noise during adjustments.
b. Isolated Mounts: Some mounts incorporate padding or isolation materials that dampen vibrations from the mounting surface.
c. Integrated Shock Mounts: While many shock mounts are separate accessories, some boom arms come with integrated solutions that add an additional layer of vibration dampening.
d. Weighted Base: For floor stands, a weighted base can absorb and reduce the transfer of vibrations up the arm.
e. Material Choices: Dense materials like steel or aluminum can sometimes be less prone to carrying vibrations than lighter materials.
6. Additional Accessories to Reduce Noise Transfer:
a. External Shock Mounts: These are designed to hold the microphone and absorb vibrations, ensuring they don't reach the mic capsule.
b. Sorbothane Pads: Placed under the base or clamp of the boom arm, these pads can dampen vibrations from the mounting surface.
c. Pop Filters: While primarily designed to reduce plosive sounds, they can also serve to slightly reduce the effect of vibrations reaching the microphone.
7. Installation Tips for Minimizing Noise Transfer:
a. Tighten All Joints: Ensure all components are securely tightened. Loose parts can introduce rattle or noise.
b. Optimal Mounting: Whenever possible, mount the boom arm on a stable, less frequented surface to minimize disturbances.
c. Cable Routing: Ensure cables are neatly routed and not touching noisy surfaces or objects that might introduce vibrations.
d. Regular Maintenance: Periodically check the boom arm for wear and tear, especially in joints or sections that might introduce noise when they degrade.
8. Recognizing Noise Transfer in Recordings:
Noise transfer often manifests as low-frequency rumbles or inconsistent buzzes in recordings. Using headphones to monitor recordings in real-time can help detect and address noise transfer issues as they arise.
11. Maintenance and Care:
Regular Inspection: Check for wear and tear, especially on the joints.
Cleaning: Use a soft cloth to wipe down the arm, avoiding any liquid cleaners that might seep into the joints.
Tightening: Over time, screws and adjustments may loosen. Regularly ensure they are secure to avoid slippage or accidents.
-
1. Introduction:
A microphone boom arm is an essential tool for broadcasters, podcasters, and audio enthusiasts. Like any piece of equipment, it requires regular maintenance and care to ensure optimal performance, longevity, and safety. This guide highlights the critical aspects of maintaining and caring for your boom arm.
2. Understanding the Importance of Maintenance and Care:
Regular upkeep not only ensures that your boom arm operates smoothly but also extends its lifespan and maintains the safety of your valuable microphone.
3. Daily Care Practices:
a. Visual Inspection: Before and after each use, quickly scan the boom arm for any visible signs of wear, loose components, or damage.
b. Wipe Down: Using a soft cloth, gently wipe down the boom arm to remove any dust or residues. This keeps the arm looking pristine and prevents buildup that could hinder its operation.
c. Cable Check: Ensure that cables are not tangled or strained. Over time, strained cables can degrade and impact audio quality.
4. Periodic Maintenance Tasks:
a. Joint and Knob Tightening: Over time, the joints or adjustment knobs of the boom arm might become loose due to regular adjustments. Periodically tighten them to ensure stability.
b. Lubrication: Some boom arms may benefit from occasional lubrication at the joints, ensuring smooth movement. Always refer to the manufacturer's guidelines regarding suitable lubricants.
c. Check Springs and Tensioners: If your boom arm has internal springs or tension adjustment systems, regularly check for signs of wear or loss of tension.
d. Inspect Mounting Mechanisms: Whether it's a clamp, wall mount, or grommet mount, regularly inspect for signs of wear or weakness. This ensures the arm remains securely affixed, preventing potential equipment falls.
5. Preventative Measures for Longevity:
a. Avoid Overloading: Always ensure your microphone and any attached accessories do not exceed the weight capacity of the boom arm.
b. Limit Exposure to Elements: If possible, avoid exposing the boom arm to excessive humidity, direct sunlight, or other potentially damaging environmental factors.
c. Proper Storage: If the boom arm is not in use for extended periods, store it in a cool, dry place, preferably in its original packaging or a protective case.
d. Handle with Care: When adjusting the arm, apply even pressure, and avoid forceful or jerky movements that could strain the mechanisms.
6. Cleaning Materials and Tools:
a. Soft Cloth: Ideal for daily wipe downs, ensuring the arm remains dust-free.
b. Mild Soap Solution: For deeper cleaning, a solution of mild soap and water can help remove stubborn residues. Ensure the arm is dried thoroughly afterward.
c. Small Brush: Useful for cleaning hard-to-reach areas, especially around joints and mounting mechanisms.
d. Lubricant: A light machine oil or lubricant, as recommended by the manufacturer, can keep joints operating smoothly.
7. Addressing Wear and Tear:
a. Replacement Parts: Some manufacturers offer replacement parts for common wear components, such as padding for clamps or tension springs.
b. Avoid DIY Repairs: Unless you're confident and familiar with the boom arm's construction, avoid making DIY repairs, especially to critical components.
c. Seek Professional Help: For high-end boom arms or complex issues, consider seeking repair services from the manufacturer or a qualified technician.
8. Key Takeaways for Maintenance and Care:
a. Consistency: Regular maintenance is more effective than occasional deep cleans. A quick daily check can prevent small issues from becoming significant problems.
b. Awareness: Familiarize yourself with the boom arm's components and how they function. Understanding its mechanics can aid in identifying potential problems early on.
c. Manufacturer's Guidelines: Always refer to the boom arm's manual or manufacturer's recommendations regarding care, cleaning, and maintenance.
12. Accessories:
Pop Filters: Help in reducing plosive sounds during recording.
Shock Mounts: Reduces vibrations and unwanted noise from reaching the microphone.
Counterweights: Useful if you have a particularly heavy microphone or if your boom arm is extended to its max regularly.
-
1. Introduction:
Beyond the boom arm itself, a range of accessories can enhance its functionality, aesthetics, and user experience. This guide is dedicated to acquainting potential buyers with essential and beneficial accessories for microphone boom arms.
2. Understanding the Role of Accessories:
Accessories for boom arms serve various purposes, from enhancing audio quality to improving the ergonomics and aesthetics of your recording setup.
3. Core Accessories for Boom Arms:
a. Shock Mounts:
Purpose: To isolate the microphone from vibrations and handling noise that might be transferred through the boom arm.
Features: Usually have elastic bands or other damping materials that decouple the microphone from any jolts or vibrations.
b. Pop Filters:
Purpose: Positioned between the microphone and the user, these filters reduce plosive sounds (like 'p' and 'b' sounds) that can cause distortion.
Features: Typically made of a mesh material, they can be attached directly to the boom arm.
c. Cable Management Clips or Ties:
Purpose: To keep microphone cables organized and prevent them from tangling or interfering with the boom arm's movement.
Features: Can be clip-on types that attach to the arm or velcro ties that wrap around the cable.
d. Counterweights:
Purpose: To balance heavy microphones or accessories, ensuring the boom arm doesn't tip or become unstable.
Features: Usually made of heavy materials, they attach to the end of the boom arm opposite the microphone.
e. Extension Arms:
Purpose: To provide additional reach or specific positioning that the primary boom arm may not offer.
Features: Can be segments that add length or side-arms that provide horizontal extensions.
f. Thread Adapters:
Purpose: Microphones and boom arms might have different thread sizes. Adapters ensure compatibility between them.
Features: Common thread sizes include 3/8" and 5/8".
4. Aesthetic Enhancements:
a. Protective Sleeves:
Purpose: Cover the boom arm, offering both protection and a customized look.
Features: Made of fabrics or flexible materials, they can be patterned, colored, or branded.
b. LED Light Attachments:
Purpose: Provide lighting for reading scripts, operating equipment, or creating ambiance.
Features: Typically clip-on types with adjustable brightness.
5. Ergonomic Enhancements:
a. Padded Clamps:
Purpose: To prevent scratches or damage to surfaces where the boom arm is clamped.
Features: Made of soft materials like rubber or foam.
b. Swivel Mounts:
Purpose: To allow for more dynamic and fluid adjustments of the microphone's position.
Features: Can rotate 360° and often have a tilt feature.
c. Quick Release Adapters:
Purpose: Facilitate the rapid attachment or detachment of microphones or other accessories.
Features: Mechanisms might be push-button releases or twist-and-lock types.
6. Safety and Protection Accessories:
a. Carry Bags or Cases:
Purpose: Protect the boom arm and accessories during storage or transport.
Features: Can be soft padded bags or hard-shell cases, often with compartments for different components.
b. Anti-droop Springs:
Purpose: Prevent the boom arm from drooping under the weight of heavy microphones.
Features: Installed internally or externally, they counteract weight to maintain position.
c. Safety Straps or Cables:
Purpose: Provide an additional layer of security, preventing mounted equipment from falling.
Features: Attach to the microphone or shock mount and the boom arm or stand.
7. Understanding Compatibility:
It's crucial to ensure that chosen accessories are compatible with both the boom arm and the microphone. Consider factors such as mounting mechanisms, thread sizes, and weight capacities when selecting accessories.
8. Prioritizing Needs Over Wants:
While the market is flooded with attractive accessory options, it's essential to distinguish between necessities and luxuries. Identify your recording needs, the challenges of your environment, and the limitations of your boom arm to guide your accessory purchases.
In the realm of microphone boom arms, accessories are more than mere add-ons. They play a crucial role in optimizing audio quality, enhancing user experience, and ensuring equipment longevity and safety. A well-accessorized boom arm can significantly elevate the quality and efficiency of any recording setup.
13. Microphone Boom Arm Recommendations:
Below are our top picks for microphone boom arms primarily based on build quality, reach, cable management, support weight, and popularity:
Microphone Boom Arm Top-Picks:
Best Budget: Samson MBA 28 - Solid aluminum build quality with no frills.
Best Value: Logitech Blue Compass - Elegant design with hidden cable management pathway. Features internal springs and silent 360° performance.
Best Overall: Rode PSA 1+ - Upgraded reach, cable management clips, and silent operation.
Longest Reach: Samson MBA 48 - 48 inches of reach can cover large desks.
Weighted Base: On-Stage DS8100 - Have extra desktop space? This weighted boom arm sits on top of your desk with 12 inches of reach.
Premium Option: Yellowtec MiKA YT3105 - A premium boom stand renowned for superior sound quality. However, it requires an additional accessory for tablemounting.
Conclusion:
In conclusion, finding the perfect microphone arm for your Blue Yeti is a pivotal step in optimizing your audio setup as a content creator or streamer. We've journeyed through the intricacies of stability, flexibility, installation ease, and durability, shedding light on the top contenders in the market.
By now, you're armed with the knowledge needed to make a judicious decision tailored to your specific needs. Remember, the right microphone arm isn't just a functional accessory; it's a vital tool that elevates the overall quality of your content, setting the stage for an immersive and professional listening experience.
As you embark on enhancing your Blue Yeti setup, consider the nuances that align with your unique recording or streaming style. Whether it's the sleek design of an adjustable arm, the robust construction for heavy usage, or the seamless integration into your existing workspace, your choice should reflect your individual preferences and demands.
Equip yourself with the best tools, and watch as your audio quality reaches new heights, captivating your audience and setting you apart in the competitive landscape of content creation.
Thanks for reading.


Follow Me On:
Share this post and help the website grow: