Best Backpacking Solar Panel

Harnessing the Sun's Energy for the Ultimate Backpacking Experience
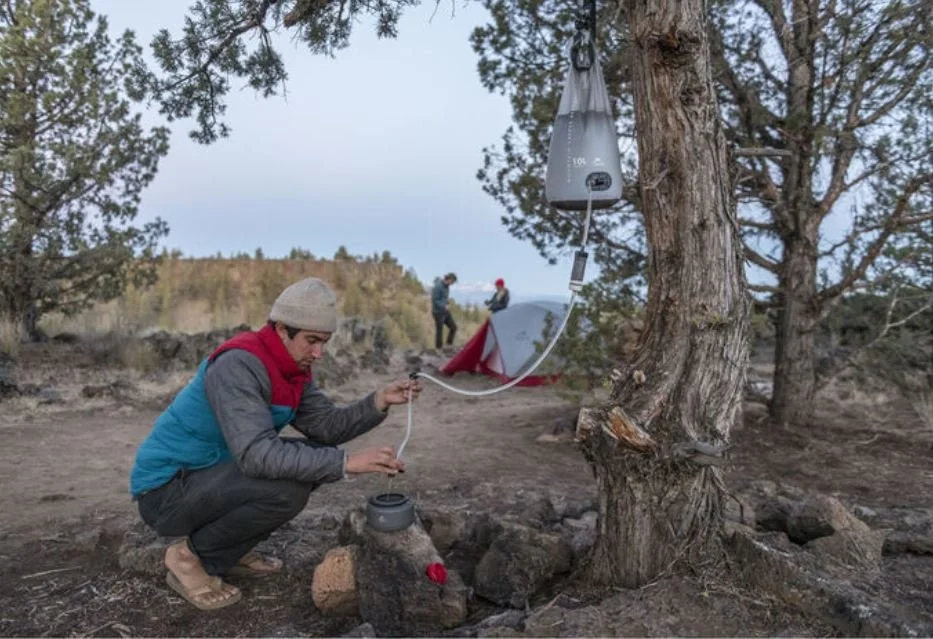
As more outdoor enthusiasts seek to blend the beauty of nature with the convenience of modern technology, the need for sustainable and portable energy solutions becomes increasingly paramount. Backpacking trips often take us away from traditional power sources, making solar panels an essential gear for keeping our devices charged.
Whether you're navigating trails with a GPS, capturing memories on a camera, or staying connected with a smartphone, the right solar panel can make all the difference.
In this guide, we delve deep into the world of portable solar panels designed for the backpacking enthusiast. We understand that choosing the perfect solar panel involves balancing various factors such as efficiency, weight, durability, and additional features that enhance usability.
Our goal is to provide you with detailed insights and practical advice, enabling you to make an informed decision that suits your specific backpacking needs.
From understanding the different types of solar panels and their efficiencies to evaluating crucial aspects like durability, weight, and size, we cover it all. We also explore those additional features that often go overlooked but can significantly improve your outdoor experience.
Whether you're a seasoned backpacker or planning your first trek, our guide is designed to help you navigate the choices available, ensuring you stay powered up in the great outdoors.
Quick Picks:
Best Overall: Goal Zero Nomad 10 - best balance between durability, weight, and charging time. The Nomad 10 can charge a phone in 3 hours of direct sun.
Best for Couples: Renogy E.Flex 21W - with 21 watts of power and x2 2.4A USB ports, the Renogy E.Flex can charge a pair of phones in under 2 hours of direct sun.
Lightest Weight: Goal Zero Nomad 5 - designed for the solo backpacker, the Nomad 5 is lightweight yet durable and can charge a phone in 4.5 hours of direct sun.
Comparison:
| Product | Watts | Weight | Charge Time* | Ports |
|---|---|---|---|---|
| Goal Zero Nomad 10 | 10 |
17.92 oz |
3 hours |
x1 1.5A USB-A |
| Renogy E.Flex 21W | 21 |
28.9 oz |
1.8 hours |
x2 2.4A USB-A |
| Goal Zero Nomad 5 | 5 |
12.7 oz |
4.5 hours |
x1 1A USB-A |
*Charge time calculated for average phone battery (4,500mAh) and optimal conditions.
Best Overall Backpacking Solar Panel
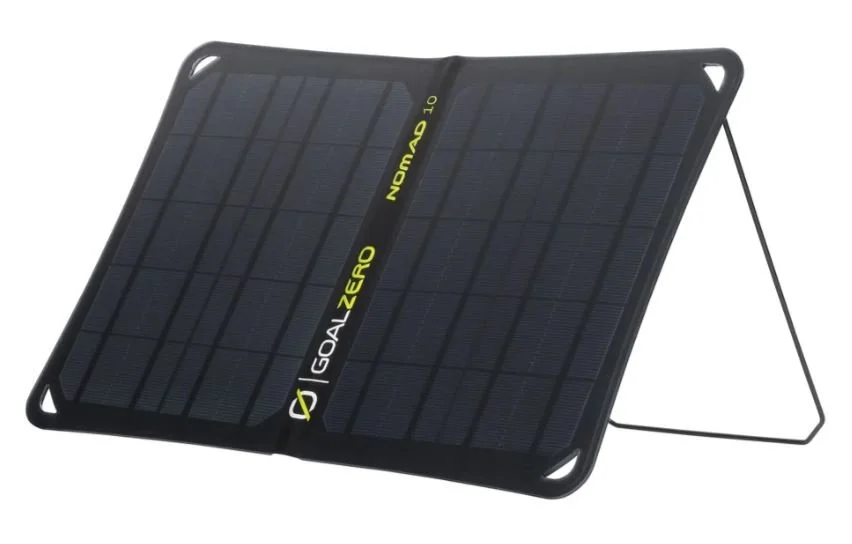
Goal Zero Nomad 10
Purpose-built for backpackers.
Power: 10W
Weight: 17.92 oz / 508 grams
Folded Size: 9.5 x 7.2 x 1.25 inches
Unfolded Size: 9.5 x 14.5 x 0.75 inches
Ports: x1 1.5A USB-A
Phone Charging Time: 3 hours full sun / 11 hours cloudy
The 10W solar panel can charge a 4,500mAH battery in 3-11 hours depending on elevation, temperature, time of year, angle and position to the sun. 4,500mAh is the average phone battery size.
To help increase efficiency and charging times, the Nomad 10 includes a built-in kickstand that clicks into place at multiple angles, so you can position your panel for optimal solar collection and ensure it stays put.
The panel has an integrated USB-A port on the back to directly charge your phone, headlamp, or other device.
Alternatively, you can purchase one of their Flip Power Banks to store power for later use (it charges while plugged into the integrated USB port on the back of the solar panel).
Best For Couples/Pairs
Renogy E.Flex 21W
Powerful backpacking solar panel from a trusted brand with great weight-to-power performance.
Weight: 28.9 oz / 820 grams
Folded Size: 11 x 7.3 x 1.2 inches
Unfolded Size: 23 x 11 x 0.8 inches
Power: 21W
Phone Charging Time: 1.8 hours full sun / 9 hours cloudy
Ports: x2 2.4A USB-A
Although the E.Flex 21W panel is heavier than the Goal Zero Nomad 10, it’s more than twice as powerful at a respectable 1.8 pounds.
The 21 watts is sufficient power to run both 2.4A USB ports simultaneously, making the E.Flex a great choice for backpacking couples who need to charge two devices efficiently.
Lightest Weight

Goal Zero Nomad 5
Lightweight solar panel ideal for solo backpackers.
Weight: 12.7 oz / 360 grams
Size: 9.5 x 7 x 0.8 inches
Power: 5W
Phone Charging Time: 4.5 hours full sun / 22.5 hours cloudy
Ports: x1 1A USB-A
The Goal Zero Nomad 5 is a high-quality solar panel from a trusted brand that is the lowest weight and power for a solo backpacker.
The 5 watt panel is enough to fully saturate the 1 amp USB port and can fully charge the average phone (4,500mAh) in 4.5 hours under full sun.
Weighing in at only 12.7 oz, it’s the lightest solar panel on this list.
Although lighter solar panels exist, like the Lixada 10W (3.56 oz), it doesn’t have an auto-reset feature – which means it will stop charging if a cloud passes over it. You’ll have to unplug the device and replug to get it to start charging again.
It also doesn’t have a blocking diode, so it could actually draw power from your device in low-light situations. Because of these reasons, it’s more reliable for charging a power bank and then using that to power your devices.
Buyer’s Guide
When selecting the best solar panel for backpacking, it is crucial to consider factors like weight, power efficiency, durability, portability, and the type of solar cells used. This guide will provide a comprehensive overview of these aspects to assist you in making an informed decision.
1. Understanding Solar Panel Types for Backpacking
a. Monocrystalline Solar Panels:
Pros: High efficiency, compact size.
Cons: Generally more expensive.
Best for: Those who need efficient power generation in a smaller package.
b. Polycrystalline Solar Panels:
Pros: Less expensive, relatively efficient.
Cons: Slightly bulkier and less efficient than monocrystalline panels.
Best for: Budget-conscious backpackers who don’t mind a bit of extra bulk.
c. Thin-Film Solar Panels:
Pros: Lightweight, flexible, and durable.
Cons: Less efficient and degrade faster over time.
Best for: Backpackers who prioritize weight and flexibility over efficiency.
2. Weight and Size Considerations
Lightweight Options: Aim for panels that are under 2 pounds (around 0.9 kg) for optimal portability.
Compact Design: Look for foldable or rollable panels for space-saving.
-
1. Understanding the Importance of Weight and Size
Pack Weight: Extra weight can significantly impact your hiking endurance and comfort. Lighter solar panels are essential for longer treks.
Space Constraints: Backpackers often have limited space, making compact and easily storable solar panels a priority.
2. Types of Solar Panels and Their Weight
Monocrystalline Panels: Typically weigh more due to their durable construction and high-efficiency cells. However, they offer more power per square inch, possibly allowing for a smaller panel overall.
Polycrystalline Panels: Slightly lighter than monocrystalline, but larger in size for the same power output.
Thin-Film Panels: The lightest option available, perfect for backpackers who are highly sensitive to weight. They can be rolled or folded, offering excellent portability.
3. Optimal Weight Range for Backpacking
Light-Duty Charging (Phones, GPS): Aim for solar panels that weigh between 0.5 to 2 pounds.
Heavy-Duty Charging (Tablets, Laptops): Panels weighing between 2 to 3 pounds are more suitable for higher power needs.
4. Size and Portability Features
Compact Design: Smaller, foldable panels are ideal as they take up less space. Look for panels that can be easily attached to the outside of a backpack.
Foldable vs. Rigid Panels: Foldable panels offer great portability but might be less efficient per square inch compared to rigid panels.
Rollable Thin-Film Panels: Offer the best in terms of reducing space and can conform to the shape of your pack.
5. Attachment and Accessibility
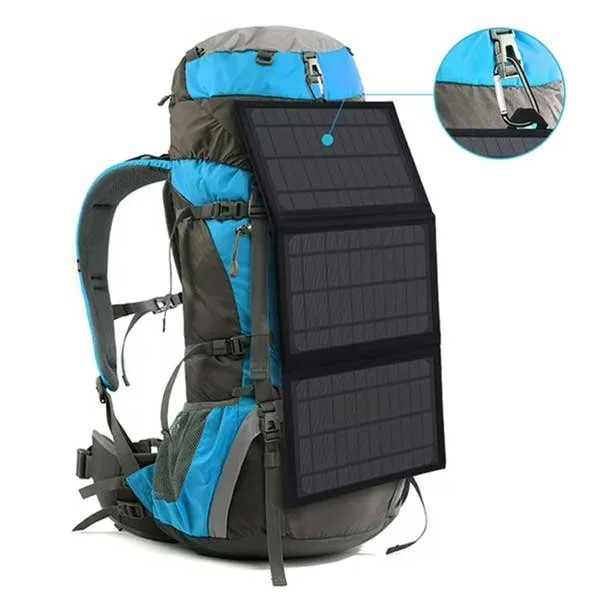
Integrated Loops or Carabiners: Useful for attaching the panel to your backpack for charging while hiking.
Ease of Deployment: Consider how quickly and easily the panel can be deployed and packed away.
6. Panel Surface Area vs. Power Output
Higher Efficiency Panels: Require less surface area to produce the same amount of power, potentially reducing the size and weight.
Lower Efficiency Panels: May need larger surface area, impacting weight and portability.
7. Trade-offs Between Weight, Size, and Power
Understand that higher power output often comes with increased weight and size. Determine your power needs and find a balance that works for your specific backpacking style.
8. Durability vs. Weight
Ruggedness: More durable panels might add weight but are essential for rough terrain.
Weatherproofing: Essential for protection against rain and moisture, which might slightly increase the weight.
3. Power Output and Efficiency
Power Needs: Determine the devices you’ll be charging (phones, GPS, cameras) and their power requirements.
Efficiency: Higher efficiency means more power per square inch, crucial for backpacking panels.
Output Range: Typically, 5-15 watts is sufficient for most backpacking needs.
-
1. Understanding Power Output
Measured in Watts: The power output of a solar panel is typically measured in watts (W). This indicates the amount of electricity the panel can produce under ideal conditions.
Common Ranges for Backpacking: Solar panels for backpacking usually range from 5W to 25W. The higher the wattage, the more power it can generate.
2. Efficiency of Solar Panels
Efficiency Rating: This indicates how effectively a solar panel converts sunlight into electrical energy. Higher efficiency means more power generation from a smaller surface area.
Monocrystalline Panels: Generally have the highest efficiency (around 15-22%).
Polycrystalline Panels: Slightly less efficient (around 13-16%).
Thin-Film Panels: Usually have the lowest efficiency (around 7-13%).
3. Determining Your Power Needs
Device Assessment: Consider the devices you'll need to charge (smartphones, cameras, GPS devices) and their battery capacities.
Daily Energy Consumption: Estimate how much power your devices consume daily to determine the total wattage required from the solar panel.
4. Size vs. Efficiency
Space-Efficiency: Higher efficiency panels are more space-efficient, meaning they provide more power per square inch, important for backpacking where space is limited.
Size Considerations: A higher wattage panel might be larger in size, so balance the power needs with the portability.
5. Environmental Factors Affecting Efficiency
Sunlight Conditions: The actual power output can vary depending on sunlight conditions. Overcast skies, the angle of the panel, and geographical location can affect efficiency.
Temperature: Extreme temperatures can also impact solar panel efficiency.
6. Charging Time Considerations
Output Current: Check the amperage (current output) of the solar panel, especially if it has a built-in USB port. A higher amp rating (e.g., 2A vs. 1A) can charge devices faster.
Integrated Batteries: Some solar panels come with built-in batteries, storing energy for later use, which can be beneficial when sunlight is inconsistent.
7. Quality and Durability
Build Quality: Ensure the solar panel is well-built to withstand outdoor conditions. Higher quality panels might have a slightly lower efficiency loss over time.
Reliable Brands: Consider purchasing from reputable brands known for their quality and efficiency.
8. Cost vs. Efficiency
Budget Considerations: Higher efficiency panels are typically more expensive. Determine if the cost increase is justified for your specific needs.
4. Durability and Weather Resistance
Rugged Construction: Ensure the panel can withstand outdoor conditions.
Water-Resistant: Look for panels that are water-resistant or waterproof, especially if you'll be backpacking in varied weather conditions.
-
1. Understanding the Importance of Durability and Weather Resistance
Outdoor Exposure: Backpacking solar panels are exposed to a variety of conditions - from harsh sunlight and heat to rain and possibly even snow.
Rugged Use: Frequent packing and unpacking, as well as potential drops or scrapes against rough surfaces, are common during backpacking trips.
2. Material and Build Quality
Panel Surface: Look for panels with high-quality, scratch-resistant surfaces. Some panels use reinforced glass, while others might use durable polymers.
Frame and Edging: Robust frames and protective edging can prevent damage from drops or bumps. Materials like aluminum add durability without excessive weight.
3. Water and Weather Resistance
IP (Ingress Protection) Rating: Check for an IP rating which indicates the level of protection against elements like dust and water. IP67 or higher is excellent for water and dust resistance.
Sealed Electronics: Ensure that the charging ports and electronics are well-sealed to prevent damage from moisture or dirt.
4. Temperature Tolerance
Heat Resistance: Solar panels are often exposed to intense sunlight, so they should be able to withstand high temperatures without degrading.
Cold Tolerance: If you’re backpacking in colder regions, ensure the panel can operate efficiently in low temperatures.
5. Flexibility vs. Rigidity
Flexible Panels: They are less prone to damage from bending and can be more durable in certain scenarios. However, their overall lifespan might be shorter than rigid panels.
Rigid Panels: Generally offer a longer lifespan but can be more susceptible to breakage if not handled carefully.
6. UV Resistance
Protection from Sunlight: Continuous exposure to UV rays can degrade some materials. Panels should be UV-resistant to ensure longevity.
7. Connectors and Cables
Quality of Connectors: Durable, corrosion-resistant connectors are essential for long-term reliability.
Cable Strength: Cables should be strong and ideally have some form of strain relief to prevent breakage at connection points.
8. Ease of Repair and Maintenance
User-Serviceable Parts: Some solar panels come with easily replaceable parts, which can be a plus for long-term maintenance.
9. Brand Reputation and Warranty
Trusted Manufacturers: Opt for brands with a reputation for durability.
Warranty: A good warranty can provide peace of mind, indicating the manufacturer’s confidence in their product's durability.
5. Additional Features
USB Ports: Direct USB charging ports are convenient.
Integrated Battery: Some panels come with an integrated battery, allowing you to store energy.
Attachment Options: Features like carabiners or loops help in attaching the panel to your backpack.
-
1. Integrated Battery Storage
Purpose: Allows you to store solar energy for use when the sun is not shining, such as at night or during cloudy weather.
Capacity Considerations: The capacity of the integrated battery should align with your power needs. Higher capacity means you can store more energy but also adds to the weight.
2. USB Charging Ports
Direct Charging: USB ports allow you to charge devices directly from the solar panel without needing an external battery or adapter.
Multiple Ports: Some panels come with multiple USB ports, enabling the charging of several devices simultaneously.
3. LED Indicators
Functionality: LED indicators provide valuable information such as charging status, battery level, and solar strength, helping you optimize panel placement and usage.
4. Auto-Restart Function
Efficiency: This feature allows the solar panel to automatically reconnect and continue charging your devices after an interruption, like a cloud passing over.
5. Voltage Regulator
Protection: A built-in voltage regulator protects your devices from overcharging or receiving too much voltage, which can be damaging.
6. Carabiners and Loops
Portability: Carabiners and loops can be used to attach the solar panel to your backpack, tent, or trees, making it easy to charge on the go or in various outdoor settings.
7. Kickstand or Mounting Stand
Convenience: A built-in stand can help you angle the panel towards the sun more effectively, increasing its efficiency.
8. Flexible vs. Rigid Panels
Adaptability: Flexible panels can be a great feature, allowing you to mount them on uneven surfaces or fold them for easier storage.
Durability Trade-off: While flexible panels offer versatility, they might not be as durable as rigid panels in the long term.
9. Waterproof or Water-Resistant Design
Weather Readiness: Ensures the panel remains functional in various weather conditions, especially important for backpacking.
10. Lightweight Design and Thin Profile
Ease of Carrying: Besides basic portability, a thin and lightweight design can make a big difference in backpacking comfort.
11. Expandability
Connectivity Options: Some solar panels allow for linking multiple panels together to increase power output, useful for more demanding power needs.
Top Recommendations:
| Product | Watts | Weight | Charge Time* | Ports |
|---|---|---|---|---|
| Goal Zero Nomad 10 | 10 |
17.92 oz |
3 hours |
x1 1.5A USB-A |
| Renogy E.Flex 21W | 21 |
28.9 oz |
1.8 hours |
x2 2.4A USB-A |
| Goal Zero Nomad 5 | 5 |
12.7 oz |
4.5 hours |
x1 1A USB-A |
Conclusion
Choosing the best solar panel for backpacking is a crucial step in preparing for your outdoor adventures. Throughout this guide, we've explored various aspects that are key to finding a solar panel that not only meets your energy needs but also complements your backpacking style. From lightweight and compact designs ideal for the minimalist hiker to more robust and feature-rich panels for the tech-savvy adventurer, the market offers a diverse range of options to suit different preferences.
Remember, the effectiveness of a solar panel is not just in its technical specifications, but also in how well it aligns with your specific usage scenarios. Consider the environments you'll be traversing, the devices you need to keep charged, and the balance between efficiency, durability, and portability that will serve you best.
Moreover, investing in a reliable solar panel is not only a matter of convenience but also a step towards sustainable and responsible outdoor recreation. By harnessing the power of the sun, you reduce your environmental footprint, making your adventures more eco-friendly.
As you gear up for your next backpacking trip, we hope this guide has illuminated the path to choosing the perfect solar panel for your needs. Remember, every journey is unique, and the right solar panel is one that reliably powers your journey, keeping you connected and safe while you explore the wonders of the natural world.
Thanks for reading.