Peak Design Tripod Review: Long-Term (Ab)Use

7 month review of the Peak Design Travel Aluminum Tripod.
I’ve owned and extensively used the Peak Designs Aluminum Travel Tripod throughout the last 7 months.
During that time, I tested the tripod in many conditions including high-elevation mountains, salty beaches, and dusty deserts.
This review shares my experienced thoughts on the tripod after hundreds of hours of use.
Disclaimer: This blog post contains affiliate links. If you purchase through one of these links, I may receive a small commission at no additional cost to you. This helps support my work and allows me to continue providing valuable content. Thank you for your support.
Table of Contents:
Build Quality & Durability
Initial Impressions:
Upon unboxing, I was immediately impressed by the build quality.
All components are recycled aluminum (love that from a sustainability standpoint) or rubber and are machined to very tight tolerances.
The smoothness of the legs really stood out to me and the center column adjustment knob popping in/out is a nice touch that adds to the premium feel and function of the tripod.
The amount of thought and attention to detail behind the design is obvious. This is a well-engineered piece of kit.
7 Month Thoughts:
The tripod has held up extremely well to scrapes and bangs against boulders, saltwater exposure, and extremely fine particulate dust storms.
Cosmetic scratches aside, the tripod functions like new.
The ball head is still perfectly smooth, as is the extension/retraction of the legs, and there is no noticeable corrosion.
The flip locks and all adjustment knobs are also still smooth with zero crunch or stick. Tension and retention of the legs is still great, I have not had to make any adjustments to the flip locks.
I was a little worried about the dust storms in the desert, which are infamous for gumming up most field equipment. The unique design of the tripod head leaves the ball exposed to the elements, and I thought dust might get in there and clog things up.
I’m a nature field recordist, so naturally, I had a microphone on the tripod recording the entire duration of the dust storm (about 2 hours). Needless to say, the tripod was completely covered in dust by the time I returned to break down the gear.
I did wipe down the leg sections with my hand before collapsing them, but there was absolutely still some dust left behind. However, as previously mentioned, the legs and ball head still function like new after this abuse.
To give you an idea of how fine this dust was, I took shelter in a tent during the storm with the rainfly staked tight and low to the ground. By the end of the storm, the tent floor was covered in ≈2mm of dust that was able to get under the fly and through the fine mesh walls. It had a powdery consistency and was difficult to completely remove from my hands.
Features
Standout Features:
The following features are unique to the Peak Design tripods as far as I know, and took a little time to learn how to use.
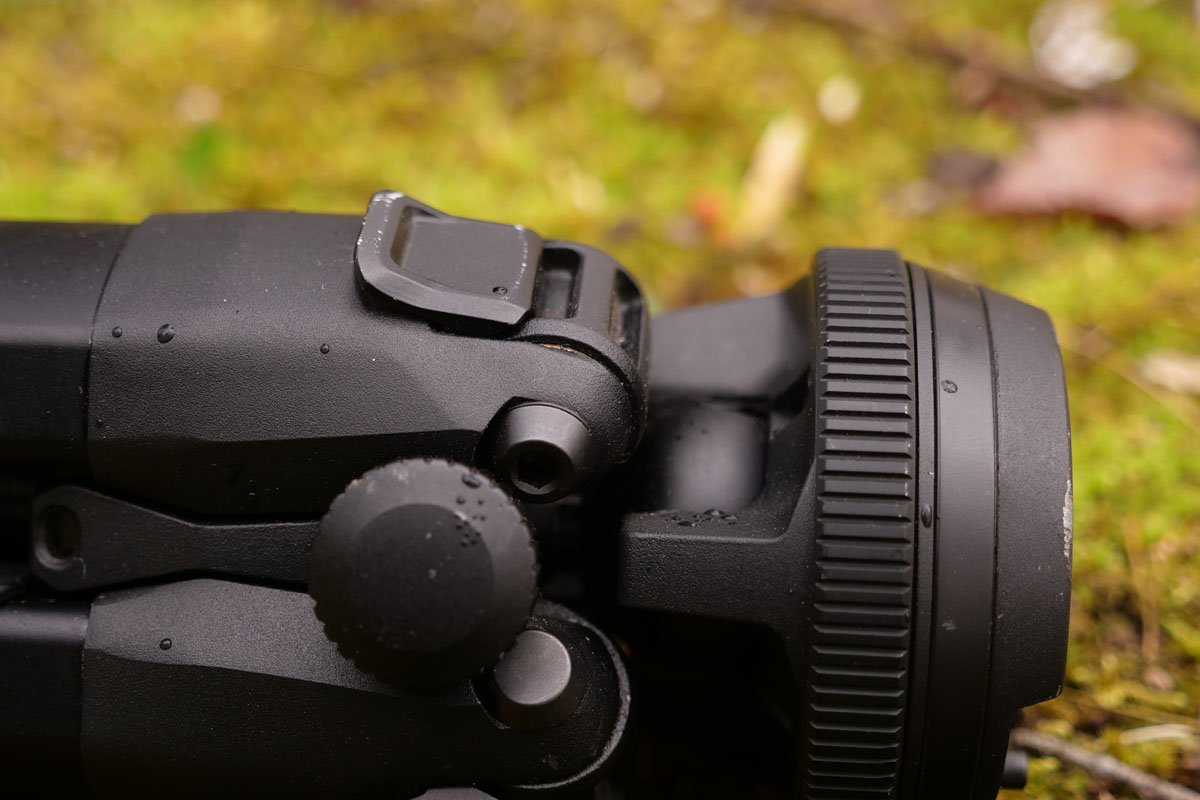
Unique ball head
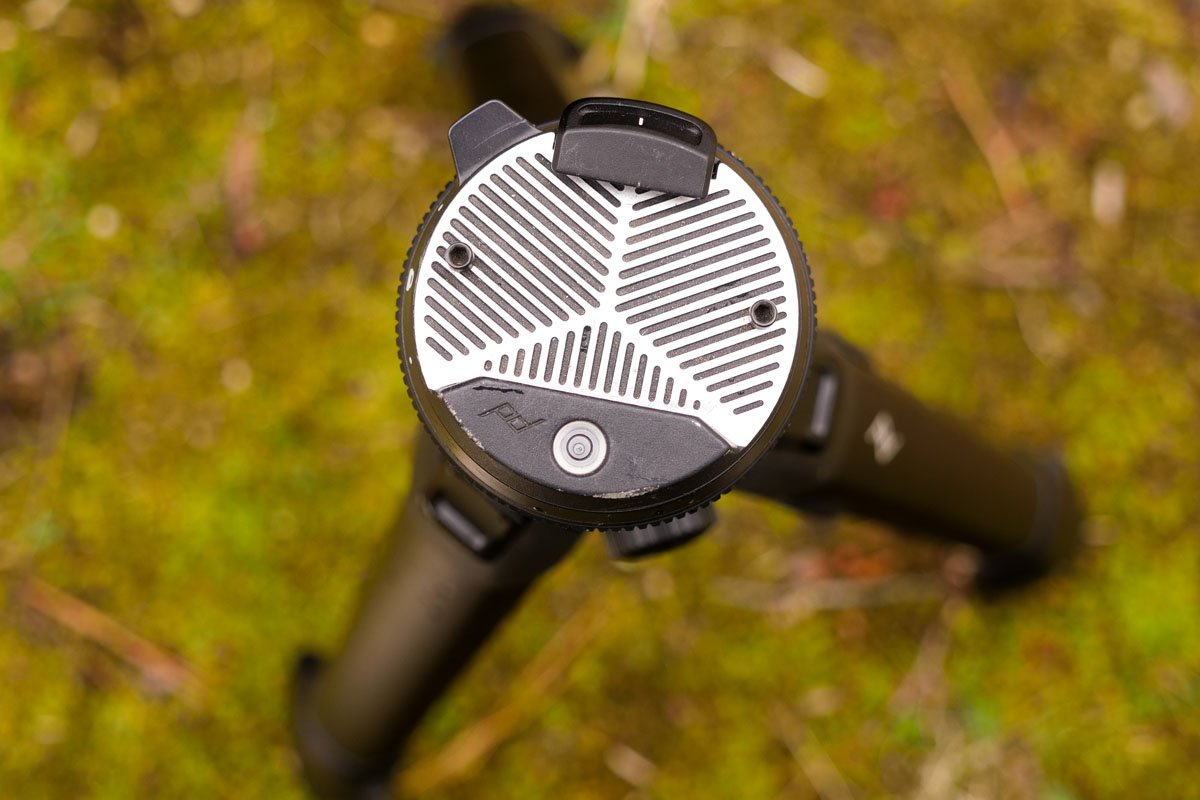
The unique design of the ball head is perhaps the most intriguing feature of the tripod so I started there.
Extremely compact, the head consists of a ball, two rotating rings, and a quick-release button compatible with Arca-type plates and L-brackets.
The rings replace the traditional knobs/levers on virtually all other tripods. This design saves a lot of space resulting in an extremely compact head.
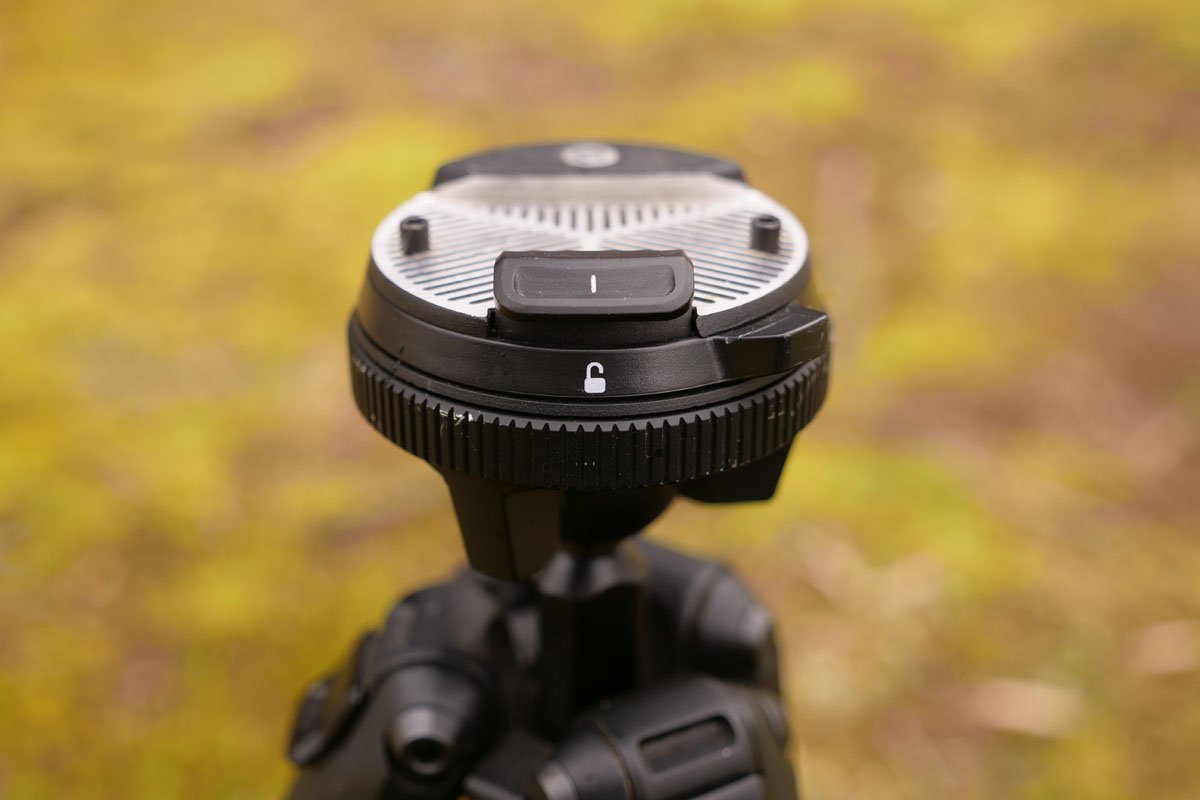
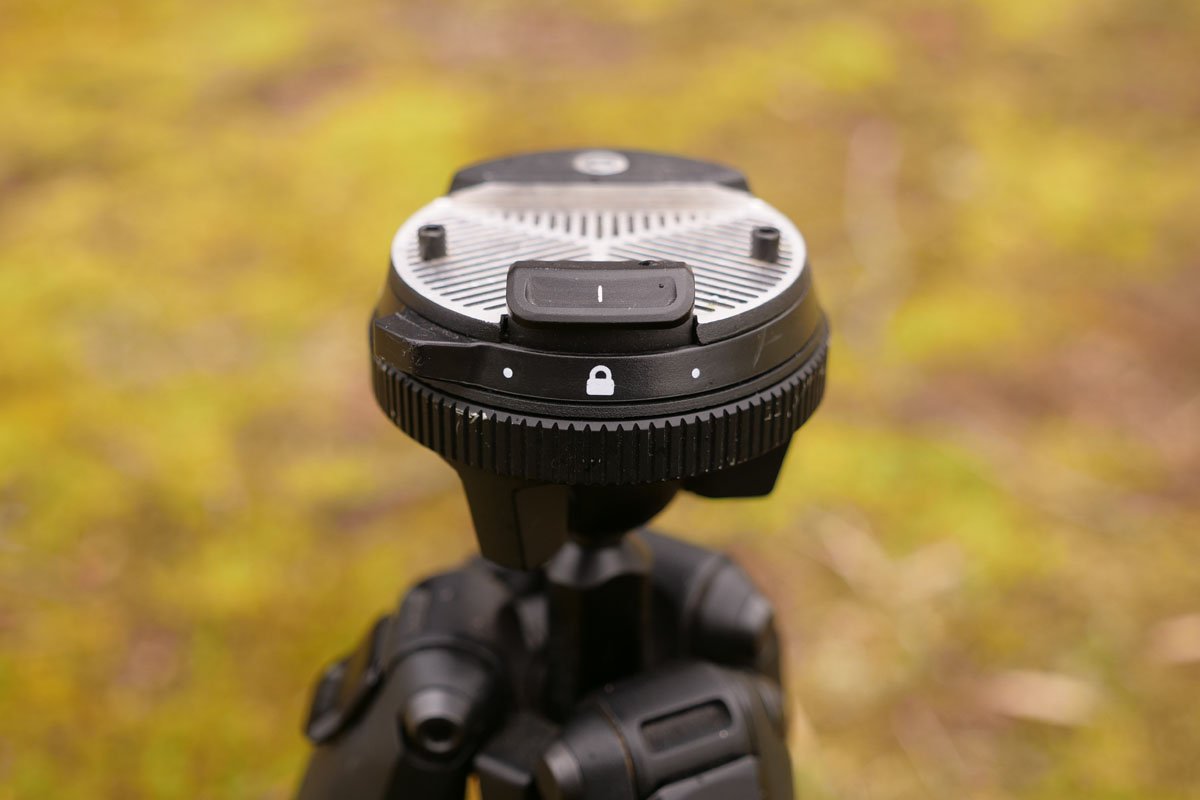
The first ring twists to lock the quick-release plate securely atop the tripod. This ring has a chunky aluminum stud protruding that makes operation as simple as flicking your thumb. With surprisingly little effort, the ring locks very tight, yet is easy to unlock with slightly more effort than the first flick.
The second ring is located below the first. After moving your camera around the ball to compose your shot, the ring twists to lock your position. I was impressed by how tight this lock is. After tightening, there is zero play or sag.
I shoot with a Lumix GH5 and Lecia 100-400mm lens and was in the habit of composing my shots slightly higher than intended to account for the slight sag after tightening the ball head on my Benro tripod. With the Peak Design tripod, I compose my scene precisely, and it stays that way after locking this ring.
The 360° knurling around this ring allows for a secure grip for fast and easy operation.
Flip locks
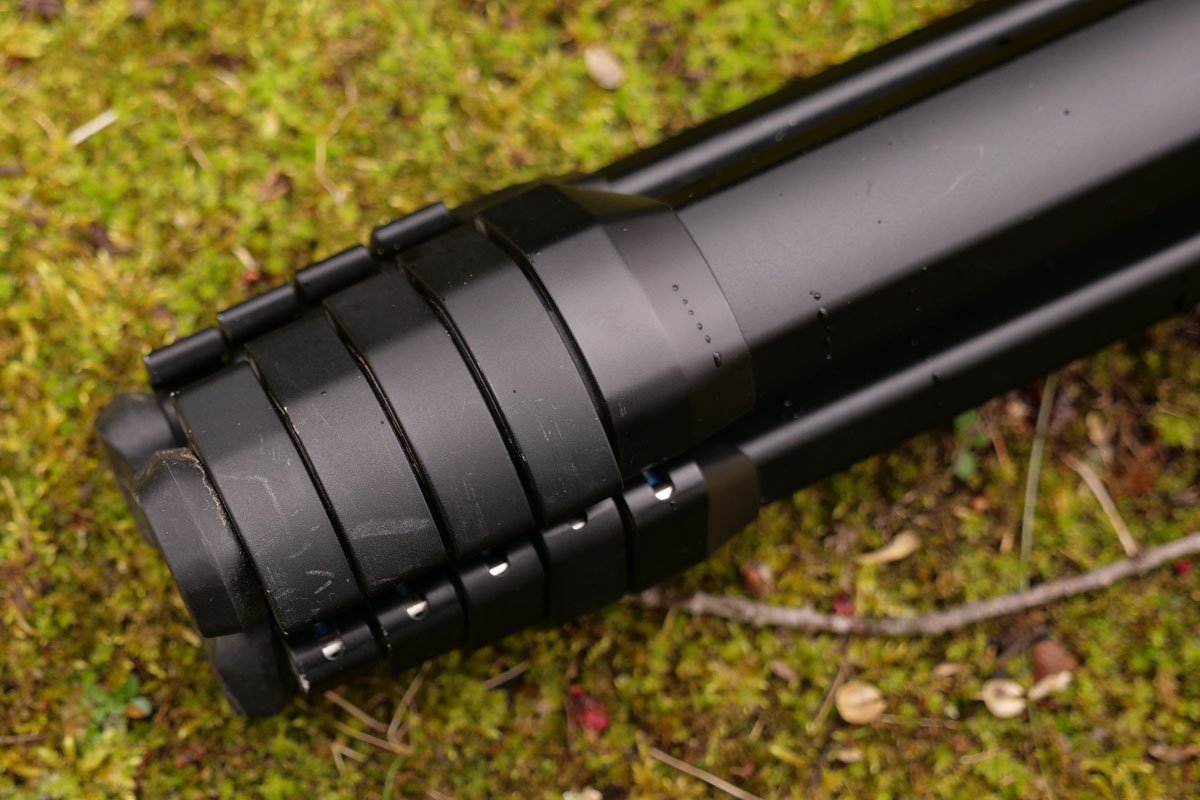
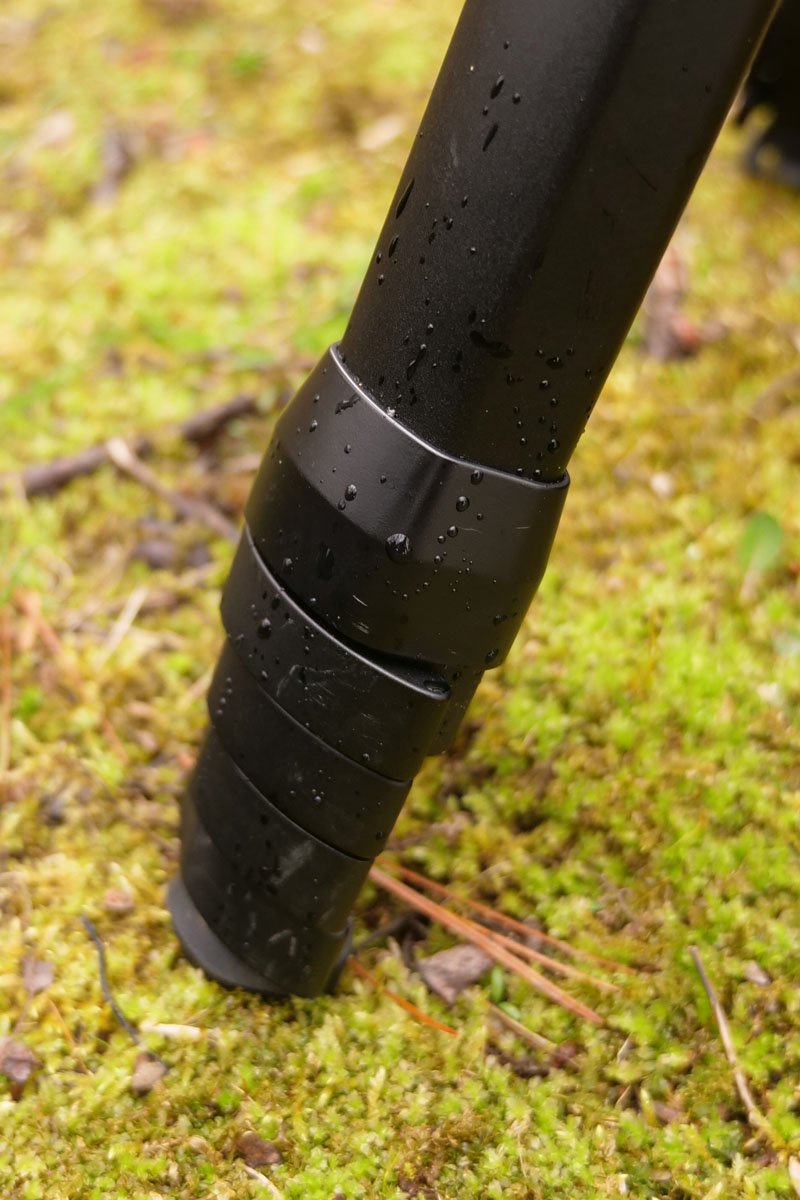
Flip locks are nothing new, but the levers on the Peak Design tripod are so thin and compact, you can easily flip all four levers at the same time, allowing for extremely fast leg deployment and field setup.
This is the only tripod I know of with this design. All others use chunky paddles or twist locks that cannot easily be operated in unison.
Phone attachment


This is a really cool feature.
Neatly stored inside the bottom of the center column is a phone mount that attaches to the tripod head and expands to accept most phone sizes.
I sometimes film vlog-style content in the field and previously carried a separate gorilla tripod for this purpose. With this feature, my kit is substantially smaller and lighter.
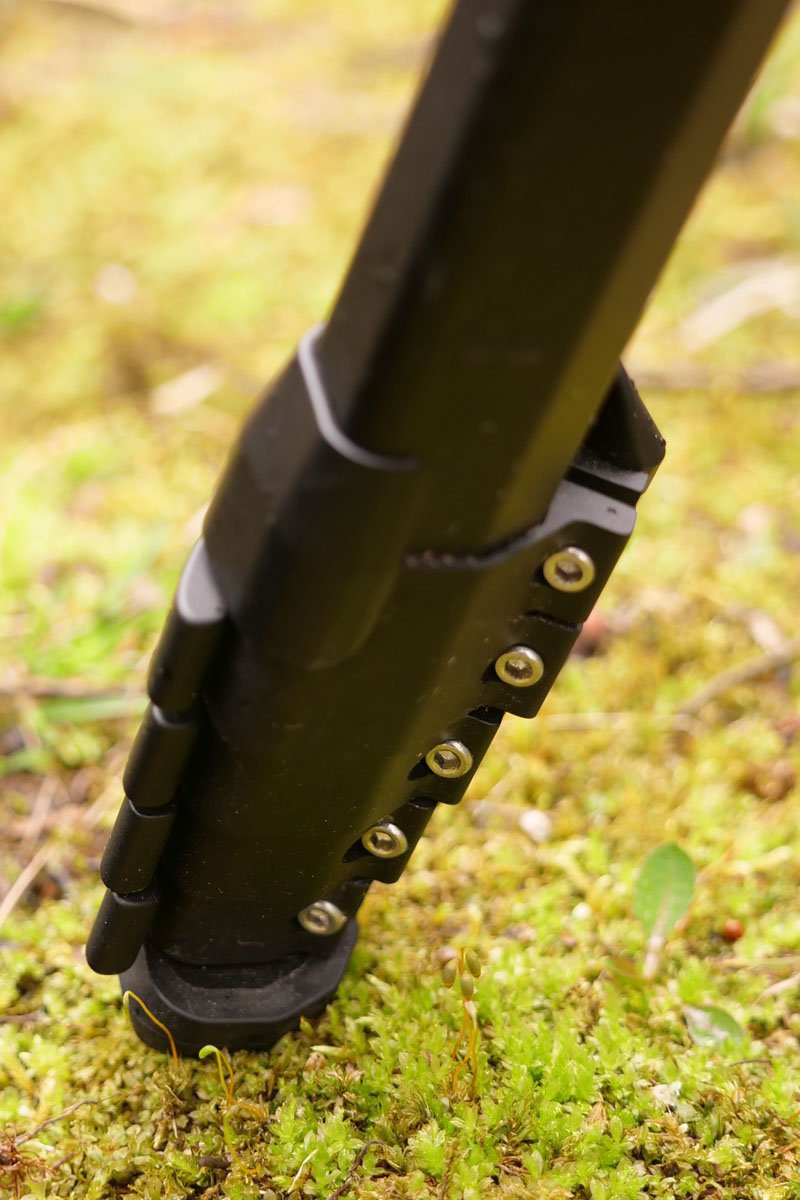
Angle adjustment

The legs of the tripod have two locking angles; one for maximum height, and another for low-angle shots. This is a pretty common tripod feature. However, the procedure for adjusting these angles is innovative and I love the design.
Most tripods use tabs you have to pull up on to free the legs, set the leg to the desired angle, and then push the tabs back down to lock the legs in place.
With the Peak Design tripod, these tabs are spring-loaded, meaning you can push down the tab to free the leg, adjust the leg angle, and it will automatically lock into place.
This feature eliminates multiple steps and results in faster operation in the field.
Included tool
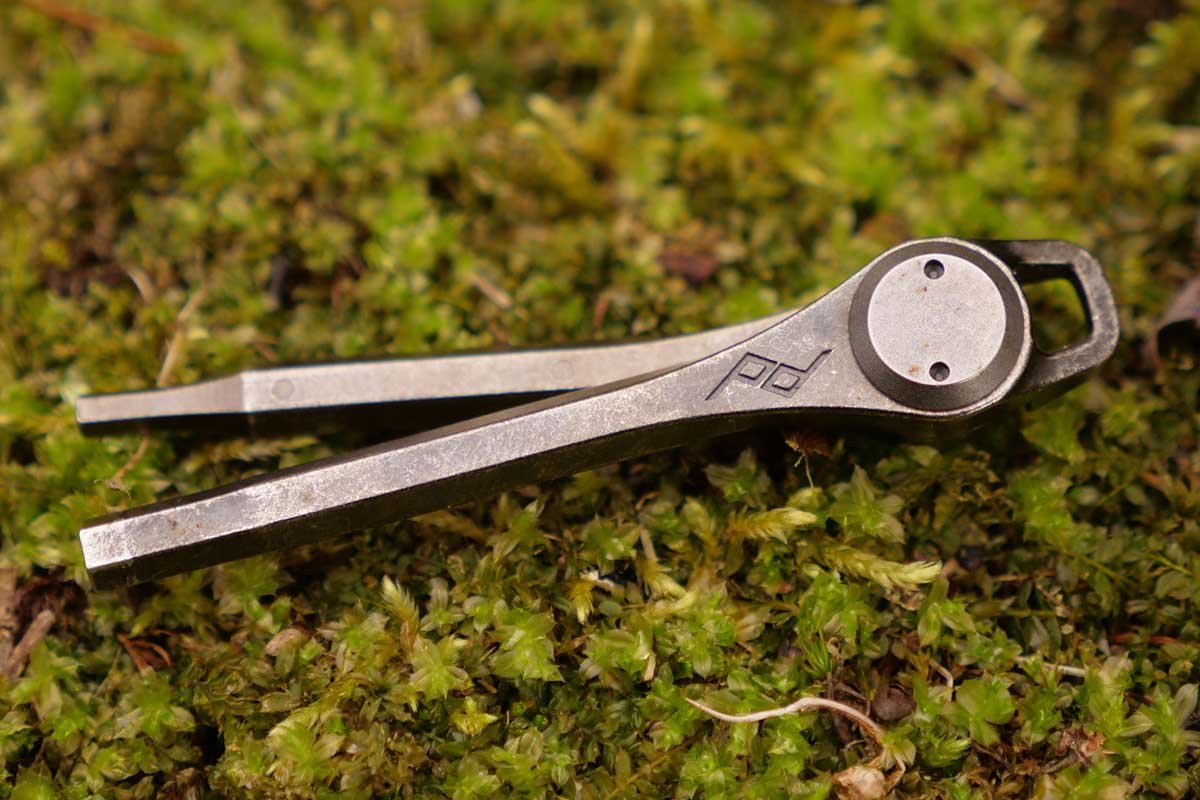

On the inside of one of the legs is a clip that houses a dual 4mm and 2.5mm Allen key (hex wrench).
The 4mm side is used to tighten the included quick-release plate to your camera and for swapping between different center column lengths.
The 2.5mm side is used to adjust the flip lock tension and to replace/remove the top plate pins to accommodate other brands’ quick-release plates.
An additional 4mm Allen key is included with a keyring. I keep this one on my car keys.
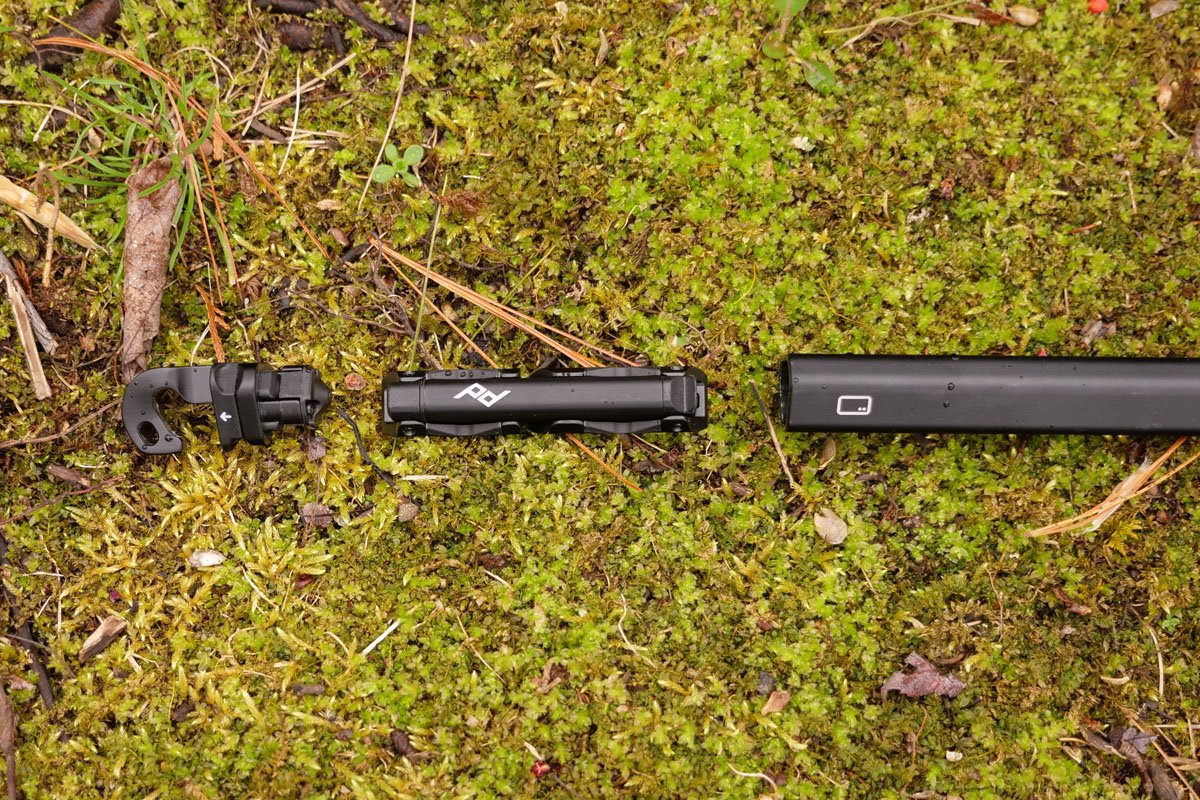
Two-piece center column
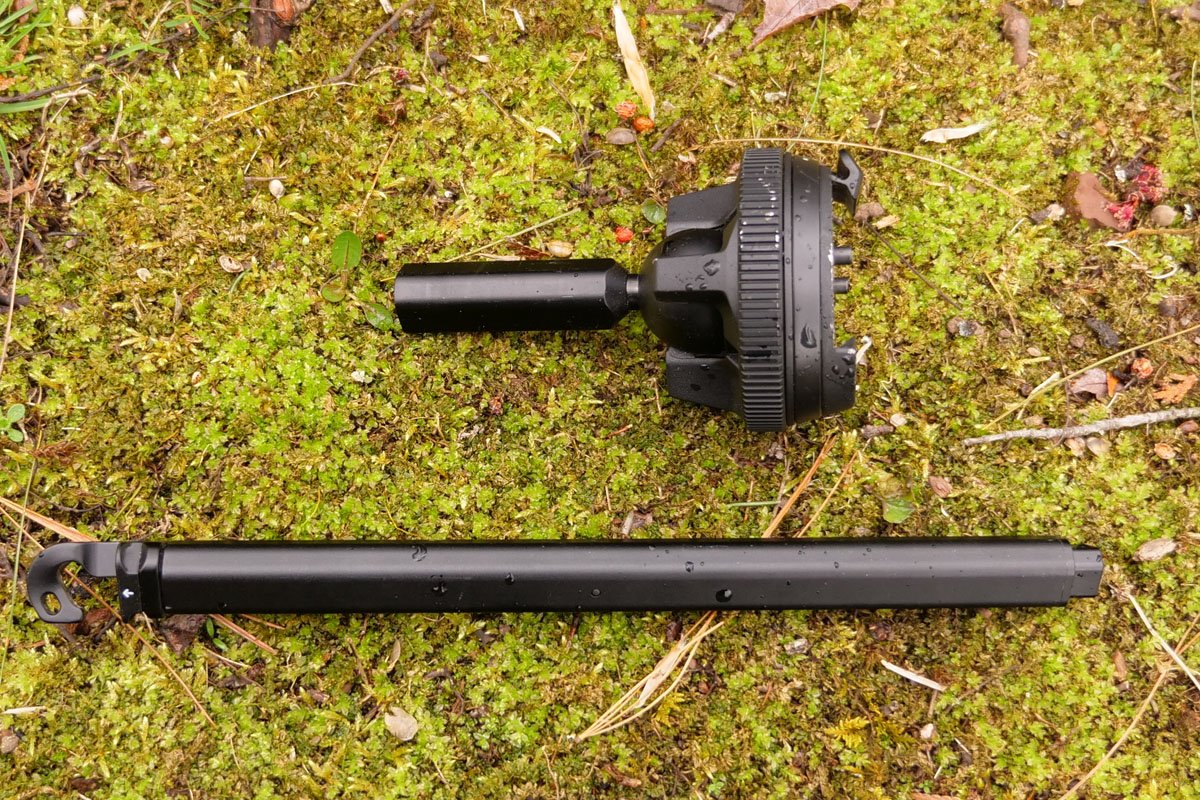
The two-piece center column allows you to use the full-length column if you prioritize a greater maximum height, or the shorter center column if you shoot a lot of low-angle compositions.
I fall into the latter group and have actually cut the center column with a hacksaw on my other tripods to get as low to the ground as possible without inverting the center column and shooting upside-down.
I tried inverting a column in the field once and swore never to do so again. Not only is inverting the center column time-consuming, but you also have to use your camera upside down, which is very awkward.
With a hacked center column, I can get super low to the ground with my camera still on top of the tripod.
With the Peak Design tripod, I can simply use the shorter center column…no hacksaw needed.
Standard Features:
Bubble level
Small bubble level similar to most mid-pro level tripods. It works well.
Hook
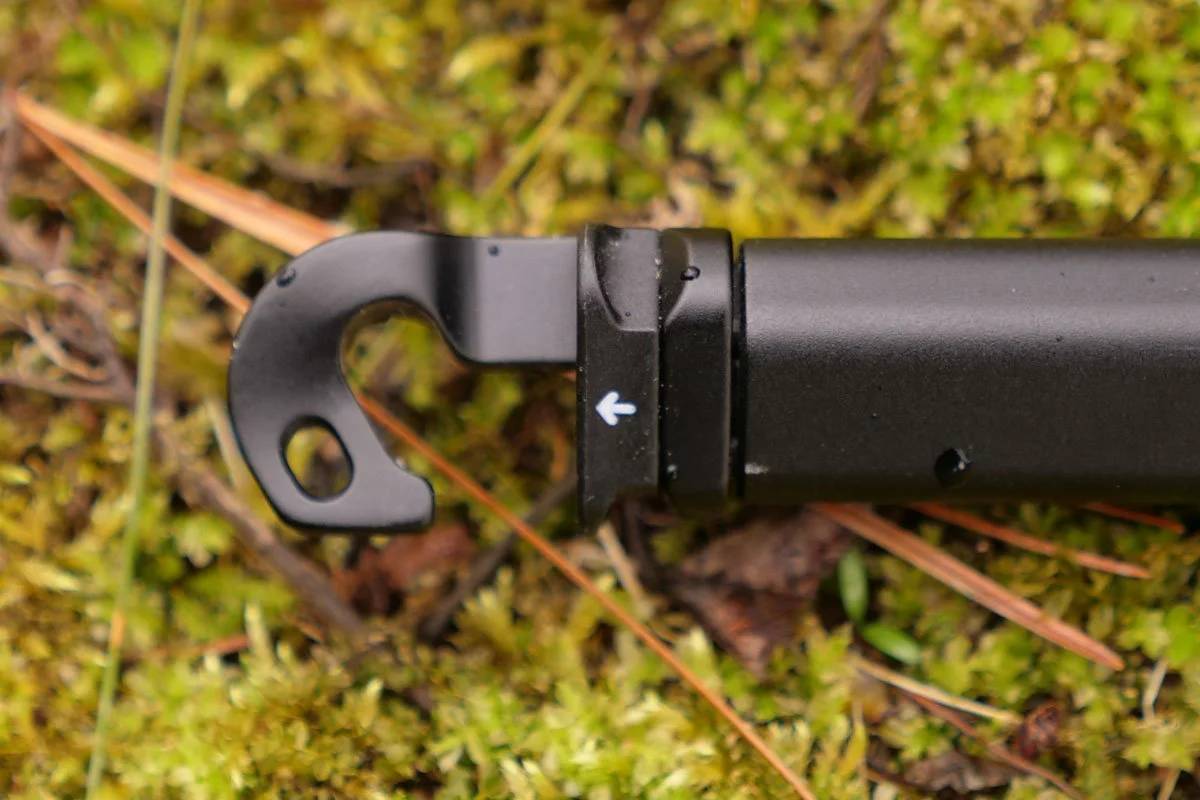
At the bottom of the center column is a standard hook for hanging a bag from for additional stability. Again, nothing new here, but the way the hook snaps into the center column is incredibly sexy and addictive. For such a small part of the design, I can’t believe the countless hours of prototyping that went into it.
Functionality
The Peak Design tripod is a well-oiled machine. It’s a joy to use in the field.
With a little practice, this will be the fastest, most efficient tripod you’ve ever used.
All four flip locks can simultaneously be unlocked on each leg for rapid deployment to full height. Peak Design says their office record is 9.8 seconds. I’ve never timed myself deploying the tripod, but it feels even faster than this mark.
Here’s a video showcasing how efficient this process can be: https://youtu.be/xV9Pcw0a0Jo?feature=shared&t=502
Additionally, the quick-release locking system is much faster than traditional methods. The thumb-stud ring is much faster to tighten than the knobs on most other tripods that clamp your quick-release plate in place.
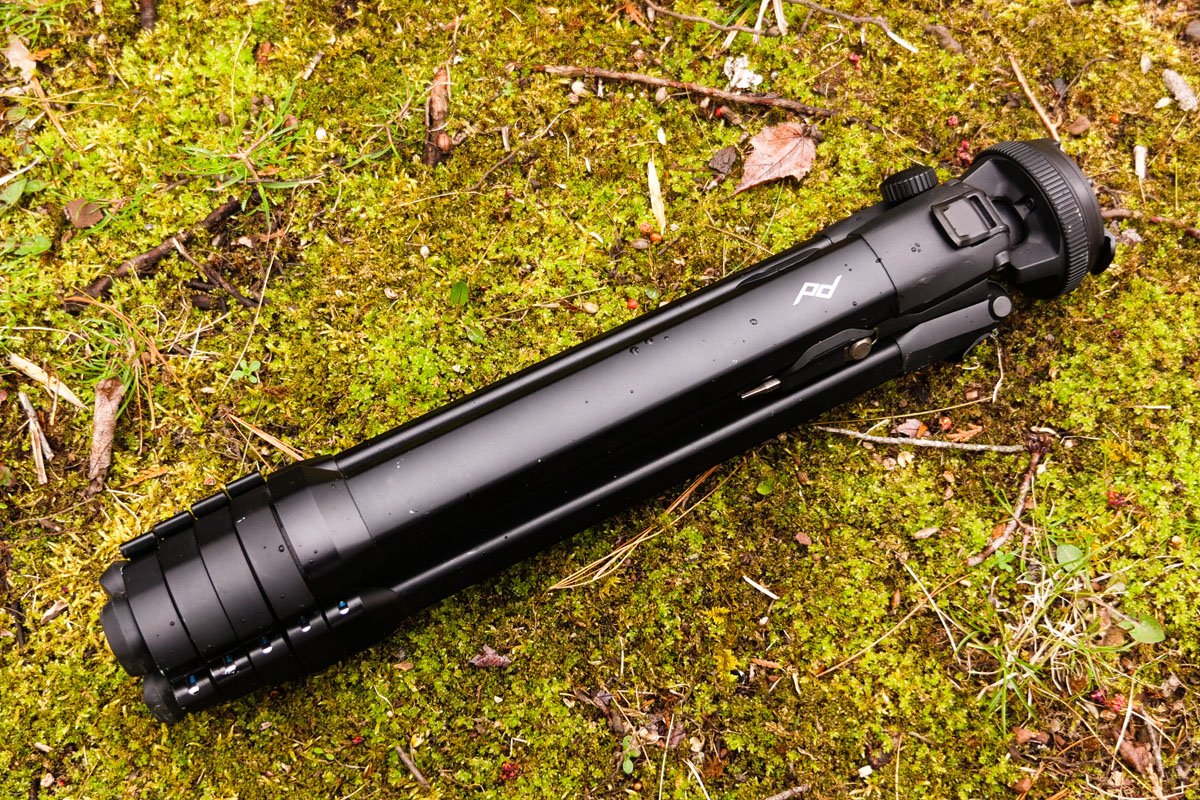
Compactness
When folded, the Peak Design tripod measures just 15.5”.
This length makes storing and traveling with the tripod a breeze.
It neatly fits in all of my backpacks and luggage, and has the perfect spot behind the cooler in the trunk of my car.
With its size and weight, I always have it with me.
Weight
The Peak Design Aluminum Tripod weighs 3.4 lbs.
This is exceptionally light for a fully-featured aluminum tripod. Most other tripods in this weight class are carbon fiber.
The Benro Tripster Travel Tripod is also aluminum and weighs 3.4 lbs, but doesn’t have a phone mount, features twist lock legs (which I don’t like), only has a minimum height of 14” (compared to 5.5” on the Peak Design), and has 3 knobs for adjustments vs. the two rings on the Peak Design.
I like storing the Peak Design in one of the side water bottle pockets on my LowePro backpack for day hikes. With my water bottle on the opposite side, the weight is very balanced and comfortable.
Peak Design tripod while backpacking.
With my old Benro tripod (5.1 lbs), it was difficult to balance my pack, and one of my shoulders was always sore at the end of the day.
I have a lot more gear for backpacking, so the Peak Design tripod usually finds its home strapped to the bottom of my pack.
As previously mentioned, I carry my tripods by hand a lot while in the field. The lightweight design of the Peak Design tripod has been great for this purpose. However, I wish it had a foam grip to make carrying it more comfortable and warmer in cold weather.
I also own a Benro Slim Carbon Fiber Tripod that weighs only 2.35 lbs. However, I find myself bringing the Peak Design tripod on all my adventures, even for long-distance backpacking trips, because the extra weight makes it more stable and I simply enjoy using it more.
My camera and microphone rigs weigh several pounds and cost thousands of dollars. At the end of the day, I trust the Peak Design tripod over my other options.
Pros & Cons
Pros:
1. Lightweight
3.4 lbs puts the Peak Design tripod in a weight class almost exclusively occupied by carbon fiber tripods. The other aluminum tripods at this weight don’t have as many features.
2. Compact
Although there are more compact tripods on the market, it’s hard to find a full-height model with as many features as the Peak Design at or under 15.5” collapsed length.
3. Build Quality
I’ve used a lot of tripods over the years: Benro Classic A2580F, Benro Slim, Manfrotto 525MVB, Benro A2573F.
By far, the Peak Design is the most complete, well-thought-out, and meticulously designed tripod in my collection.
4. Speed
The rapid deployment legs, adjustment rings, and quick-release plate all make for the fastest tripod workflow I’ve ever experienced.
5. Included Phone Clamp
The phone clamp stores inside the center column so you always have it with you if you need to mount your phone on the tripod.
6. Repairability
While other tripod manufacturers offer replacement parts, they’re constantly making new models and replacement parts become increasingly hard to find the older your tripod gets.
Peak Design has spent years designing their aluminum and carbon fiber tripods and only makes those two models.
Every part can be replaced or repaired.
7. Shoot Down in any Position
Most tripods I’ve used have a notch on one side of the ball head for shooting down. Locating and orienting into this notch is time you’ll save with the Peak Design tripod.
Thanks to the unique ball design, the camera can be pointed straight down in any position.
Cons:
Okay, so far this post has been nothing but praise. However, the Peak Design tripod is not perfect. Here are the things I don’t like and hope to see changed/added to the design in the future.
1. Only Two Locking Leg Angles


I’m used to tripods with three leg angles: one for max height, one for low angle, and one in between. The Peak Designs Tripod only has two locking leg angles: max height and low angle.
I’m often setting up on rugged, uneven terrain and I frequently wish there was a locking leg angle between those extreme settings for extra stability and peace of mind.
As a result, I manually set the legs to those in-between angles for stability in tight spaces and over extremely variable rocky terrain. While I have never experienced the legs shifting under the weight of my gear in these unlocked positions, I would appreciate a third locking leg section, especially when the tripod is topped with $3,000 worth of equipment.
Now that I think of it, I should increase the leg tightness to make them even more unlikely to shift in these unlocked positions. I can do this by tightening the leg hinge with the 4mm Allen key. I’ll only do this when I have the leg at the angle I want, and loosen it afterwards so the tripod isn’t too stiff for normal use.
2. Short Center Column Could Be Longer
This is a nitpick and niche con. I don’t think many users would agree with me or be able to empathize. To better understand where I’m coming from, please read the following:
I despise center columns. I often like to get low angles, and inverting the center column in the field is a pain and super awkward. If you don’t invert the column, the lowest you can get still leaves your camera almost two feet above the ground. To solve this, I've used a hacksaw to cut the center column off, leaving just enough to still fit into and secure to the legs.
Honestly, the Peak Designs Tripod solves these issues with the two-piece center column. If you’re like me and prioritize easy low-angle shooting over extra height, just use the short center column, problem solved.
However, I want the short center column to be slightly longer to maintain all the features of the tripod.
With the present design, you lose two features when using the short center column:
Phone Clamp
When using the full-length center column, the accessory for mounting your phone to the tripod neatly folds and stores inside the bottom of the center column. The short center column is not long enough or wide enough to accommodate this feature.
Hook
Additionally due to the narrower internal width of the short center column, the hook cannot attach. This means you cannot hang a bag from the bottom for additional stability.
If the short column was a little longer and slightly wider (interior diameter), both of these features would be maintained.
Plus, the extra length wouldn't affect the low-angle height. With the legs at their minimum height and the short center column dropped all the way down, there's still several inches of gap above the ground, leaving more than enough room to accommodate the phone clamp inside and hook on the bottom.
3. No Foam Grip
I miss the foam grip I grew accustomed to on my old Benro.
I carry my tripods by hand a lot in the field. Whether it’s short walks between shots or long treks from A to B, I almost always have my tripod with a camera/microphone attached in my hand so I never miss a moment.
Without the foam grip, my hands are often cold and uncomfortable.
Additionally, when using my tripod for sound recording, the foam grip helps deaden handling noise when I have the tripod set up with only one leg extended like a monopod.
Conclusion
Having extensively used the Peak Designs Aluminum Travel Tripod for over seven months in extreme environments and demanding situations, I can honestly say that it’s the best tripod I’ve ever used.
While minor improvements could enhance its versatility, like a foam grip and more leg angles, these do not detract much from its value.
It's a tool that not only meets the rigorous expectations of professional fieldwork, but elevates and streamlines the creative process.
Please leave a comment below if you have any questions.
Thanks for reading,
Jared
Share this post to help the website grow.
Help Support Acoustic Nature
If you enjoyed this post and would like to help support Acoustic Nature, please consider "buying me a coffee" or becoming a Patreon with the buttons below.
As a thank you for your support, Patreon supporters receive a copy of Field Recording For Beginners, exclusive access to the full Behind The Sounds video series, nature sound library downloads, and more.
If you are unable to support the site financially, please share this post with others, or leave a comment below letting me know you enjoyed this post! Both are free and help the website grow. Thank you ♫
Thanks for reading,
-Jared