Field Recording Equipment: 2023 Buyer's Guide
Discover the best field recording equipment available in 2023.
This isn’t your average product guide.
Written by a professional nature field recordist, this guide not only offers professional advice and insight, it actually teaches you about every piece of equipment related to field recording so you can confidently select and purchase the best product for your purposes.
With every project and person having their own unique requirements and style, the “best” product is highly custom to you.
Only through understanding product specifications and knowing what’s available can you make this decision with confidence.
This article seeks to provide you with both.
In this post, you’ll learn about every piece of field recording equipment:
Important specifications
How to choose
Up-to-date product recommendations
Jump to Product Recommendations ↓
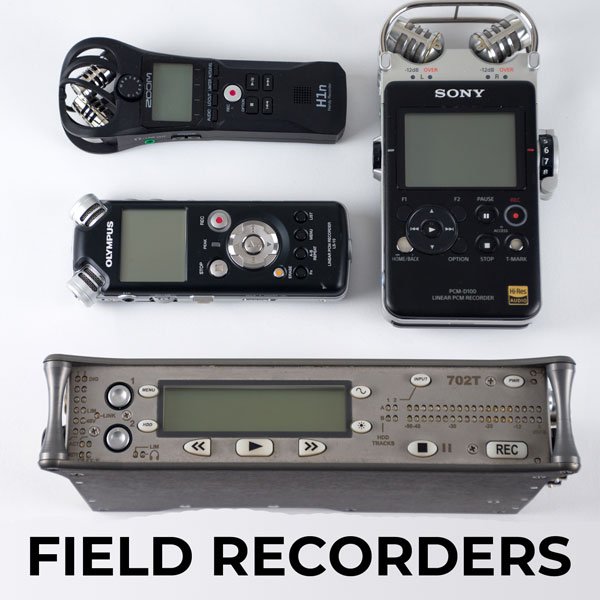
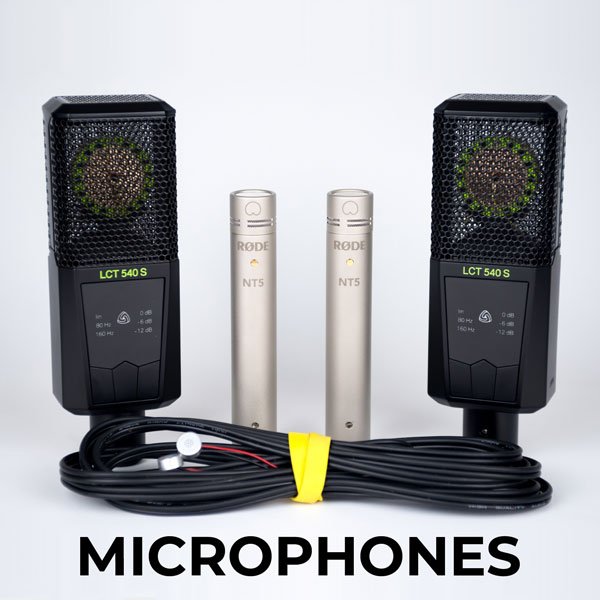
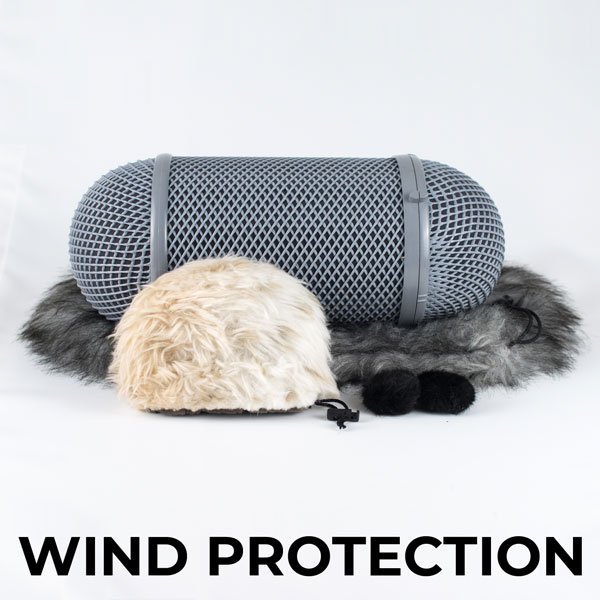
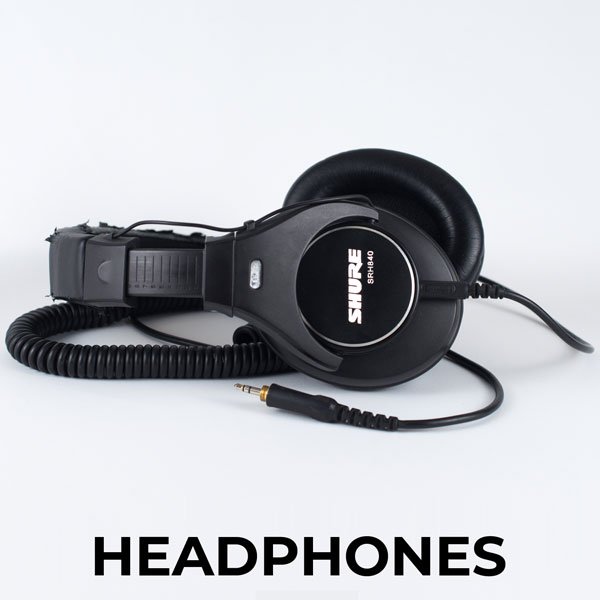
Table of Contents:
The Essentials
This section will start with a brief overview of the essentials, with in-depth, dedicated sections for each item in the “Gear Guides” section.
At the bare minimum, you’ll need the following equipment:
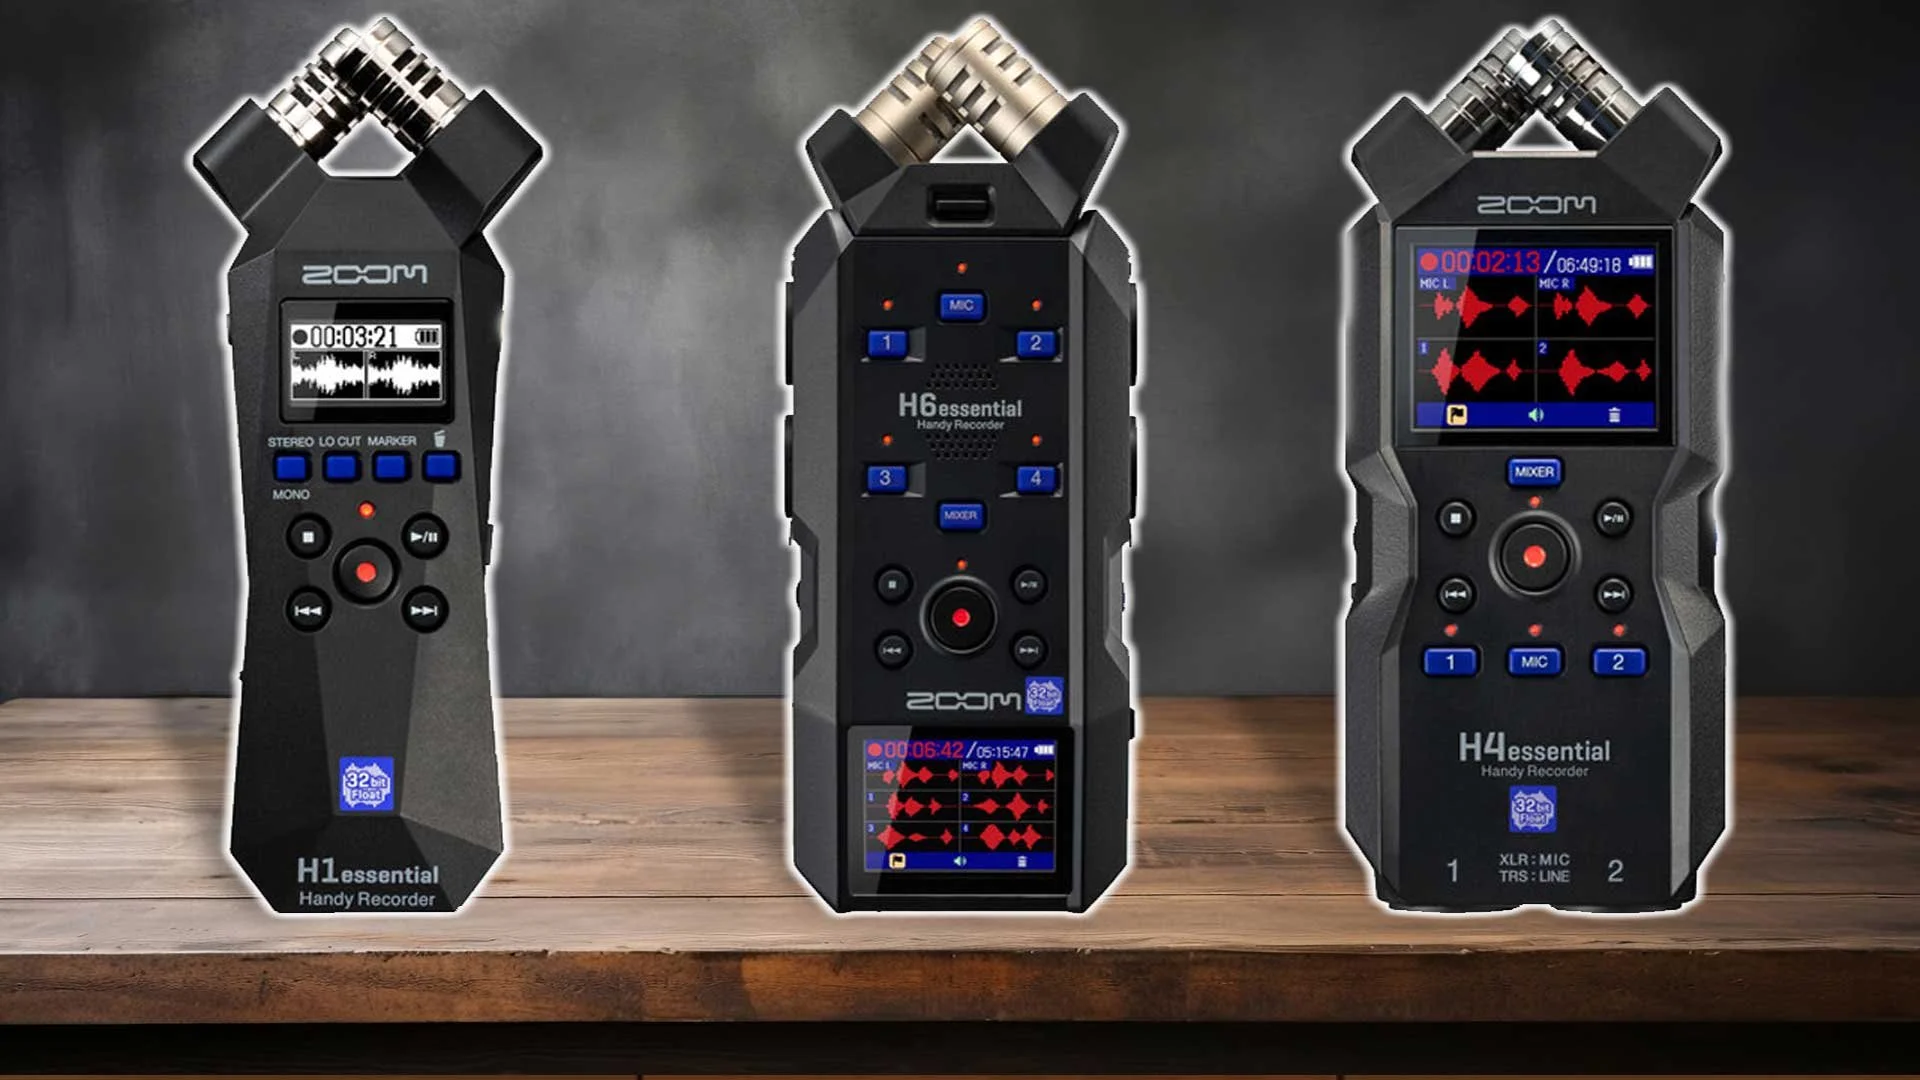
Field Recorder
A field recorder is at the heart of every field recordist’s kit. It is the device that will actually record the sounds you’d like to capture.
There are lots of different options available, but for this overview, we’ll split them into two categories:
Handheld field recorders
Dedicated field recorders
Handheld field recorders are all-in-one recording devices that are small enough to fit comfortably in your hand. They have built-in microphones and are capable of recording sounds straight out of the box.
Because they need few accessories and are simple to operate, they are popular field recorders for beginners.
Although they generally don’t offer the sound quality of dedicated field recorders, there are ways around this and it is possible to get amazing recordings with handhelds.
Pro:
Small size
Require few accessories
Simple to operate
Con:
Limited features
Lower sound quality
Dedicated field recorders are strictly for recording audio and require the additional purchase of external microphones in order to work.
They’re typically much larger than handheld recorders but offer many powerful features and settings that could make your workflow much easier.
Dedicated field recorders are made for professionals and are often used for recording sound for TV and film.
Pro:
Advanced settings
Awesome sound quality
Rugged construction
Con:
Bulky
Heavy
Require accessories
Wind Protection
By design, microphones are extremely sensitive to wind and unprotected mics can easily become overloaded by the moving air and experience audio distortions.
Even a slight breeze or just someone walking past your microphone can cause these distortions. For this reason, having some kind of wind protection is essential.
The most common way of overcoming this problem is by installing a layer of fur over your microphones to help shield them from the wind. The fur absorbs, deflects, and disperses the wind’s energy away from your microphones and thus prevents audio distortions.
Their furry and motionless appearance has earned them the rather unfortunate nickname of “deadcat” in the audio industry. I prefer calling them windscreens.
Headphones
Although not required for recording, without headphones you’ll be recording blind in the field. Being able to hear what you're recording while you’re recording is an invaluable resource. For this reason, I’ve included headphones as a field recording essential.
Listening to your audio while recording is called “monitoring” and has many benefits:
Confirm that your gear is working correctly
Fine-tune your microphone placement
Intimately connect with your sounds
Monitoring your audio with headphones will give you peace of mind in knowing that your gear is working as it should. There is nothing worse than coming home from the field and discovering that your recording failed for some reason.
The following list contains possible reasons for failure that you can avoid or fix simply by monitoring:
Distorted audio caused by peaking
Radio frequency interference
Dead batteries
Damaged cables
If these problems go undetected, the results can be frustrating and demotivating. Learn from my mistakes and always monitor your audio in the field.
The second reason to use headphones is to get better recordings. Small changes in the distance and angle of your microphones to your subject can substantially change a recording.
Getting closer will make your subject louder and capture more detail while changing the angle will affect the stereo image.
Stereo image refers to the balance between your left and right channel audio and where sounds appear to originate from. If your right channel microphone is more directly angled towards your subject, it will be louder in your right headphone. Your brain will interpret this information and tell you that the sound is coming from your right. In this case, you may find yourself wanting to turn your head to listen to the sound more directly.
While this can add interest to a recording, it can also sound very unbalanced. Personally, I strive for recordings with well-balanced stereo images.
At the end of the day, microphone distance and angle are variables for you to play with to find your ideal sound and monitoring with headphones gives you precise, creative control over them.
Lastly, monitoring creates a deep connection between you and your sounds. Most microphones are more sensitive than our own ears and experiencing this enhanced detail in the moment is deeply satisfying.
There’s nothing more satisfying than bathing in your favorite sounds through a pair of headphones.
Memory Cards
Although most field recorders have an internal memory, some do not; and the ones that do typically only have a few gigabytes of internal storage.
1 hour of audio @48kHz/24-bit = 1 Gigabyte
Combined with the fact that audio files require lots of storage, you’ll want to invest in at least a couple high-capacity memory cards.
That way, if you fill up a card in the field, you’ll have an extra to pop in and continue the recording session.
Batteries
Batteries are something that most people don’t think about but are absolutely an essential piece of gear.
Due to the portable nature of field recorders, they require portable power. That means batteries.
Batteries come in many different types and capacities and most field recorders include a page in their manuals detailing life expectancy for different battery types and recording settings.
Although some recorders feature internal lithium-ion batteries that can be recharged, they can be frustrating to use. When the internal battery dies, you’ll have to wait for it to recharge before you can record again. Also, the battery will slowly lose capacity over time and eventually need replacing.
Microphones For Field Recording
In this section you’ll learn all about the different types of microphones used for field recording:
Microphone Self Noise
Microphones and their associated preamplifiers both have inherent levels of noise.
The noise is created by electrons moving in circuits and sounds like the classic white-noise static hiss.
The problem with self noise is that too much of it can ruin a recording. When using a microphone or preamplifier with high self noise, the hissing sound can overpower your subject. At best, this can be distracting, and at worst, unbearable.
All microphones and preamps produce some amount of self noise, but the amount varies between devices and you usually get what you pay for.
Depending on the components used in construction like tubes, transistors, resistors, and the layout of the PCB, the self noise of a device can be minimized. Finding, combining and designing the lowest self noise components and layouts requires significant research and development, hence the increased price for low noise products.
So how much self-noise is too much?
Well, it depends on what you’re recording. If you’re recording loud sounds, your subject will easily overpower the noise from the recorder and it won’t be audible in the final recording. However, self noise can be a major problem when attempting to record quiet sounds.
Self noise usually becomes an issue when attempting to record sounds less than 40dB. In order to determine how quiet your sounds are, please use the image below.

Decibel chart of common sounds.
If you don’t know how loud your sounds are, I recommend using an app on your phone to measure them. My favorite is the Decibel app by Vlad Polyanskiy (iOS / Android).
As a nature field recordist, the sounds I record are between 20-40 decibels so I need extremely quiet recording equipment to capture those sounds without any background hiss.
So what is a good self noise value for recording quiet sounds?
Self noise can be challenging to understand and compare between recorders due to the number of ways it’s measured. Some manufacturers don’t even include a self noise measurement under the specifications!
While researching microphones and recorders you may see self noise measured as:
Self Noise: measured in dBA
Equivalent Input Noise (EIN): measured in dBu
Signal-To-Noise Ratio (SNR): measured in dB
Use the chart below to determine what an acceptable self noise measurement is for your use.
| Self Noise (dBA) | EIN (dBu) | SNR (dB) | Rating | Description |
|---|---|---|---|---|
| ≤ 12 |
-130 | ≥ 82 |
Ultra Quiet | Extremely low self noise. Undetectable even under the most critical recording conditions. |
| 16-13 | -126 | 78-81 | Very Good | Very slight noise discernable when recording the quietest signals. |
| 20-17 | -119 | 74-77 | Good | Good enough for most purposes. Noise noticeable in quieter recordings. |
| 24-21 | -110 | 70-73 | Fair | Noise obvious when recording anything below speaking level. |
| ≥ 24 |
-100 | ≤ 69 |
Poor | Not recommended unless you only record waterfalls, alarms and jets (very loud signals). |
Understanding Microphone Sensitivity
To put it simply, microphone sensitivity measures the amount of output for a given input.
The output of a microphone is what is recorded, and is referred to as “the signal.”
The more sensitive a microphone is, the louder the signal will be for a given input of sound.
What is a Good Microphone Sensitivity?
The best microphone sensitivity will depend on the recording application. Sometimes a lower sensitivity microphone is better, and other times, a higher sensitivity microphone is more appropriate.
Low sensitivity mics are generally better for recording isolated, loud sounds.
High sensitivity mics are generally better for recording ambient, quiet sounds.
Low sensitivity mics are good for:
close miking drums
vocals in a loud environment (live music venue)
guitar and bass amps
high SPL sounds (gunshots, vehicles, etc)
High sensitivity mics are good for:
ambiences
nature sounds
parabolic microphones
voice-over work
dBV vs. MV
Microphone sensitivity can be difficult to understand and compare between models due to the different methods for measuring it. Some manufacturers use dBV, while others use mV.
In the beginning of my field recording career, I found myself searching Google for “Which microphone sensitivity is better?”, “dBV vs mV”, and “Is a negative or positive sensitivity better?”
Most of the search results were filled with complicated terminology and formulas requiring an audio engineering degree to understand. After suffering through many such articles, I finally found the answer.
Measured in dBV:
Given one microphone with a sensitivity of -45dBV, and another microphone with a sensitivity or -36dBV, which is more sensitive? ANSWER: The -36dBV microphone is more sensitive.
Measured in mV:
Another scenario using mV: given one microphone with a sensitivity of 10mV, and another with 15mV, which is more sensitive? ANSWER: The 15mV microphone is more sensitive.
But what if you want to compare sensitivity measurements with different units to determine which is more sensitive? Enter my microphone sensitivity converter.
Convert Between dBV and mV
Microphone sensitivity can be measured two different ways. European manufacturers tend to measure using millivolts (mV). American manufacturers tend to use decibels relative to one volt (dBV).
This difference in units can be confusing when shopping for a new microphone. How do mV compare to dBV? Which one is more sensitive?
In order to accurately compare different units, we need to convert one to the other. Use this calculator to convert between dBV and mV.
Omnidirectional Microphones
Omnidirectional microphones, omni for short, are sensitive to sounds 360° around the capsule.
Sounds emanating to the front, rear, and sides of an omni mic will be recorded with equal signal strength (loudness).
Because omnidirectional microphones record all sounds with equal emphasis, the pick up pattern is also called “non-directional”.
Due to their enveloping pickup pattern, they are great for capturing entire environments of sound.
Omni microphones are often used to record ambiences and soundscapes. Use two of them to create a stereo image.
There are many stereo miking techniques using a pair of omni mics including, A/B stereo, jecklin disk, binaural, and Olson wing.
Cardioid Microphones
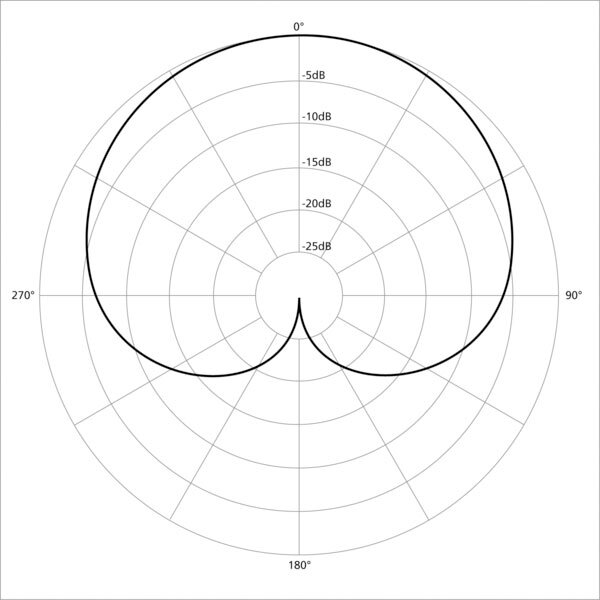
Cardioid microphones are sensitive to sounds to the front and sides of the capsule. They reject sounds emanating behind the capsule.
The cardioid microphone gets its name from its heart-shaped pickup pattern. They are the most popular microphones for recording speech thanks to their ability of rejecting sound from the side and rear.
A cardioid mic’s pickup pattern is unidirectional, meaning it is only sensitive to sound from 1 direction.
Single cardioid mics are used for recording spot sound effects in situations where you can get the microphone very close to your subject.
More commonly, pairs of cardioid microphones are arranged in X/Y, and ORTF to record stereo ambiances.
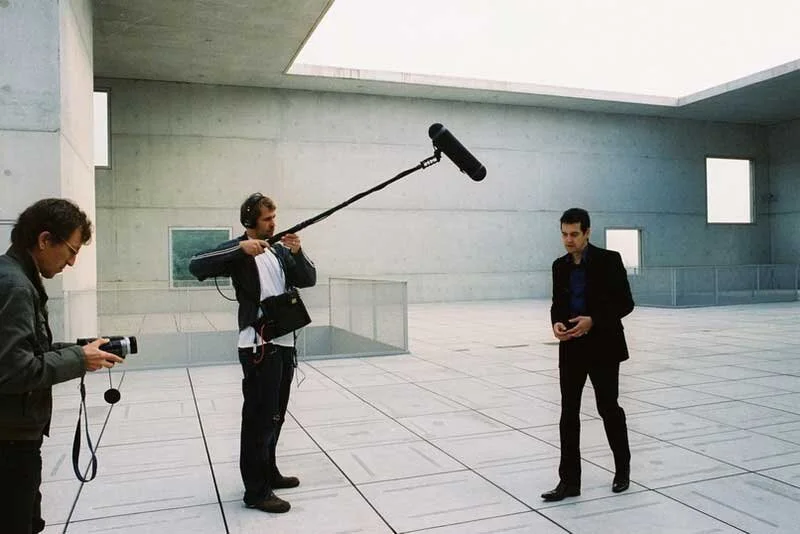
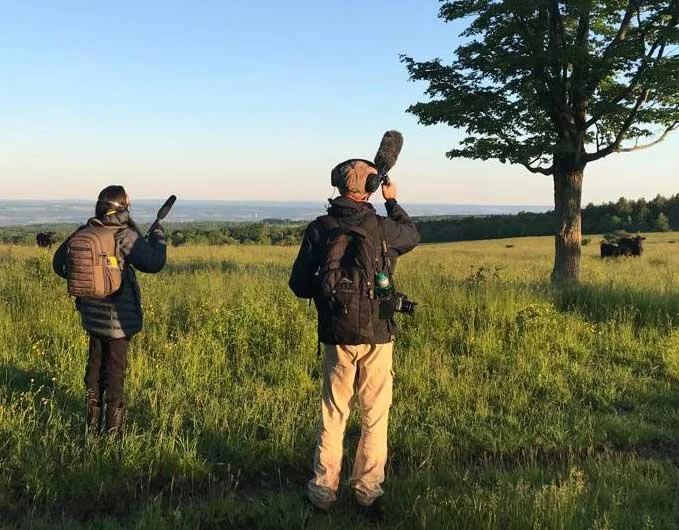
Shotgun Microphones
Shotgun microphones are directional microphones that are most sensitive to sounds in the direction it is facing. Sounds to the side and rear are attenuated.
This directionality makes them great tools for recording and highlighting the sounds of a single subject.
They are most often used for recording dialog and wildlife species at short distances.
The microphone capsule itself is located at the bottom of a long tube. The tube gives the mic its name due to its resemblance to a shotgun barrel.
Without the tube, a shotgun microphone would perform like a supercardioid condenser microphone, with a heart-shaped pickup pattern (pictured below).
Parabolic Microphones
Parabolic microphones are even more directional than shotgun microphones, work at greater distances, and also amplify the incoming signal, resulting in increased sensitivity and lower noise.
Due to their ability to capture focused sounds at a distance with excellent off-axis rejection, they’re the best tool for recording individual wildlife species and are most commonly used by bird recordists.
You’ve probably seen them in use on the sidelines of sporting events to capture detailed sounds of distant athletes on the field.
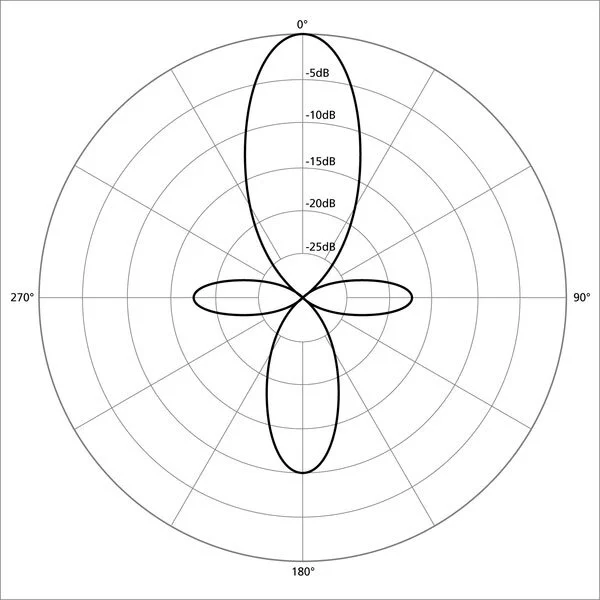
Figure-8 Microphones
Figure 8 microphones are only sensitive to sounds to the front and rear of the capsule. When viewing the pickup pattern, these areas of sensitivity form a figure 8, hence the name.
Figure 8 microphones are most commonly used in tandem with a cardioid microphone to provide the left and right channel audio for mid-side recordings.

Binaural Microphones
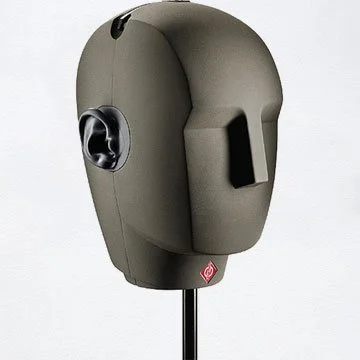
Binaural microphones are designed to capture sounds similar to how humans actually hear them.
“Binaural” means two ears, so you can probably guess how they work, but the details are interesting.
Listening to binaural audio creates a 3-D landscape of sound inside your head. You can hear sounds all around you and can pinpoint their location. It is as if you are really standing in the recorded environment.
Ambisonic Microphones
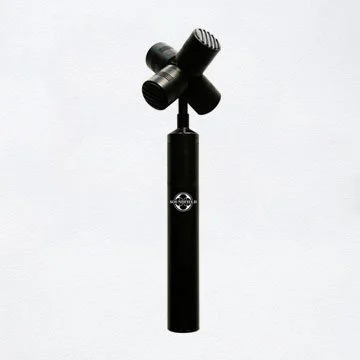
Ambisonic microphones are used to record soundscapes in 360°. This full-sphere surround sound format captures the full localization information around the microphone as well as height information.
Most ambisonic microphones feature four microphones arranged in a tetrahedral array.
Developed by Michael Gerzon, Peter Felgett, and Geoffrey Barton in the early 1970s at the University of Oxford and the University of Surrey, the best benefit of ambisonic recordings is their flexibility.
Raw ambisonic recordings store audio information in what’s known as B-format. The four audio channels are called W, X, Y, and Z. These channels each represent a different spherical sound component.
In post production, B-format offers incredible flexibility and can be exported to almost any format including:
Mono
Stereo
Quad
5.1 Surround Sound
7.1 Surround Sound
Contact Microphones
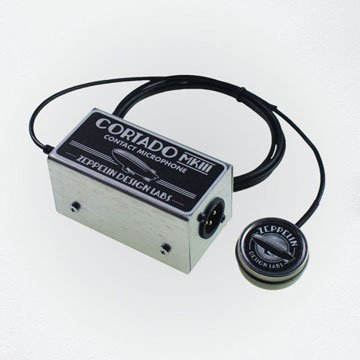
Contact microphones sense sound vibrations through contact with solid objects. They are almost completely insensitive to airborne sounds.
Most contact microphones are made by gluing a piezoelectric element to a thin brass disc.
By design, contact microphones are passive (don’t require power) and extremely high impedance.
This high impedance is not well-matched for field recorder mic inputs and can cause them to sound tinny and lacking bass without a matching preamp.
Most manufacturers offer contact microphones with and without matching preamps, so make sure you get one with a matching preamp. The difference is dramatic.
Popular methods for securing contact microphones to solid objects include:
Double sided sticky tape: works well for clean and flat surfaces
BluTak: works well for irregular surfaces
Beeswax: similar to BluTak but with less high frequency damping
Handling noise can be a major issue with contact microphones as the cable is a solid object attached to the mic.
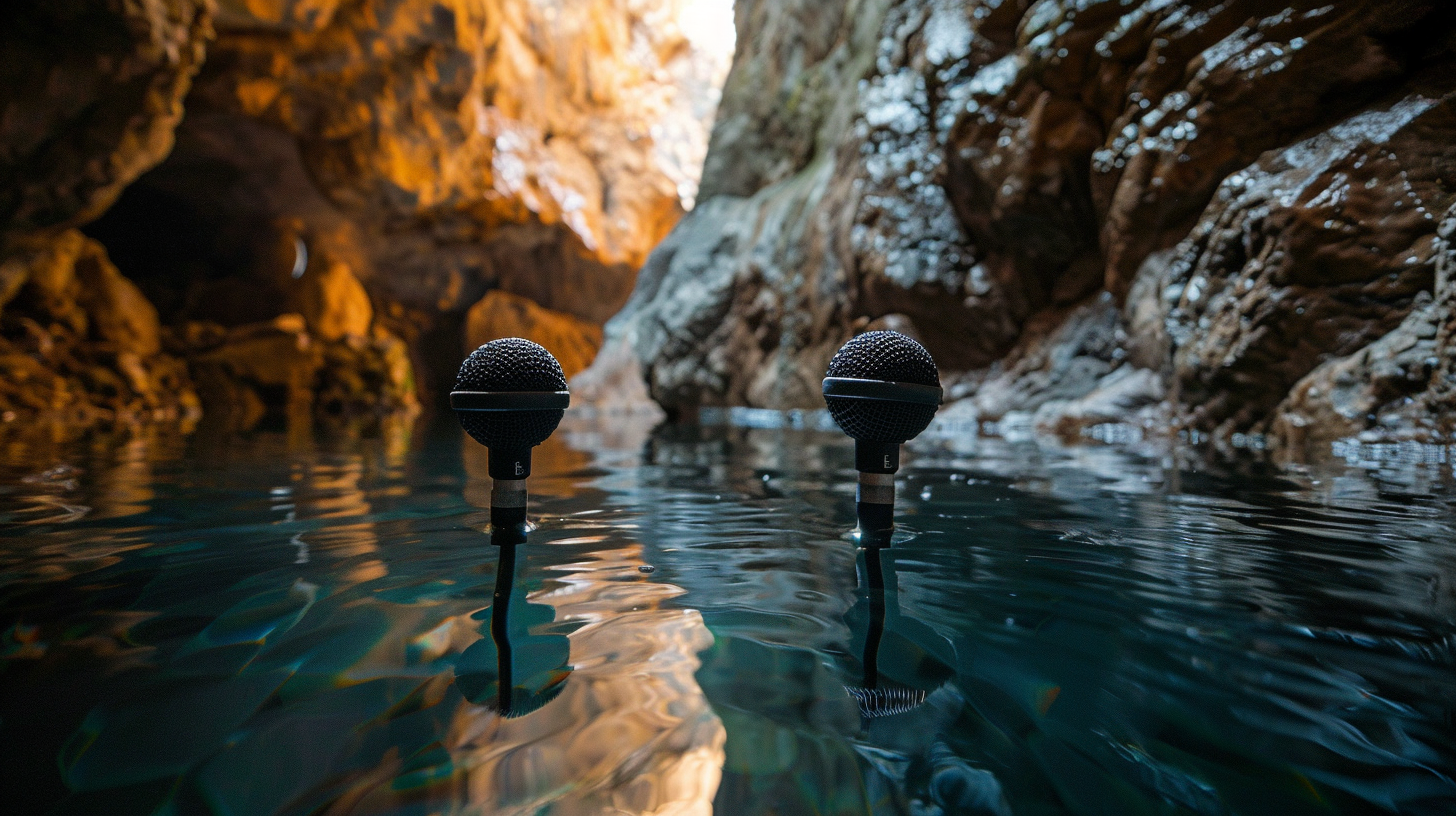
Hydrophones
Hydrophones are basically contact microphones that have been adapted for recording sound underwater.
Hydrophones open up a whole new world to field recordists, full of aquatic life, their associated sounds, and new sonic textures created by plants, rocks, and sand caught in the current.
The first hydrophone was invented by Reginald Fessenden in 1914. Its invention was inspired by the Titanic disaster and aimed to detect icebergs to prevent future accidents.
Hydrophones soon caught military interest and were further developed and used to locate submarines.
Like contact microphones, all piezo hydrophones need a way to match their extremely high impedance to the low impedance microphone input. Most professional hydrophones include a matched preamp.
When selecting your desired cable length, it’s best to err on the side of caution and get a little extra. It is not possible to add more cable later without leaks.
If you’re interested in stereo underwater recordings, try spacing your hydrophones at 3’ or more. Because sound travels 4x faster underwater, closely spaced hydrophones will have very limited stereo width.
Gear Guides
In this section, you’ll learn more detailed information about the various specifications behind equipment used for field recording.
Use the jump navigation below to quickly access the equipment you’d like to learn more about, or continue reading to develop a solid foundation on field recording gear.
Jump Navigation:
Field Recorder Details
This section is all about field recorders. It will bring you up to speed on all the important features and specifications you need to know before selecting a field recorder.
The best field recorder is dependent on your specific needs. Thoroughly reading and understanding this chapter will help you determine what your needs are.
Knowing exactly what you’re looking for will greatly simplify your decision as you can filter the list of results with your specific requirements.
Size & Weight
Field recorders come in many different sizes which often correspond to weight. If you have limited space, travel often, or weight requirements, size will be an important specification to consider when choosing a field recorder.
For example, as a nature field recordist, I need my field recorders to be small and lightweight. I often camp and record for multiple days in one location and with all my backpacking gear, my pack is already heavy and lacks space for recording gear.
Recording scenarios where size and weight are important:
Have far distance to carry equipment
Require many recording accessories
Require additional equipment outside of strictly recording
On the other hand, while having lighter, smaller, and less gear is always nice, some field recording settings allow you to lug in as much gear as you want.
Recording scenarios where size and weight are less important:
Have short distance to carry equipment
Have few additional accessories
Sole purpose is to record audio
Material
Aluminum vs. plastic field recorders.
Field recorders are constructed from either plastic or metal. The most common metal used in field recorder construction is aluminum.
Both have their pros and cons so let's cover each material so you can decide which is best for you.
Plastic:
Field recorders made of plastic have the following benefits:
Cheap
Less handling noise
Lightweight
Plastic is a very inexpensive material for manufacturers to use for constructing the body of field recorders. This savings is passed on to you (the consumer) and results in a more affordable device.
Another benefit of plastic is less handling noise. Plastic helps to deaden the vibrations created by the subtle movements of your hand while holding the recorder.
The Zoom H1n is a plastic-bodied field recorder.
While practice and a balanced grip are still required for noiselessly holding a plastic
recorder, a plastic body makes this much
more feasible.
Lastly, plastic recorders are lighter than their aluminum siblings by about 50%.
Plastic field recorder cons:
Less durable
Prone to RF interference
Durability is the main downside of plastic field recorders. While some recorders are made of denser plastic than others, they all fall short to metal-bodied recorders when it comes to durability.
If you’re tough on gear, record in extreme environments, or travel frequently to record, plastic is not recommended.
A lesser drawback of plastic field recorders is their vulnerability to radio-frequency (RF) interference. Without additional RF protection, plastic-bodied field recorders will record RF interference as loud clicks, pops, and static.
These interference noises are only an issue if you’re recording in an environment with sources of RF interference. The closer your recorder is to these sources, the larger the risk of interference. Possible sources include:
Cell phones
WiFi
Bluetooth devices
Power lines and transformers
Power cables
Fluorescent light fixtures
2-way radios
If your recording environment contains these sources, consider going with an aluminum-bodied recorder or conducting research on a plastic-bodied recorder’s RF protection.
Aluminum:
Field recorders made of aluminum have the following benefits:
Great RF protection
Very durable
Aluminum naturally has a high resistance to RF interference. Aluminum-bodied field recorders block RF interference and make them a great choice for recording in urban areas.
The Sony D100 is an aluminum-bodied field recorder.
Aluminum field recorders are also very durable. Although they may become scratched, they will handle drops, dings, and general wear much better than plastic field recorders.
Aluminum field recorder cons:
Expensive
Sensitive to handling noise
Heavier
Because aluminum costs more than plastic and is more difficult to work with, aluminum field recorders are more expensive than plastic ones. If you’re on a tight budget, you may not be able to afford an aluminum recorder.
Aluminum field recorders are also more sensitive to handling noise. Every slight movement of your hand, even the creaking of your joints, is transferred to the microphones and audible in the final recording. However, with practice, it is possible to noiselessly hold an aluminum recorder while recording; it’s just more difficult.
Lastly, aluminum field recorders are heavier than ones made of plastic. As previously mentioned, aluminum field recorders are about twice as heavy as the same sized device made of plastic.
Personally, I think the extra weight is well worth the durability benefits.
Self Noise
As previously mentioned, all field recorders and microphones have some level of self noise. Some have more than others and the total amount is important when recording quiet sounds below 40 dB.
Under these circumstances, self noise is arguably the most important factor to consider when choosing a field recorder because it directly impacts the overall sound quality.
Too much self noise can ruin a recording with overbearing static hiss.
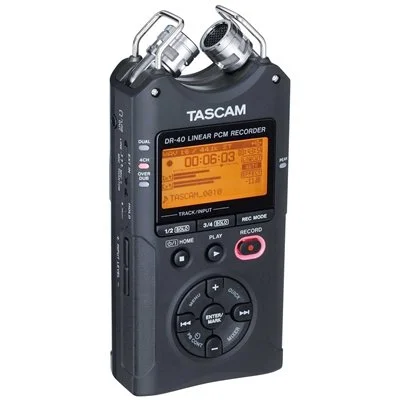
Tascam DR-40. High self noise.
My first field recording was of a quiet woodland captured with the internal microphones of a Tascam DR-40.
When I got home and listened to the sounds, the hissing self noise of the DR-40 overpowered the woodland ambience and was extremely distracting.
Know what self noise level is acceptable for your purposes so this doesn’t happen to you.
For researching field recorder self noise levels, I recommend this fantastic resource from Avisoft Bioacoustics. They have independently tested and measured the self noise values for most commercially available field recorders.
For the tests, they use equivalent input noise (EIN) to measure the amount of self noise. EIN ratings are listed below.
| EIN | Rating | Description |
|---|---|---|
| -130 | Ultra Quiet | Extremely low self-noise. Only noticeable under the most critical recording conditions. |
| -126 | Very Good | Slight noise discernible when recording sounds below 30dB. |
| -119 | Good | Good enough for most purposes. Noise noticeable for sounds less than 40dB. |
| -110 | Fair | Noise obvious when recording anything below speaking level (50dB). |
| -100 | Poor | Not recommended unless you only record very loud signals. |
Wind Protection Details
Protecting your microphones from wind is an absolute must for field recording.
Microphones are incredibly sensitive to wind noise and it doesn’t take much to ruin a recording. Even just air moving at 2 mph can overload the microphone resulting in distorted audio.
You may be thinking to yourself, “why does something silent like moving air cause audio peaking and distortion?” To answer this question, we need to better understand how a microphone works.
Why Are Microphones So Sensitive To Wind?
Microphones are susceptible to wind noise because of the way the diaphragm works.
Incoming sound waves strike the diaphragm causing it to vibrate. As it vibrates, the distance between the diaphragm and the backplate changes. This varying distance generates a constantly fluctuating charge that mimics that pattern of the incoming sound waves. This charge creates an electrical signal that corresponds to the sound.
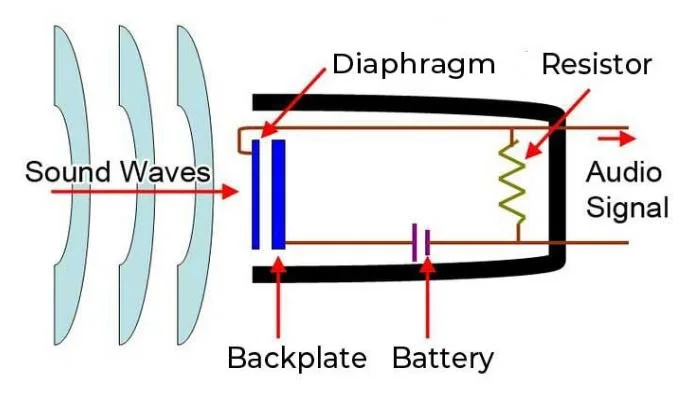
Microphone diaphragms are so thin and lightweight, that even the slightest sound will cause them to vibrate. In fact, most diaphragms are just 5 microns thick. That’s the same diameter of a red blood cell!
So if a diaphragm can pick up the subtle vibrations of a distant bird, imaging how sensitive it must be to the direct impact of moving air. As you can imagine, the thin diaphragm vibrates violently and creates a signal exceeding the dynamic range of the recorder, resulting in extremely distorted audio.
Different Kinds of Wind Protection
Foam
The foam windscreen offers the least protection from wind. It is usually a free accessory included with the purchase of most microphones.
Low wind protection
Included with most microphones
Protects up to 1 mph winds
Furry
A furry is a sleeve of fake fur and open-cell foam that slips directly over your microphone. The layer of hair blocks wind and creates a zone of still air around your microphone to help mitigate wind noise.
Medium wind protection
Light-weight solution
Protects up to 8 mph winds
Blimps
Blimps are designed to create an area of still air around the entire microphone, rather than just around the diaphragm. This larger pocket of “dead” air is better able to protect against wind distortion.
High wind protection
Models with built-in shock mounts
Protects up to 12 mph winds
Blimp + Furry
In extreme conditions, pairing a blimp with a furry provides the maximum amount of wind protection. The large pocket of still air combined with a layer of fur is enough wind protection for almost any scenario.
Maximum wind protection
Models with built-in shock mounts
Protects up to 18 mph winds
How Are Wind Speeds Measured?
Wind speeds can be measured in many different ways. Miles per hour, kilometers per hour, meters per second, and even knots. All of these varying methods can make comparing wind speeds difficult. If only there was an empirical method for measuring wind speed…
Introducing the Beaufort Wind Scale.
The Beaufort Wind Scale
Invented by Sir Francis Beaufort in 1805, the Beaufort Wind Scale is a method for estimating wind speeds based on environmental observations.
It was originally developed to standardize wind force observations while at sea - one man’s “stiff breeze” might be another’s “soft breeze”. Today, Beaufort’s scale terminology is still used for weather forecasts for marine travel and severe weather warnings.
This method is useful because it allows you to assess your environment with nothing more than your senses. All you have to do is observe how the wind is interacting with your surroundings.
If you require exact wind speed measurements, you should look into purchasing an anemometer.
This scale is really overkill for microphone windscreens since even the best wind solutions can only counteract force 5 winds. Nonetheless, the full chart is below.
| Force | Wind Speed | Classification | Appearance |
|---|---|---|---|
| 0 | < 1 mph < 2 km/h < 0.5 m/s |
Calm | Smoke rises vertically |
| 1 | 1–3 mph 2–5 km/h 0.5–1.5 m/s |
Light air | Smoke drift indicates wind direction, still wind vanes |
| 2 | 4–7 mph 6–11 km/h 1.6–3.3 m/s |
Light breeze | Wind felt on face, leaves rustle, vanes begin to move |
| 3 | 8–12 mph 12–19 km/h 3.4–5.5 m/s |
Gentle breeze | Leaves and small twigs constantly moving, light flags extended |
| 4 | 13–18 mph 20–28 km/h 5.5–7.9 m/s |
Moderate breeze | Dust, leaves, and loose paper lifted, small tree branches move |
| 5 | 19–24 mph 29–38 km/h 8–10.7 m/s |
Fresh breeze | Small trees in leaf begin to sway |
| 6 | 25–31 mph 39–49 km/h 10.8–13.8 m/s |
Strong breeze | Larger tree branches moving, whistling in wires |
| 7 | 32–38 mph 50–61 km/h 13.9–17.1 m/s |
Near Gale | Whole trees moving, resistance felt walking against wind |
| 8 | 39–46 mph 62–74 km/h 17.2–20.7 m/s |
Gale | Twigs breaking off trees, generally impedes progress |
| 9 | 47–54 mph 75–88 km/h 20.8–24.4 m/s |
Strong Gale | Slight structural damage occurs, slate blows off roofs |
| 10 | 55–63 mph 89–102 km/h 24.5–28.4 m/s |
Storm | Seldom experienced on land, trees broken or uprooted, "considerable structural damage" |
| 11 | 64–72 mph 103–117 km/h 28.5–32.6 m/s |
Violent Storm | Very rarely experienced; accompanied by widespread damage |
| 12 | ≥ 73 mph ≥ 118 km/h ≥ 32.7 m/s |
Hurricane | Devastation |
How Much Wind Protection Do You Need?
There are many levels of wind protection. The amount of protection you will need depends on your recording environment. I’ve listed common recording environments below, ranked from lowest wind threat to greatest.
Indoors (Controlled)
Indoors (Uncontrolled)
Boom Operator
Outdoors
1. Indoors (Controlled): Recording stationary sounds indoors with only one person; just you and your subject.
Under these circumstances, there is virtually zero air movement. Not only that, it also eliminates any “surprises” that may stir up some wind caused by people walking by or turning on fans.
This level of control makes for an “air-tight” environment, requiring zero wind protection.
Live streaming
YouTube videos
Indoor sound effects

2. Indoors (Uncontrolled): Recording sounds indoors with many people or unpredictability.
These environments either have multiple subjects, busy environments, or a mixture of the two. There most likely will be physical movement around your microphones caused by people walking around.
These environments require low wind protection.
Podcast
Interview
Recording a music group/band
Indoor ambience
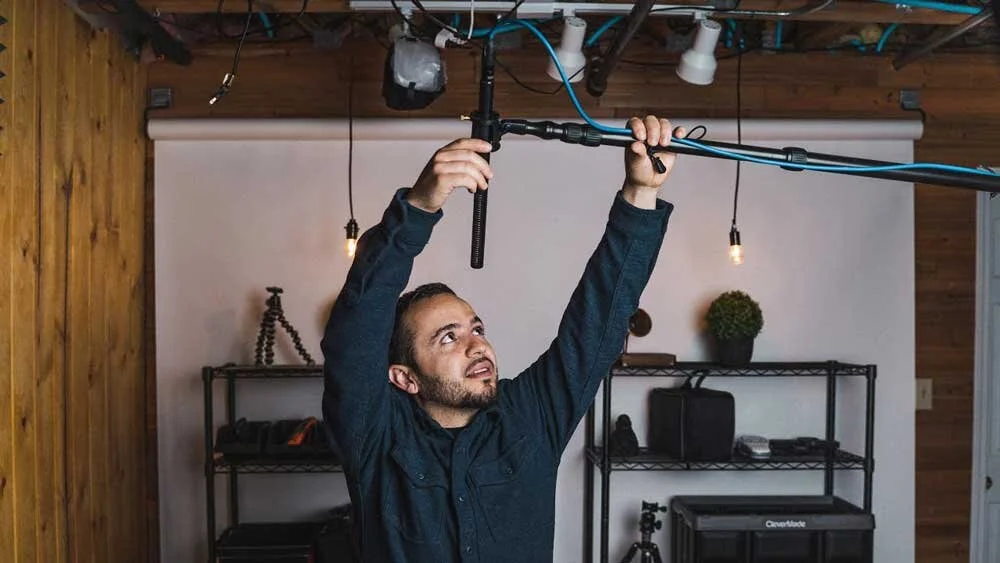
3. Boom Operator: When operating a boom, you most certainly will have movement around your suspended mic.
Not only is it impossible to hold a mic perfectly still, you will likely have scenes that require you to move while recording (following moving scenes/subject spotlight).
4. Outdoors: If you find yourself outdoors with a microphone, you are going to need wind protection.
Even on a calm day, a gust can kick-up and ruin your recording.
Check the weather beforehand and prepare for winds greater than predicted. It is always better to be safe than sorry, especially if you are a professional working on a project or production.
Depending on wind speeds, recording
outdoors can require high wind protection.
Headphone Details
Headphones are a must for field recording.
Through listening to your audio live in the field, you can confirm that everything is working correctly, better place your microphones for optimal sound quality, and more intimately connect with your sounds.
Before selecting a pair for the job, it’s important to understand the following headphone fundamentals:
Comfort - You’ll be wearing headphones for upwards of several hours while recording. Comfort is a must.
Isolation - The ability to hear exactly what your microphones are recording without any distracting sounds leaking in.
Impedance - Determines if your headphones can be properly powered by your field recorder.
Comfort
Comfort is the #1 consideration because even the best headphones in the world are useless if they are uncomfortable.
There are a lot of factors that determine a headphone’s overall comfort level. The three most important are headphone type, weight, and clamping force.
Out of the available headphone types, some are more comfortable than others. The following list is ranked from least to most comfortable. (This is a general consensus that most people agree with, your opinion may vary)
Over-Ear
On-Ear
Earbuds
In-Ear
Over-Ear
Over-ear headphones are far-and-away the most used type of headphone for field recording because of their comfort level. Many models are purpose-built for monitoring audio and boast highly accurate sound reproduction. Most comfortable
Ears can get hot
Accurate sound
Professional appearance
On-Ear
On-ears fit directly on your ear. They are used by some sound engineers in the industry. They look professional and can do a great job if you find them comfortable. When it comes to the on-ear fit, you either love it or you hate it. Personally, I don’t like having my ears pinned to my head and actually find it painful after only 20 minutes.
Love or hate fit
Keep ears cooler than over-ear
Accurate sound
Professional appearance
Earbuds
Similar to in-ears, earbuds also fit into the ear canal, but not as deep. This gives them slightly less isolation than in-ear monitors but isolation is still very good. However, most earbuds lack accurate audio, long-term comfort, and professionalism.
Uncomfortable for some
Good isolation
Unprofessional appearance
In-Ear
In-ear headphones fit directly into the ear canal and outer-ear ridges, creating a seal to ambient surroundings. Because of this, they are the best headphones for noise isolation and are commonly used by live performers.
However, they are less popular for field recording for a few reasons. First, having a foreign object directly in the ear canal is uncomfortable for most people. You can get custom-molded in-ears that fit perfectly, but between the molding and manufacturing process, a pair can cost $600-$1400.
Additionally, taking in-ears on and off takes a little bit of time because of the small adjustments necessary to get them seated properly in your ears. This may seem small, but they’re so good at blocking outside sound that you’ll have to remove at least one whenever someone is talking to you. Unless working alone, an entire day of this can be frustrating.
Best for isolation
Uncomfortable for some
Time consuming to put on/take off
Isolation
Isolation measures a headphones’ ability to mute the ambient sounds of your environment.
Good noise isolation allows you to really “zone-in” on your desired sound source with limited/no distractions.
Once you have isolated yourself from your environment, and you can only hear the audio your field recorder is capturing, you can fine-tune your microphone adjustments to achieve the perfect stereo balance.
Making sure that your subject is spaced pleasantly between left and right channels can make or break a field recording.
In my opinion, this is the second-most important factor to consider when selecting a pair of headphones (behind comfort), regardless of what you record. If your headphones do not separate you from your ambient environment, it will be difficult to correctly place and angle your microphones for optimal performance.
Unlike EQ, this cannot be fixed in post-production and is critical to get right in the field. Yes, there are some workarounds, but they all fail in comparison to nailing it in the field.
Additionally, using headphones with good isolation will allow you to monitor at lower volumes and preserve your hearing. Leaky headphones will require you to crank the volume to hear what you’re recording and can damage your ears over time.
Impedance
Impedance is measured in ohms (Ω) and measures the amount of power needed to drive a pair of headphones.
Headphone impedance ranges between 8-600 Ω. Lower values require less power and vice versa.
Higher impedance headphones provide better overall sound & enhanced bass reproduction
If your recorder cannot fully power your headphones, your audio will be very low volume, even with the gain cranked all the way up. Make sure your recorder matches or surpasses your headphones impedance.
How to Find Device Ω Output
Most manufacturers will have this value listed under the “Headphone Output Power” specification. Try looking there first.
If you cannot find this value, the general rule of thumb is that most portable recorders can power headphones with ≤ 50 Ω impedance.
How to Use High Impedance Headphones
Some higher-end recorders have powerful headphone amps built into their design. Professional recorders like the Sound Devices Mixpre Series have dedicated headphone amplifiers capable of powering “any impedance headphone” as stated on their website.
Battery Details
Batteries are often unsung heroes.
Because field recording is a nomadic hobby, portable power in the form of batteries is a must.
I started out using disposable, alkaline cell batteries, but quickly found them wasteful and expensive.
Not only was I going through batteries like crazy, I didn’t want to use anything but brand-new batteries out of fear of having the batteries die mid-recording.
Soon, I turned to rechargeable batteries and haven't looked back.
Rechargeable batteries can be used again and again with optimal performance. Most reputable brands advertise that their batteries can be recharged over 1,000 times with minimal capacity loss.
Another renewable power solution are portable power banks.
Portable power banks allow you to power your devices in the field via USB cables.
This used to require adapters and voltage boosters to supply power to recorders via NPF dummy batteries or Hirose connectors, but most modern recorders support external USB power natively.
Portable power banks have capacities ranging from 10,000-50,000mAh. These extreme sizes can power some field recorders for multiple days straight on a single charge!
For my handheld field recorders, I use rechargeables. I get 12 hours of recording time from 2,000mAh AAs.
For my dedicated recorders, I use 26,800mAh power banks.
Shotgun Microphone Details

The key behind a shotgun microphone’s directionality is the tube.
The microphone capsule sits at the bottom of a long, hollow tube with slotted holes on the sides. Sounds in front of the tube travel down to the capsule unimpeded. This direct path maximizes the gain of your desired subject.
Sounds to the side of the barrel can only reach the capsule by traveling through the slots in the tube. The same sound enters through multiple slots, which creates differences in phase inside the tube. When these phase differences meet each other, they cancel out.
This phase-canceling works especially well for frequencies above 2kHz, and is increasingly less effective for frequencies below 2kHz.
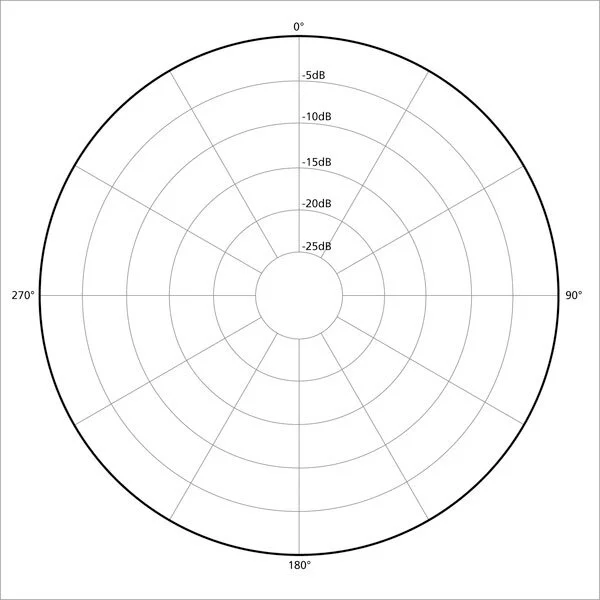
Off-Axis Rejection
Off-axis rejection measures the reduction of ambient noise levels at 60°, 120°, and 180° from the microphone capsule.
Off-axis rejection is an important shotgun mic specification. It measures the microphone’s effectiveness at reducing unwanted, off-axis sounds.
For this specification, the manufacturer measures the reduction (in dB) at 60°, 120° and 180° from the capsule. See the image below to get an idea of where these angles are in relation to the microphone.
How much reduction is good?
I recommend taking these three reduction values and calculating the average reduction to compare off-axis reduction between shotgun microphones.
After doing so, the following averages are ranked below from good to excellent.
Good: 30-39 dB.
Best used in environments with few distractions in the ambient environment.
Booming
Home video
Recording studio
Very Good: 40-49 dB.
Best for recording in environments with some unwanted sounds.
Interviews
Live reporting
Noisy ambient environments
Excellent: 50+ dB.
Best for eliminating distractions in loud or chaotic environments.
Birds and other wildlife
Crowded areas
Length
The length of a shotgun microphone will determine how portable it is, how focused the pickup pattern is, and how effective it is at canceling-out lower frequency sounds.
Depending on your application, overall microphone length can be critical. For example, if you need a shotgun microphone to sit on top of your camera via hot shoe connection, the microphone must be short enough to stay out of frame.
Additionally, travel restrictions and user preference may also determine the maximum size.
Short (<280mm):
Less directional than its longer counterparts, short shotgun mics are useful when length must be minimized. They have a wider “sweet-spot” and are forgiving towards slightly-off placement.
Medium (300-400mm):
Medium length shotgun mics work well in most situations offering a good balance between rejection, ease-of-use, and form factor.
Long (>400mm):
Long shotgun mics have the greatest off-axis rejection. However, they are more difficult to aim and to work with because of their length. Long shotguns require precise positioning that requires either a fixed mic or skilled boom operator to keep the subject in the narrow “sweet-spot.” Long shotgun mics are the best option for recording distant sounds or loud environments.
Parabolic Microphone Details
Parabolic microphones are great at capturing and isolating individual sounds from within a soundscape.
They are the premier choice of wildlife sound recordists, and especially so for birders.
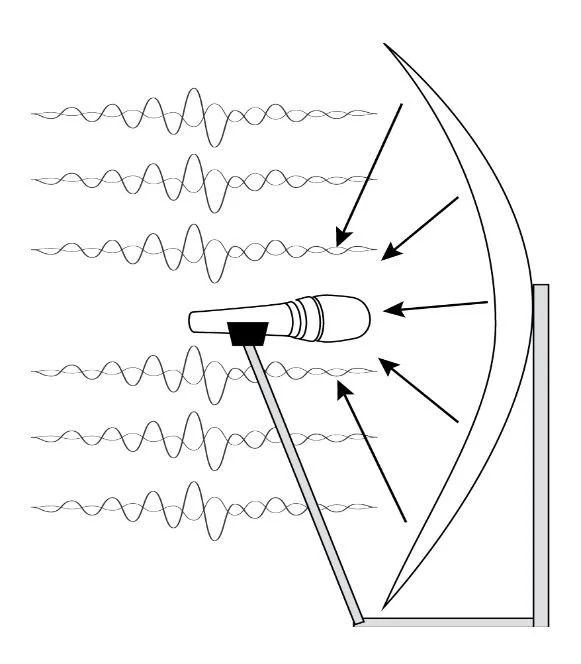
How Parabolic Microphones Work
Parabolic microphones harness the magic of a parabolic curve into a mirror-symmetrical dish that concentrates incoming sound waves to a single point.
Concentrating incoming sound waves in this way effectively increases the microphone’s surface area to the size of the dish and amplifies the signal.
This passive method of signal amplification does not add any noise to the signal and will perceptively lower the noise of the microphone.
Binaural Microphone Details
The relationship between our ears, head, and brain is fascinating. The three combine to produce instant feedback in response to sound. Within milliseconds of sound waves entering our ear, we already know its pitch, location, and where they came from.
This feat is possible thanks to the natural spacing of our ears, our heads, and interaural differences in time and intensity.
How It Works:
A sound that originates on our right side must travel further to reach our left ear. This additional distance causes each ear to hear the sound slightly differently. One ear will hear the sound first and it will be more intense (louder).
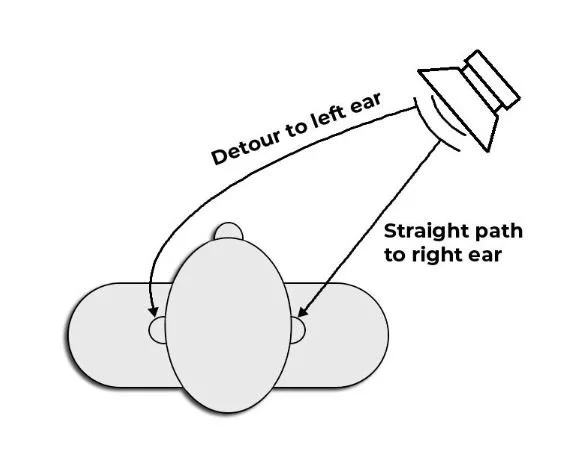
From subtle differences in the time received and volume of sounds, our brain calculates the location where the sound originated from.
These subtle differences in time received and intensity are called interaural time and level differences respectively.
The real magic occurs when our brain receives this information. Based on the difference in time and loudness, it tells us where the sound originated from! This directional information is called sound localization.
Binaural microphones attempt to replicate these differences between right and left channel audio by mimicking our ears.
How Binaural Microphones Create 3-D Sound
The most important aspect of adding realism to a binaural recording is in replicating the interaural time differences of our ears.
Binaural microphones accomplish this by spacing a stereo pair of microphones at 7”. This is the average distance between human ears.
Some binaural microphones even go a step further by embedding the microphones in anatomically correct ears and adding a solid object between the microphones to simulate a human head.
In-Ear Binaural Microphones
In-ear binaural microphones use your ear spacing and head size to capture binaural audio unique to how you hear the world.
These devices are essentially earbuds with microphones instead of speakers. By wearing the microphones in your ear, they will record accurate, binaural audio.
I really like this method. It greatly simplifies the process and still delivers on quality. It does have some drawbacks though.
Recording with these in your ears will partially block your hearing. If they create a good seal in your ear, you may not be able to hear your surroundings at all. This could impact the “naturalness” of recordings because you won’t be reacting to the sounds around you as you usually would.
Usually, sharp, unexpected, or curious sounds will draw our attention, causing us to turn our heads. If the in-ear microphones prevent you from hearing those sounds, this action will be missing.
Ambisonic Microphone Details
In order to capture ambisonic recordings, you’ll need the following:
An ambisonic microphone
A recorder with gain-linking for 4 input channels
A DAW capable of decoding B-format
When recording ambisonic audio, it’s important to sync gain settings for all 4 input channels. Field recorders that offer gain-linking for 4 input channels include the Zoom F6 & F8n and the Sound Devices MixPre-6 II & MixPre-10 II (with additional plugin).
Ambisonic recordings are most often used for 360° video, video games, and surround sound for theater and stage purposes.
Support Acoustic Nature
If you enjoyed this post and would like to help support Acoustic Nature, please consider "buying me a coffee" or becoming a Patreon with the buttons below.
As a thank you for your support, Patreon supporters receive a copy of Field Recording For Beginners, exclusive access to the full Behind The Sounds video series, nature sound library downloads, and more.
If you are unable to support the site financially, please share this post with others, or leave a comment below letting me know you enjoyed this post! Both are free and help the website grow. Thank you ♫
Thanks for reading,
-Jared