How To Record Nature Sounds: The Ultimate Guide
From gear, research, microphone placement, and stereo techniques, learn how to record nature sounds like a pro!
Recording nature sounds is a difficult job that requires the proper gear, plenty of research, and a plethora of patience.
Let’s take a deep dive into the works of nature sound recording…the gear, the techniques, and the essential skills, all necessary for success.
Let’s go!
How To Record Nature Sounds
Let’s start off with a brief overview of what it takes to record nature sounds.
Microphone - Used to transform sound into an electrical signal.
Windscreen - Used to protect microphones from wind noise.
Recorder - Used to digitally record audio for later processing.
Headphones - Used to monitor live audio from the field.
Location Selection - Finding a location with minimal noise pollution is paramount.
Wildlife Research - For species specific recordings, you must intimately know your subject.
Location Scouting - How to choose a location for your microphones.
Drop Rigs - Used for capturing natural sounds without having to be present.
Stereo Mic Configurations - Learn some tried-and-true stereo microphone arrangements or experiment with some of your own.
This article provides detailed information for each of these essential items.
After reading, you’ll be well-equipped to begin capturing nature sounds near you!
A Brief Word About Gear
Before we get into the details behind the gear associated with nature sound recording, it’s important to make one thing very clear:
High quality nature sounds do not require expensive equipment or fancy accessories.
While some microphones and recorders certainly are better than others, great recordings are possible with any budget.
On the same note, the best gear in the world will produce disappointing results without proper field skills, especially when recording nature sounds.
Microphone Selection
Before selecting a microphone for recording nature sounds, it’s important to understand what specifications are important, and what makes some microphones better than others.
The following items will be covered in further detail as you read on:
Microphone Self Noise
Microphone noise refers to the static sound that all microphones produce when powered. This noise sounds like hissing, and is similar to “white noise”.
Under most recording circumstances, microphone noise is not a problem because the subject you are recording is much louder than the background hiss and is not audible in the final mix.
However, when recording quiet sounds, like those of nature, the noise level of your gear becomes extremely important.
Microphone noise can be measured in many different ways.
Under a microphone’s specifications, you may see its noise value listed as:
self noise - measured in dBA
signal-to-noise ratio (SNR) - measured in dBA
equivalent input noise - measured in dBu
Below you’ll find a helpful chart with ratings for the various noise measurement techniques. For recording nature sounds, I recommend selecting a microphone with a “Very Good” rating or higher.
| Self Noise (dBA) | EIN (dBu) | SNR (dB) | Rating | Description |
|---|---|---|---|---|
| ≤ 12 |
-130 | ≥ 82 |
Ultra Quiet | Extremely low self noise. Undetectable even under the most critical recording conditions. |
| 16-13 | -126 | 78-81 | Very Good | Very slight noise discernable when recording the quietest signals. |
| 20-17 | -119 | 74-77 | Good | Good enough for most purposes. Noise noticeable in quieter recordings. |
| 24-21 | -110 | 70-73 | Fair | Noise obvious when recording anything below speaking level. |
| ≥ 24 |
-100 | ≤ 69 |
Poor | Not recommended unless you only record waterfalls, alarms and jets (very loud signals). |
Polar Patterns
Microphones come in many different pick up patterns.
Also called “polar patterns”, a microphone’s pick up pattern determines the directionality; in what direction(s) the microphone is sensitive to sound.
For recording nature sounds, omnidirectional and cardioid pick up patterns are the most common, so those are the two we’ll cover.
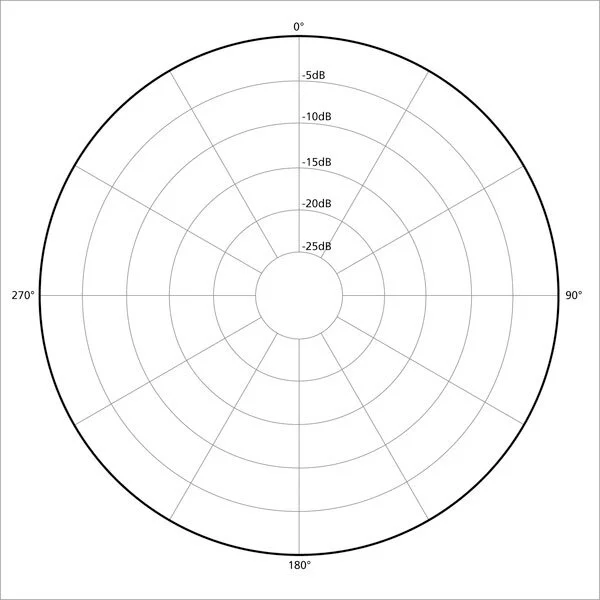
Omnidirectional:
Omnidirectional microphones, omni for short, are sensitive to sounds 360° around the capsule.
Sounds emanating to the front, rear, and sides of an omni mic will be recorded with equal signal strength (loudness).
Because omnidirectional microphones record all sounds with equal emphasis, the pick up pattern is also called “non-directional”.
Due to their enveloping pickup pattern, they are great for capturing entire environments of sound.
Omni microphones are often used to record ambiences and soundscapes. Use two of them to create a stereo image.
There are many stereo miking techniques using a pair of omni mics including, A/B stereo, jecklin disk, binaural, and Olson wing.
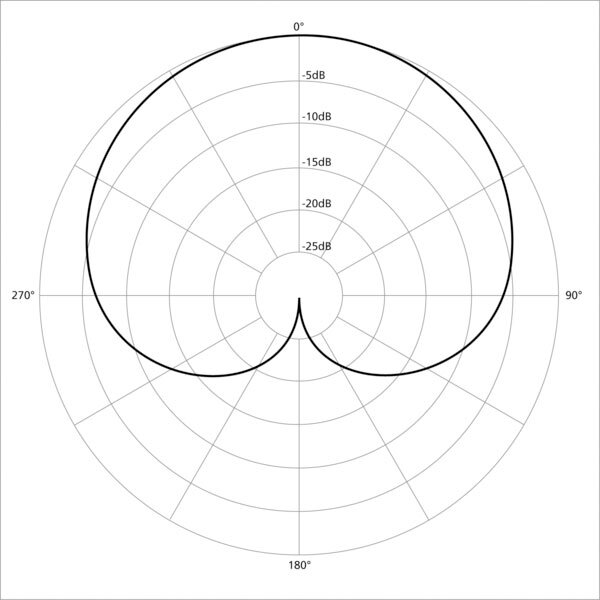
Cardioid:
Cardioid microphones are sensitive to sounds to the front and sides of the capsule. They reject sounds emanating behind the capsule.
The cardioid microphone gets its name from its heart-shaped pickup pattern. They are the most popular microphones for recording speech thanks to their ability of rejecting sound from the side and rear.
A cardioid mic’s pickup pattern is unidirectional, meaning it is only sensitive to sound from 1 direction.
Single cardioid mics are used for recording spot sound effects in situations where you can get the microphone very close to your subject.
More commonly, pairs of cardioid microphones are arranged in X/Y, and ORTF to record stereo ambiances.
Moisture Resistance
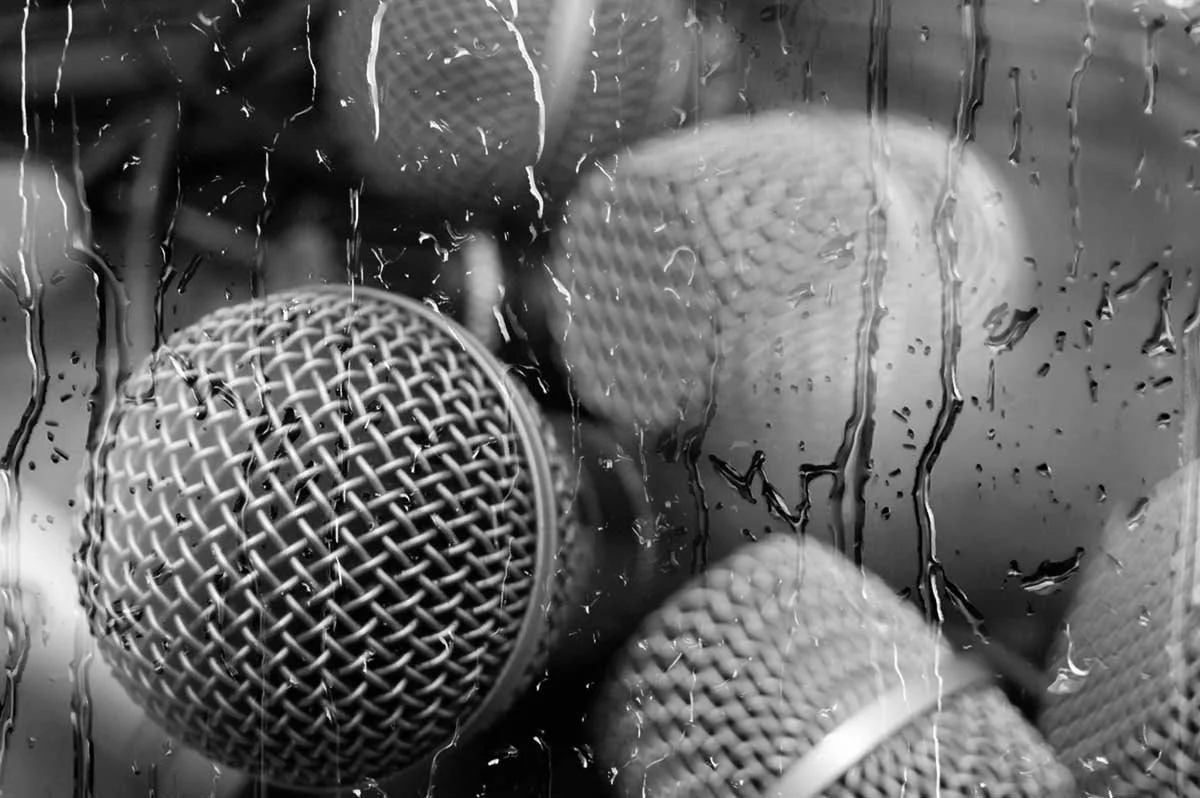
Moisture resistance is a premium microphone feature that is currently only offered by Sennheiser for omnidirectional and cardioid condenser microphones.
Though costing a pretty penny, the Sennheiser “MKH” series of microphones are well worth the cost if you plan to record in very humid environments, or leave your microphones in the field overnight.
In either case, high humidity and condensation from morning dew can cause non-moisture resistant microphones to pop, sputter, and burp due to their high impedance capsule design.
I’ve written an entire article on this subject that goes into much more detail, but the basics are as follows.
In most condenser microphones, the vibrating diaphragm generates a fluctuating charge that mimics that pattern of the incoming sound waves. This charge is passed through an electrical circuit and creates an electrical signal corresponding to the sound.
The problem is that this circuit has a very high impedance.
In humid conditions, it can be easier for this charge to escape through the water molecules in the air, rather than the circuit. This causes unwanted hissing, popping, and crackling sounds. It also reduces the output level and can change the microphone’s frequency response.
Invented in 1962 by Sennheiser, RF-biased condenser microphones have low impedance circuits.
They accomplish this low impedance by using a relative low capsule polarization voltage.
The reduction of the electrical impedance of the capsule makes RF condenser microphones well-suited for recording outdoors in high humidity.
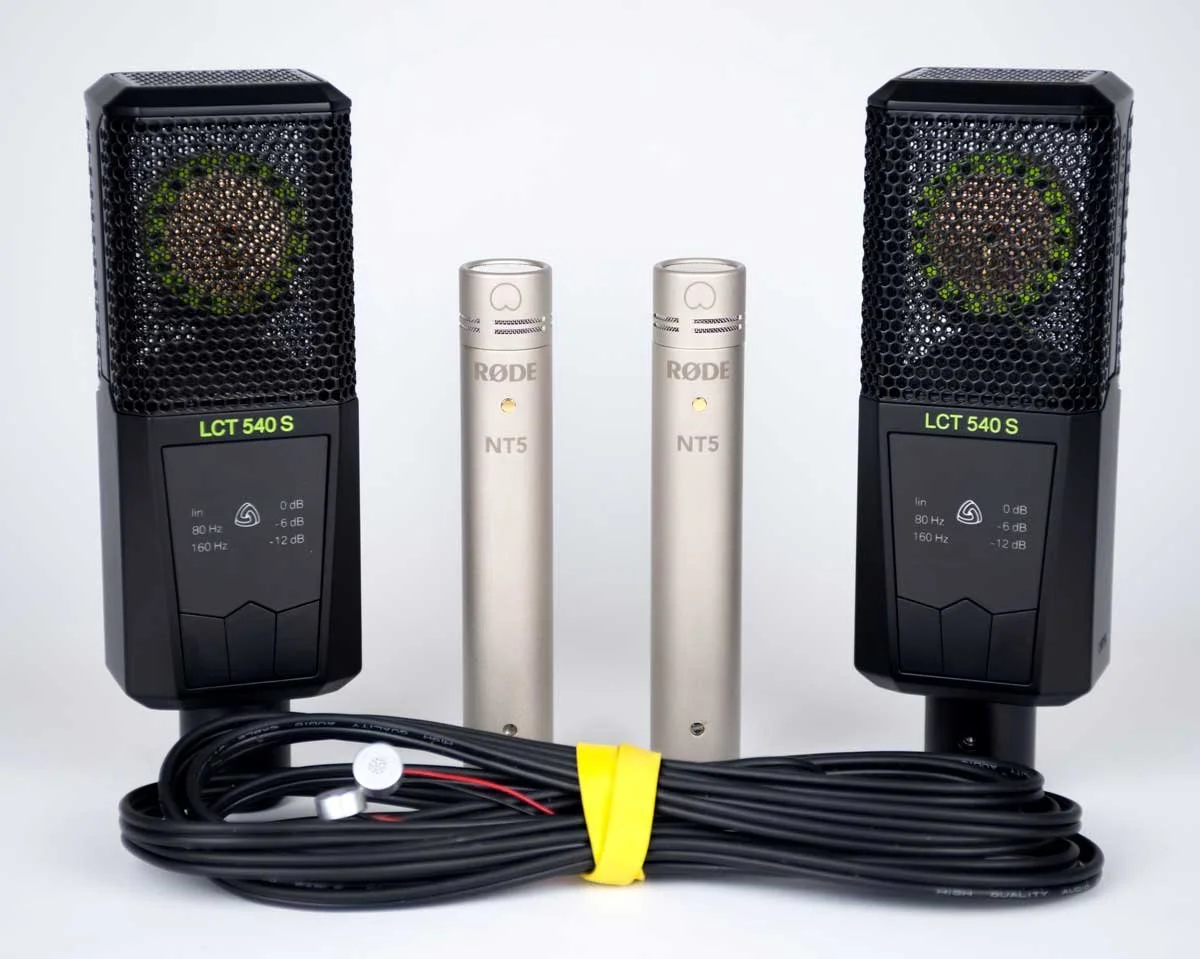
Matched Pairs
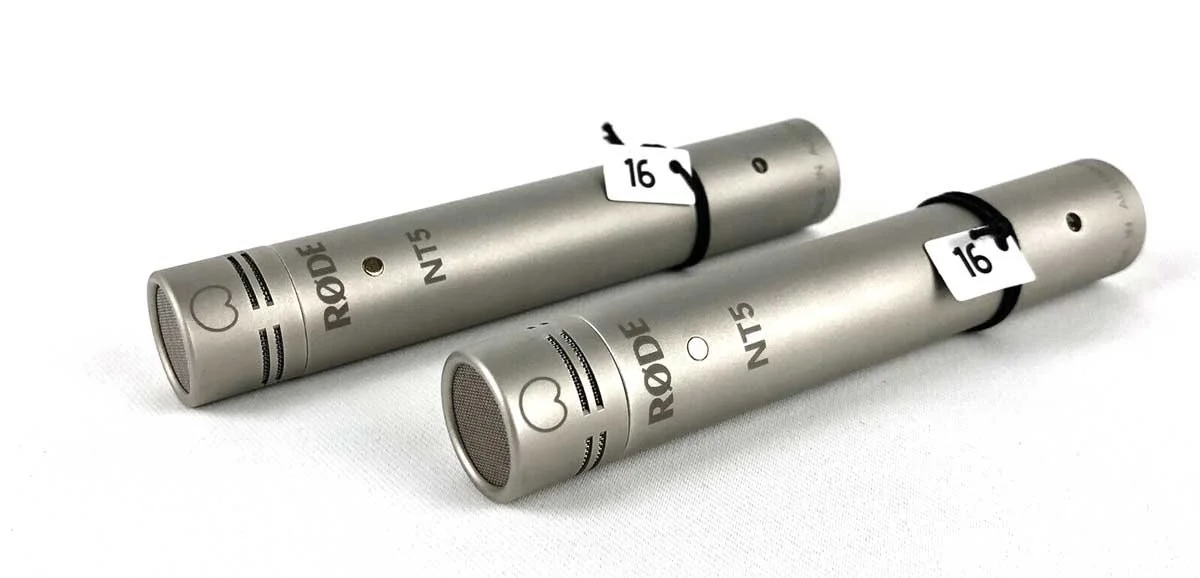
Microphones of the same make, model, and identical sensitivity measurements are called “matched pairs”.
They are most commonly used to record stereo ambiences accurately, with no bias.
Because they are perfectly equal in sensitivity, they are capable of capturing spacious, 3-dimensional audio that accurately recreates the soundscape when listening with a pair of headphones.
To more clearly illustrate this, imagine you are recording a natural environment without a matched pair. Let’s say the right channel microphone is more sensitive than the left microphone.
If the difference in sensitivity is great enough, a sound originating to the left of your stereo mic setup may actually sound louder in the right ear.
This is very confusing to our brains and is difficult to process.
Normally, our brains are able to tell where a sound originated from by analyzing the minute time differences between when the sound enters one ear versus the other, and how loud the sound is in each ear.
This information is processed faster than the blink of an eye, and is how you instantly know where a sound came from.
When listening to a stereo recording made with unmatched pairs, this data is biased and just sounds wrong.
Recommended Microphones
To view my microphone recommendations, please click here, or use the button below.
You’ll be taken directly to my most up-to-date recommendations, with details, specifications, and my opinion for each recommendation.
If you choose to purchase, please do so through my links. At no extra cost to you, I’ll receive a small commission payment ☺
Recommended
Microphones
Windscreen Selection
Did you know that just a 2mph breeze can ruin a recording?
That’s because microphones are ultra-sensitive to vibrations.
So sensitive in fact, they can detect the tiny vibrations of air particles caused by a whisper.
Now imagine how destructively loud a gust of wind hitting an unprotected microphone must be…a loud, distorted mess.
Since nature sounds exist outside, where wind is almost ever-present, windscreens are mandatory.
Windscreen Types
Just as there are many different kinds of microphones, there are an equal amount of wind protection solutions available.
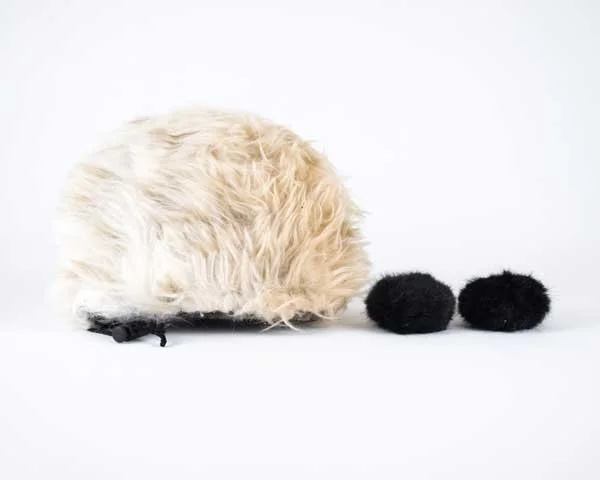
In general, windscreens are broken down into 3 categories:
Foam - Offers the least protection from wind. Usually a free accessory included with the purchase of most microphones.
Furry - Sleeve of fake fur and open-cell foam that slips directly over your microphone. The layer of hair blocks wind and creates a zone of still air around your microphone to help mitigate wind noise.
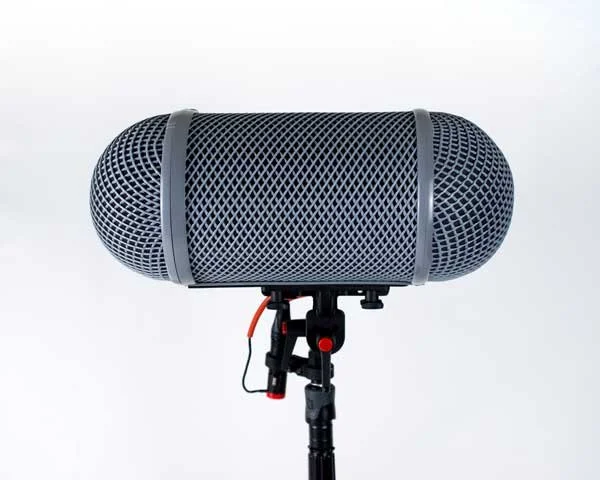
Blimp - Creates an area of still air around the entire microphone, rather than just around the diaphragm. This larger pocket of “dead” air is better able to protect against wind noise.
Windscreen Recommendations
Since foam windscreens are usually included with your microphone purchase (and are almost useless alone for nature recording), I’ve listed links to my windscreen recommendations below for furry and blimp models only.
If you choose to purchase, please do so through my links. At no extra cost to you, I’ll receive a small commission payment ☺
Recommended
Furry Models
Click below for my recommended furry windscreens ↓
Recommended
Blimps
Click below for my recommended blimp windscreens ↓
Recorder Selection
As I mentioned earlier, great nature recordings are possible with any gear, and that holds true for field recorders.
However, before choosing a recorder, you should understand the following items so you can make the best choice for your needs and interests:
Recorder Types
Generally speaking, there are 2 types of field recorders:
Handheld - All-in-one systems with built-in microphones.
Dedicated - Strictly for recording. Require external microphones.
Below you’ll find general details for each type, but please keep in mind that there are always exceptions to any rule.
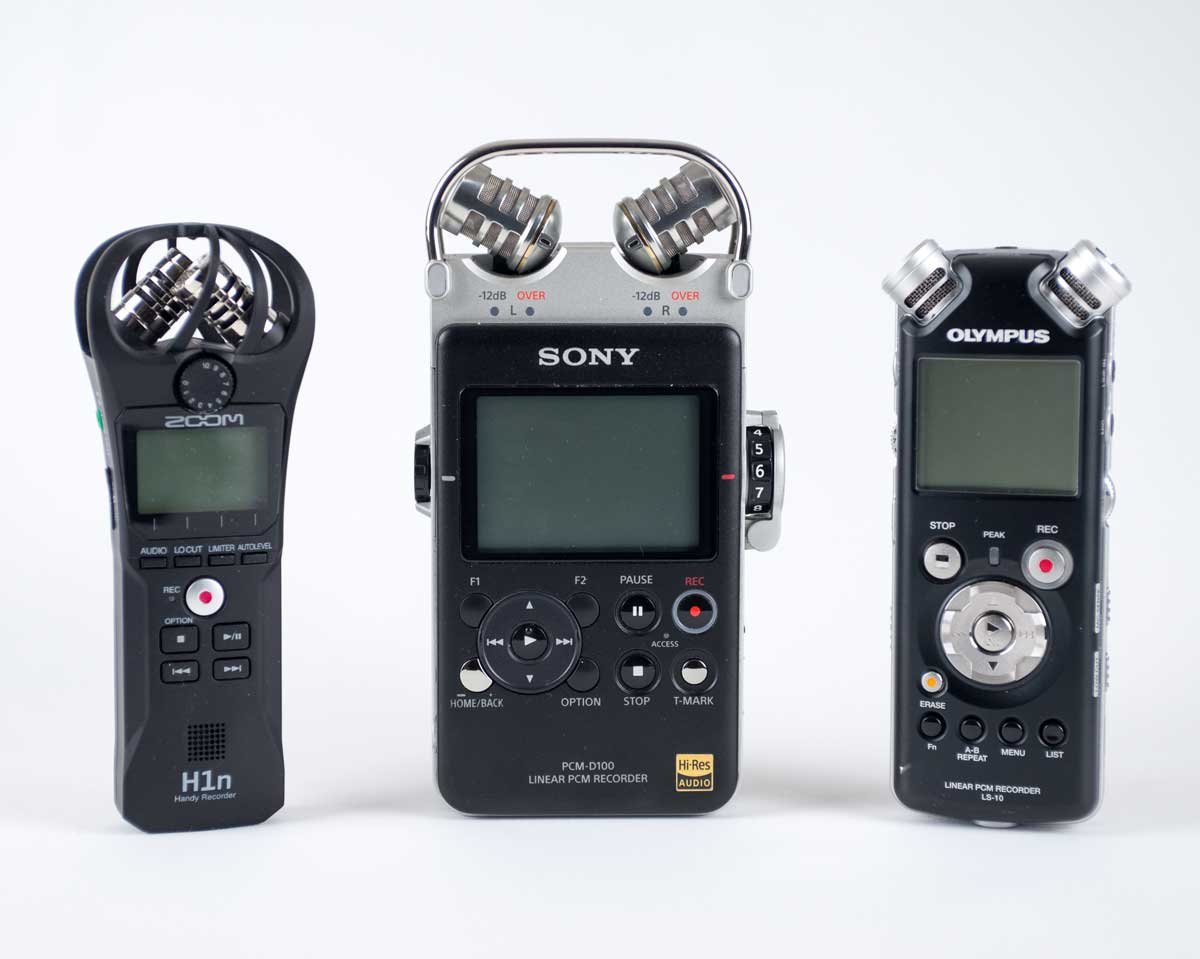
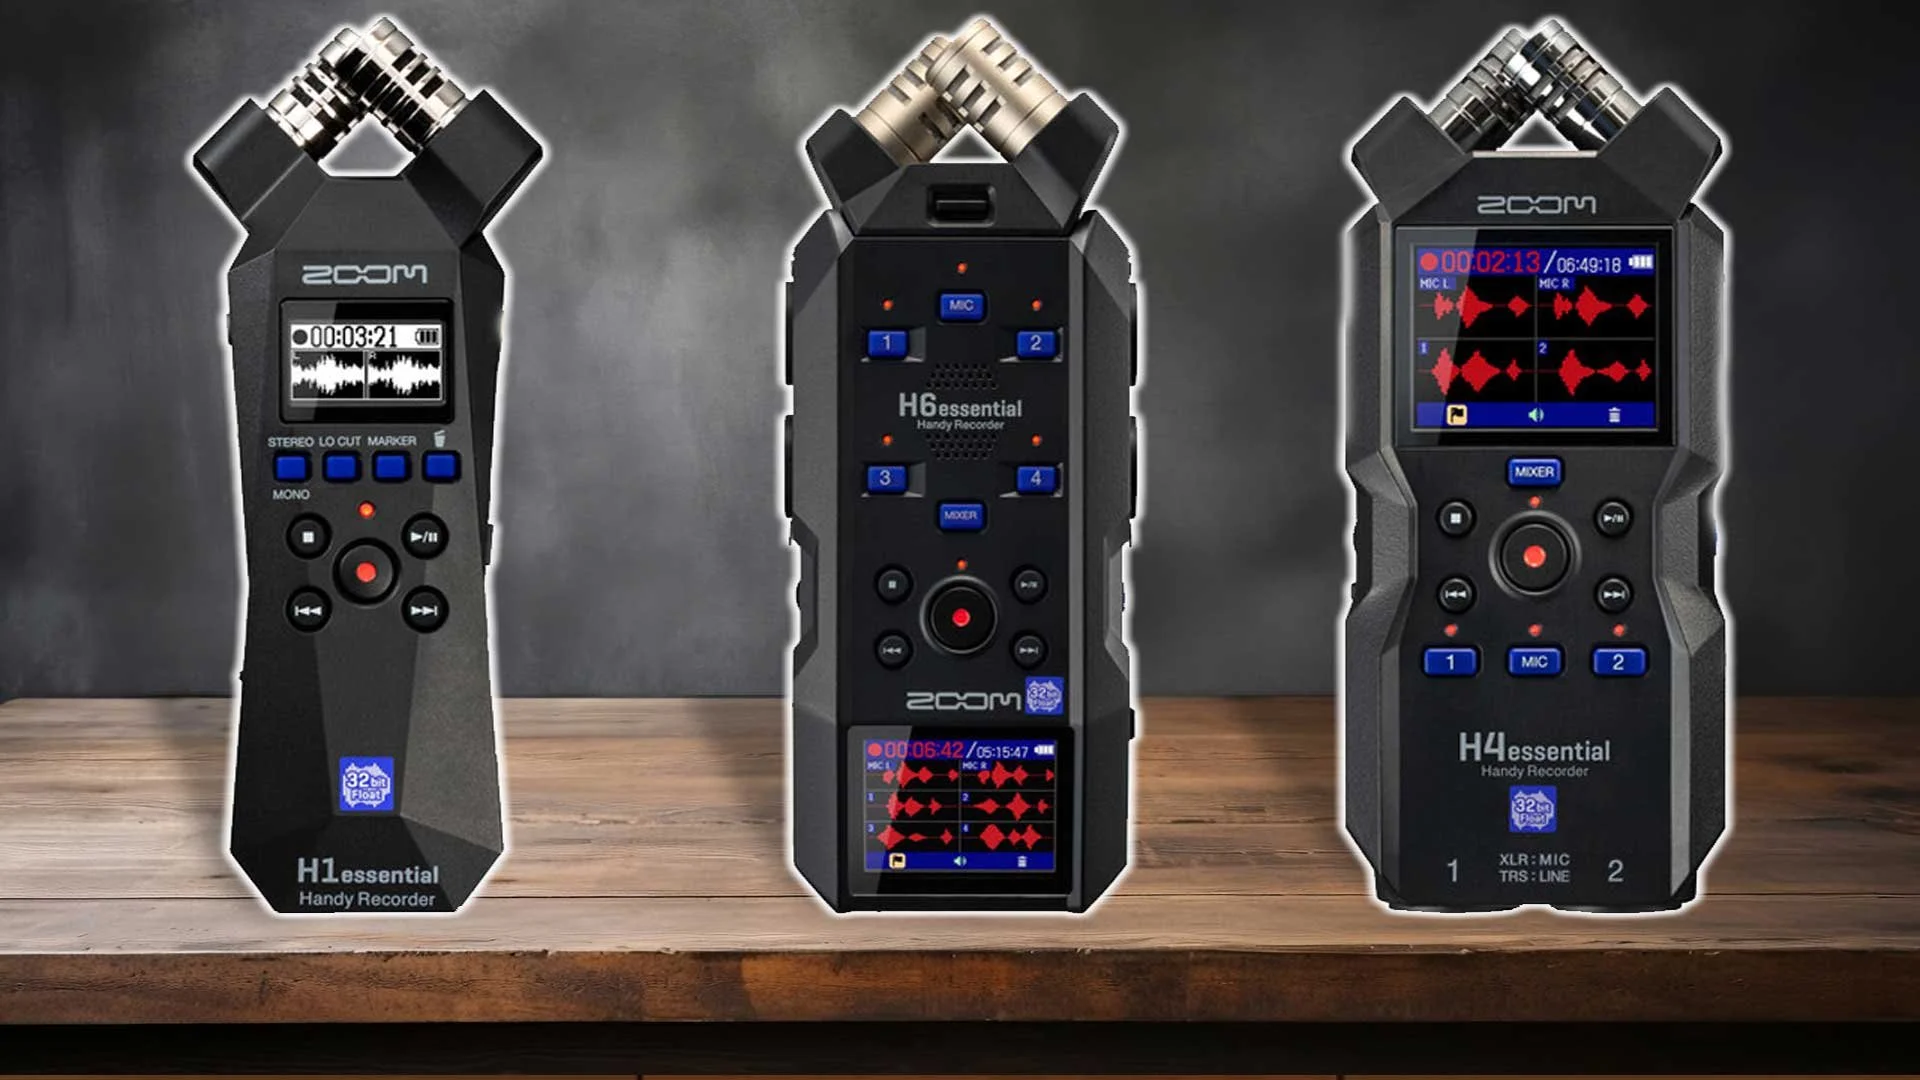
Handheld Field Recorders:
Handheld field recorders are all-in-one recording devices that are small enough to fit comfortably in your hand. They have built-in microphones and are capable of recording sounds straight out of the box.
Because they need few accessories and are simple to operate, they are popular field recorders for beginners.
Although they generally don’t offer the sound quality of dedicated field recorders, there are ways around this and it is possible to get amazing recordings with handhelds.
Pro:
Small size
Require few accessories
Simple to operate
Con:
Limited features
Lower sound quality
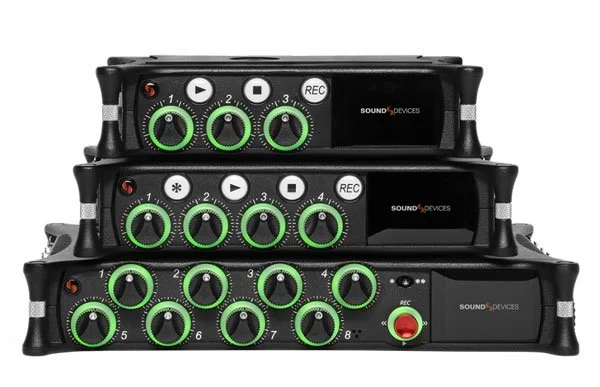
Dedicated Field Recorders:
Dedicated field recorders are strictly for recording audio and require the additional purchase of external microphones in order to work.
They’re typically much larger than handheld recorders but offer many powerful features and settings that could make your workflow much easier.
Dedicated field recorders are made for professionals and are the premier choice for recording nature sounds.
Pro:
Advanced settings
Awesome sound quality
Rugged construction
Con:
Bulky
Heavy
Require accessories
Recorder Self Noise
Similar to the previous “Microphone Self Noise” section, recorders also produce noise when in use.
However, instead of coming from microphones, recorder self noise is generated by the microphone preamplifiers.
In any case, the same noise guidelines hold true, and I recommend choosing a recorder with a self noise rating of “very good” or higher for nature sounds.
You should be able to find the self noise measurement of any recorder under its specifications.
| Self Noise (dBA) | EIN (dBu) | SNR (dB) | Rating | Description |
|---|---|---|---|---|
| ≤ 12 |
-130 | ≥ 82 |
Ultra Quiet | Extremely low self noise. Undetectable even under the most critical recording conditions. |
| 16-13 | -126 | 78-81 | Very Good | Very slight noise discernable when recording the quietest signals. |
| 20-17 | -119 | 74-77 | Good | Good enough for most purposes. Noise noticeable in quieter recordings. |
| 24-21 | -110 | 70-73 | Fair | Noise obvious when recording anything below speaking level. |
| ≥ 24 |
-100 | ≤ 69 |
Poor | Not recommended unless you only record waterfalls, alarms and jets (very loud signals). |
Recorder Size & Weight
Since recording nature sounds often requires travel by foot on hiking trails for several miles, recorder size and weight are important factors to consider before purchasing.
If you plan on a multiday backpacking and recording trip, size and weight are even more important, as your bag will have to carry your recording and camping gear, plus food.
This is less of a problem today, with manufacturers releasing smaller, more compact, and lightweight products all the time, but should still be considered.
For example, if you have the following recording gear: dedicated recorder, 2 condenser microphones, XLR cables, portable power banks, tripod, blimp, and headphones, the distance you can comfortably travel and the number of nights you can spend in the wilderness will likely be limited.
For this reason, I recommend having two recording kits; one for day trips, and another for overnight adventures.
Plug-In Power
Plug-in power (PiP) is a feature offered on most field recorders.
PiP allows you to use an external microphone with a 3.5mm connector.
With PiP turned on, the recorder will send about 3V to the microphone and power it.
PiP is a great way to save on accessories, while maximizing sound quality at the same time.
The most popular PiP microphones for nature sounds are Primo EM272 capsules. They’re relatively cheap, have extremely low self noise, and are easy to wire together to create your own microphone (see this tutorial on how to build a SASS microphone from them).
Phantom Power
External condenser microphones require much more power to operate than plug-in-powered mics.
The standard voltage required by external condenser microphones is 48V.
DC electric power transmitted through microphone cables is called “phantom power”.
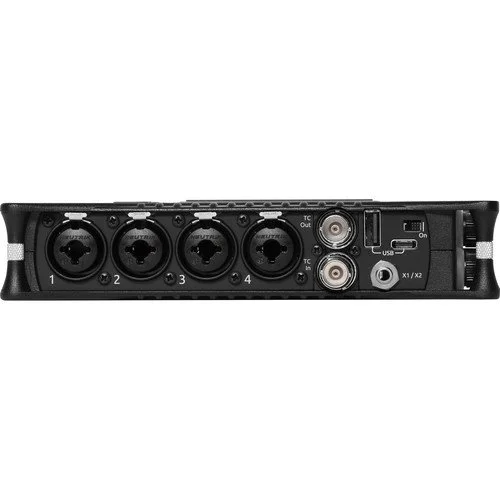
Field recorders that supply phantom power do so through XLR connectors, built into their design.
Most professional microphones used for field recording require phantom power and a recorder that can supply it.
Field recorders that support phantom powered microphones include:
Zoom H5/H6/H8/F3/F6
Tascam DR-100
Sony D10
Sound Devices MixPre Series
Number of Inputs
If you plan to use XLR condenser microphones, you’ll need a recorder with enough microphone inputs for your purposes.
Depending on what format you wish to record in, the number of required input channels varies.
Below you’ll find a table listing popular recording configurations and the number of input channels required for each.
| Configuration | Preamps |
|---|---|
| Mono | 1 |
| Stereo | 2 |
| Mid-Side | 2 |
| Double Mid-Side | 3 |
| Quad | 4 |
| Ambisonic | 4 or more |
Recommended Recorders
Below you’ll find links to my most up-to-date field recorder recommendations for handheld and dedicated field recorders.
If you choose to purchase, please do so through my links. At no extra cost to you, I’ll receive a small commission payment ☺
Recommended
Handhelds
Click below for my handheld field recorder recommendations ↓
Recommended
Dedicated
Click below for my dedicated field recorder recommendations ↓
Headphone Selection
Although not required for recording, without headphones you’ll be recording blind in the field. Being able to hear what you're recording while you’re recording is an invaluable resource.
Listening to your audio while recording is called “monitoring” and has many benefits:
Confirm that your gear is working correctly
Fine-tune your microphone placement
Intimately connect with your sounds
Monitoring your audio with headphones will give you peace of mind in knowing that your gear is working as it should. There is nothing worse than coming home from the field and discovering that your recording failed for some reason.
The following list contains possible reasons for failure that you can avoid or fix simply by monitoring:
Distorted audio caused by peaking
Radio frequency interference
Dead batteries
Damaged cables
Recommended Headphones
Below you’ll find links to my most up-to-date headphone recommendations for field recording.
If you choose to purchase, please do so through my links. At no extra cost to you, I’ll receive a small commission payment ☺

Recommended
Headphones
Click below for my field recording headphone recommendations ↓
Location Selection
Noise pollution is the biggest obstacle for nature field recordists.
By thoroughly researching potential locations before hitting the trail, noise pollution can largely be avoided by following the tips in this section.
If you are interested in capturing the sounds of a specific species, noise pollution is still important to avoid (if possible), and the wildlife research section of this article will be of particular interest to you.
Ask Yourself These Questions
Before you can start recording, you need to select a recording location.
This step is vital to the success of your field recording trip and cannot be overlooked.
The following are questions I seek answers for during my research:
How large is the natural area? - the bigger the better. Larger preserved natural areas provide natural noise suppression against the sounds of civilization
How far away is the nearest primary road? - vehicle traffic is one of the most intrusive forms of noise pollution. Try selecting a location that is at least 5 miles away from any primary route (yellow roads on Google Maps).
Are there any nearby airports or major flight routes overhead? - aircraft noise is almost impossible to escape. However, you can limit its effect on your recording by selecting locations 50 miles away from any airports and away from any major flight routes. FlightRadar24 is an awesome (and free) tool for this job.
What access trails are available? - although bushwhacking through wilderness can lead you to some great recording locations, it is not always desirable, or advisable, with a heavy pack and expensive recording gear. Research the area with AllTrails to find what trails are available and which ones are less popular (less people = less noise).
How much light pollution is present? - light pollution maps are a good indication of the level of urbanization surrounding a natural area. Generally speaking, the darker the sky, the less people are nearby, resulting in a quieter soundscape.
Related Post:
Wildlife Research
Image courtesy of Thomas Caldwell (CC BY-ND 2.0)
If you’re after the sounds of a specific wildlife species, additional research is required for the best results.
No matter the species, you should know the following information:
What habitat(s) are preferred by your selected species?
What time(s) of day does your species make vocalizations?
What time(s) of year does your species make vocalizations?
Does your species seek out a specific structure to call from?
What signs does your species leave behind? (scat, tracks, trails)
What does your species eat?
This information is readily available for most species with just a few Google searches.
Answering these questions in your research will not only help you select the best location for maximizing your chances of finding your selected species, they will also help you locate “hot spots” where your species has been or likely will be.
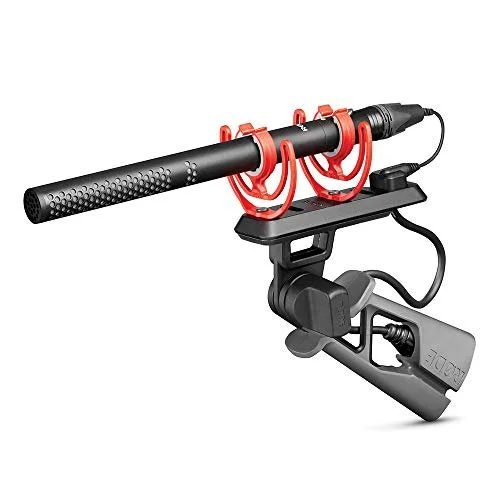
Microphones for Recording Wildlife
Although cardioid and omnidirectional microphones are great for capturing wide natural ambiences, they are not the best tools for the job of recording individual species.
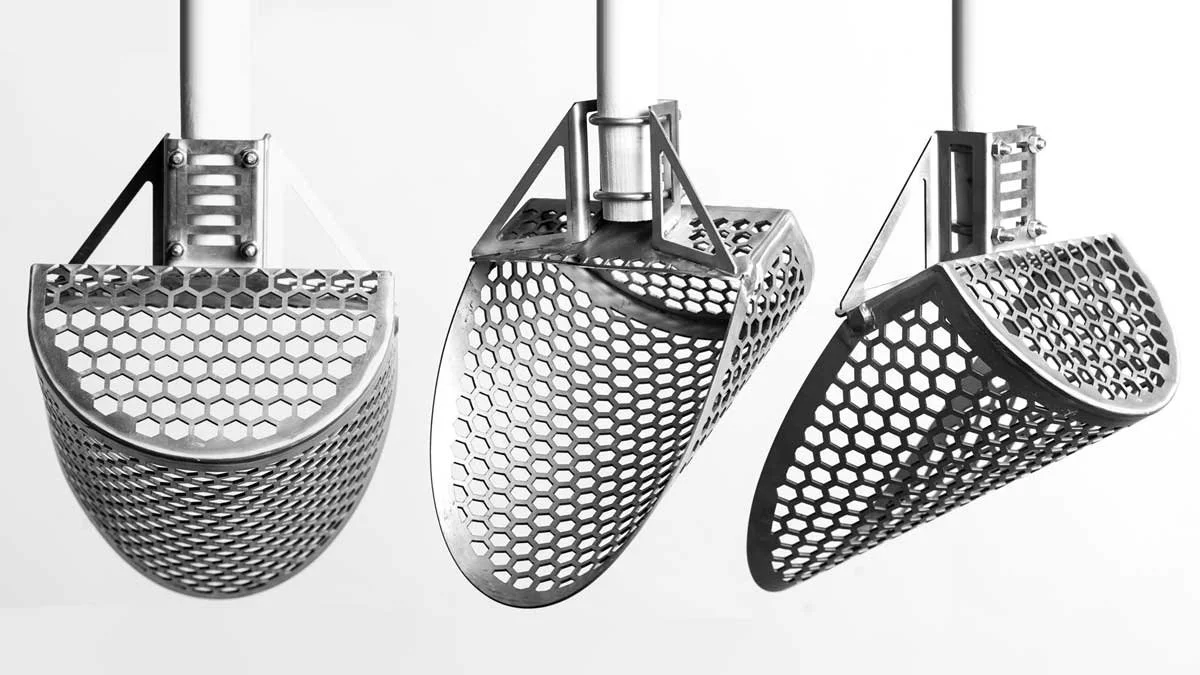
The best microphones for this purpose are:
Shotgun microphones - work best at short distances
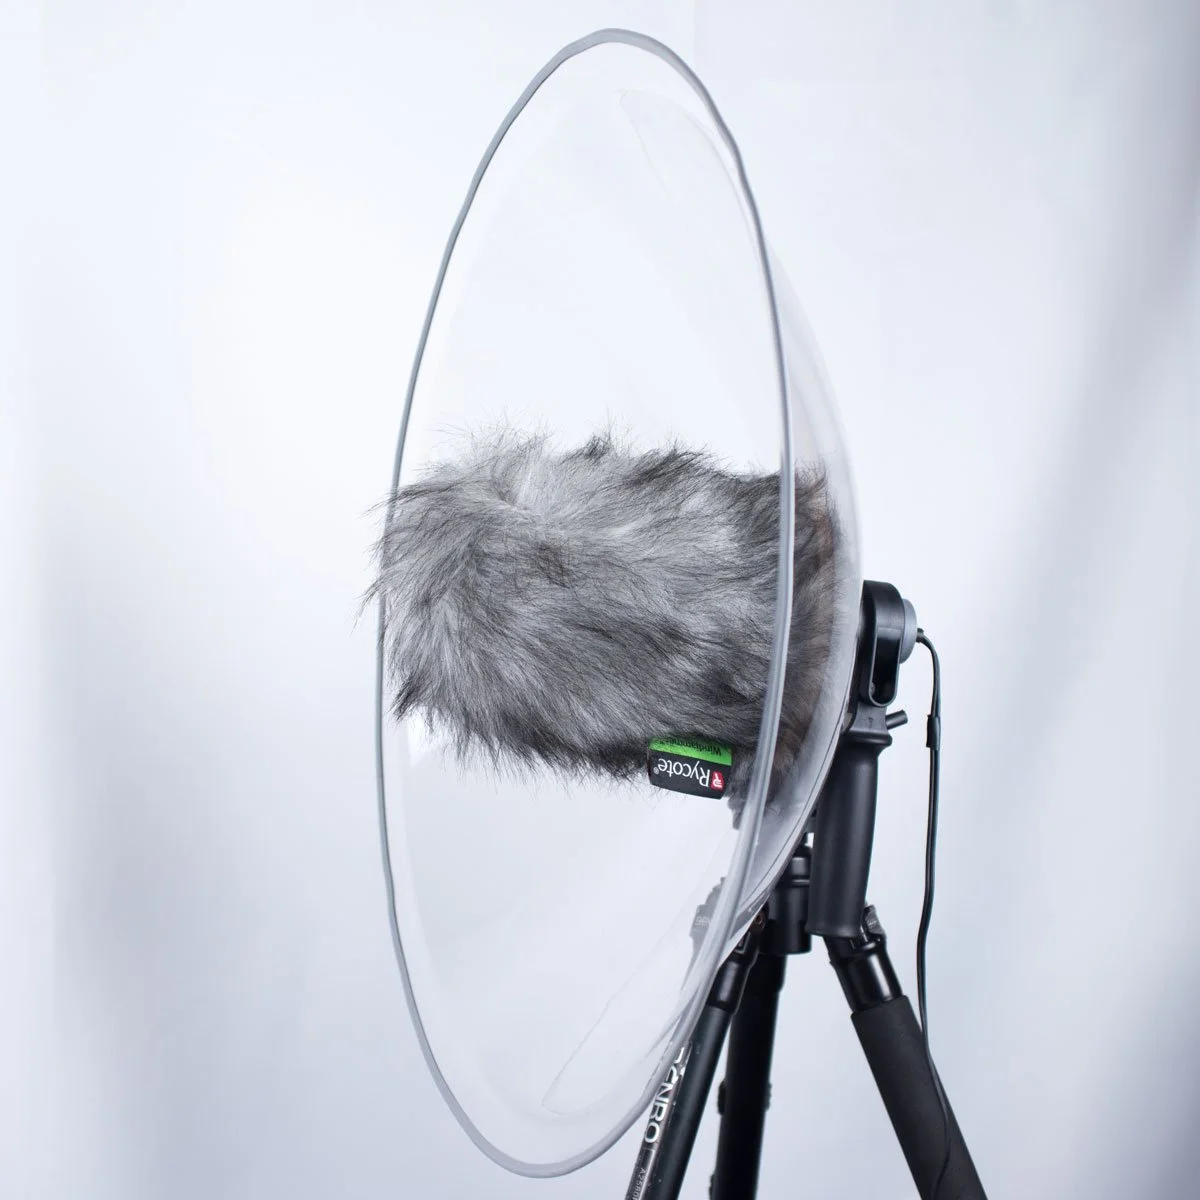
Parabolic microphones - work best at short and long distances
Shotgun and parabolic mics are great for recording individual species because they reject sound from the sides, rear, and back of the microphone capsule.
These highly directional microphones allow you to highlight and isolate the calls of your desired species from the background soundscape.
If money is not an option, parabolic microphones are the absolute best tool for recording individual species.
They can effectively be used at great distances (minimizing the chance that you’ll scare your subject off), and have superior rejection (enhanced details and isolation).
Check out my shotgun and parabolic microphone recommendations below.
Wildlife Microphone Recommendations
Below you’ll find links to my most up-to-date parabolic and shotgun microphone recommendations.
If you choose to purchase, please do so through my links. At no extra cost to you, I’ll receive a small commission payment ☺
Recommended
Parabolic Mic
Click below for my parabolic microphone recommendation ↓
Recommended
Shotgun Mics
Click below for my shotgun microphone recommendations ↓
Location Scouting
Once you’ve arrived at your researched location, it’s time to explore the landscape, keeping an eye out for potential recording locations.
If possible, I like to spend an entire day getting to know the land before making any recordings. I spend the day hiking and sitting in silence while observing with my eyes and ears.
Things I look for include:
Snags - snags are dead trees still standing upright. They are preferred locations for birds to sing from (song posts), raptors to hunt from, and for birds and mammals to raise their young.
Ecosystem edges - biodiversity is greatest where two or more unique ecosystems meet. The border between the two is called an “edge”. These are great locations to record unique soundscape compositions.
Scat/tracks/game trails - by observing where animal tracks and game trails are, you learn what areas have the greatest wildlife traffic. Close wildlife encounters are one of my favorite kinds of nature sounds.
Interesting sounds - you never know what you’ll find while out in the field. Keep an ear out for any sounds that pique your interest. If the moment is fleeting, set up quickly and begin recording. I like to keep a Sony D100 in my pocket for this purpose. If possible, spend some time observing the moment and think about where the optimal place for recording is. Can you get closer to your subject? What would you like to include in the soundscape? How wide do you want the stereo image to be?
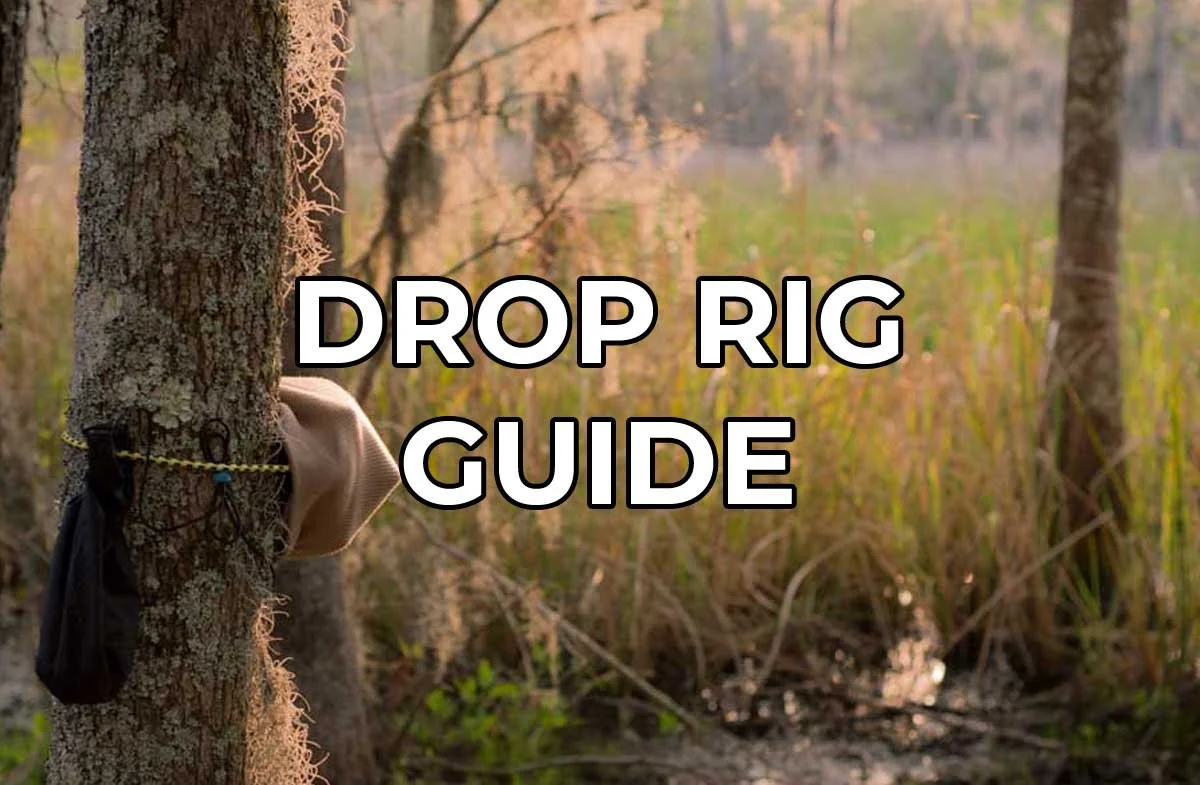
Drop Rig Recordings
Example drop rig with spanish moss covering for rain protection.
Drop rig recordings are ones made in the field without the field recordist present.
The gear is set up and left behind to capture whatever sounds may occur while the recording is rolling.
Drop rigs are a great way to capture natural soundscapes.
In this case, natural doesn’t mean nature, but rather the “normal” sounds of a place, uninfluenced by the presence of a field recordist.
When a field recordist is present, people and animals will react to their presence and may not act naturally.
Drop rigs are also perfect for recording very long takes that would be extremely difficult otherwise.
For example, I often use drop rigs to record nature sounds for 12 hours straight. It would be almost impossible to remain present for this period of time while remaining perfectly quiet and still to prevent my sounds from polluting the recording.
Drop Rig Essentials
If you’re already a field recordist, you’ll probably have most of the gear necessary for making a drop rig recording already. Here’s what you’ll need:
Recorder: something to record with.
External Microphones: even if you’re not expecting rain, morning dew can ruin your recorder. External microphones are more resilient and easier to protect from the elements.
Tripod: since you won’t be in the field to hold your gear, you’ll need something to support your equipment.
Waterproof Bag: used to protect your recorder from the elements.
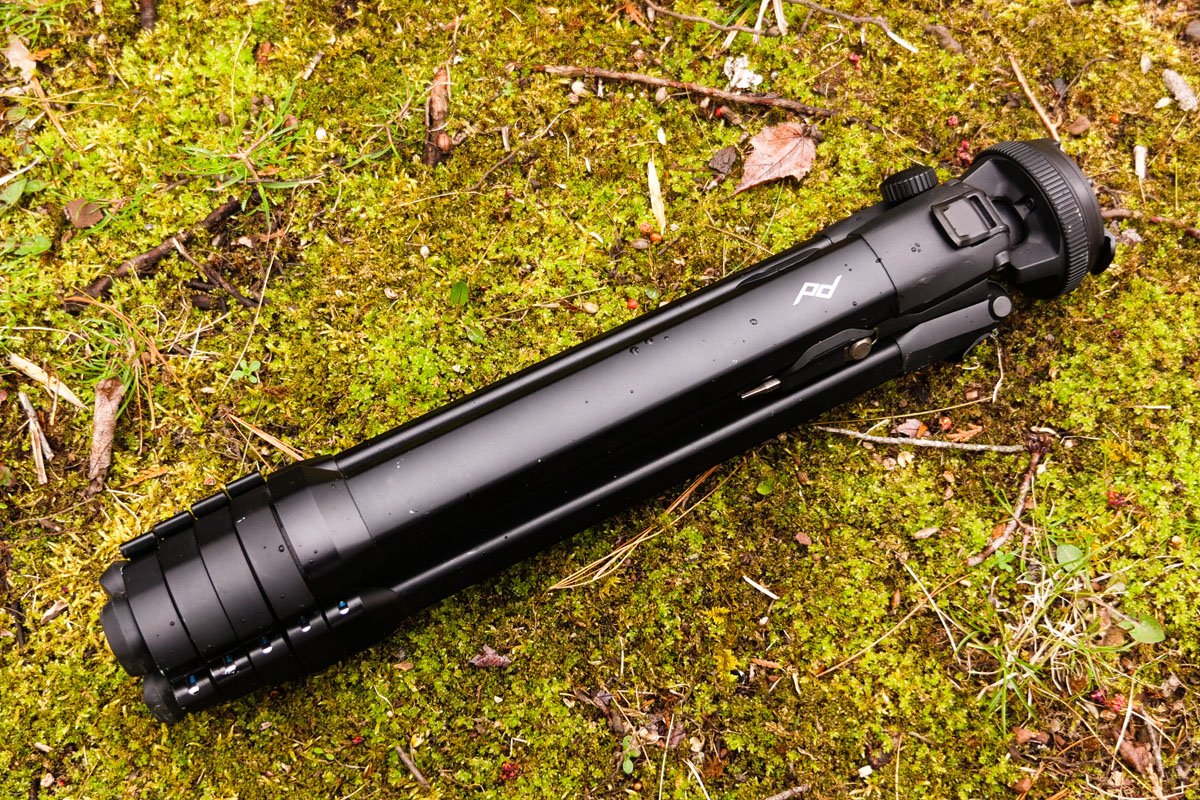
Drop Rig Best Practices
Example of a well camouflaged drop rig.
Since drop rigs are left unattended in the field, I recommend following these practices to limit the chance of theft and keep yourself out of any legal trouble.
Do not listen to recorded conversations.
Delete all recorded conversations.
Never release recorded conversations to the public.
Post signs stating that a sound recording is taking place.
Do not use any equipment you can’t afford to lose.
Camouflage your drop rig to minimize theft and disturbance to wildlife.
If you go off trail, take care to avoid stepping on any plants. If you frequent the location, take different paths to your drop rig location to minimize your impact on the land.
More Information about Drop Rigs:
Stereo Miking Techniques
Using different microphone arrangements, the stereo image of your recording will be dramatically different.
I recommend experimenting with a few “tried-and-true” methods and using whatever sounds best to you. Don’t be afraid to experiment either! That’s how all of these techniques were invented in the first place.
A-B Stereo
Among the simplest stereo microphone configurations to set up, A-B uses a matched pair of front-facing omnidirectional or cardioid microphones spaced 2-10 feet apart.
A-B stereo is good for capturing spacious sounding ambiences of varying stereo width.
The spacing between microphones creates time and intensity differences between capsules, which recreates a 3-dimensional soundscape when listening back with headphones.
The wider the spacing, the more dramatic these differences will be, and the “wider” the recording will sound.
For A-B stereo you’ll need:
stereo bar or x2 tripods/mic stands
method for measuring distance to produce repeatable results
X-Y Stereo
X-Y stereo is another easy-to-set-up technique, but it is not commonly used for recording natural ambiences due to its lack of stereo width.
X-Y stereo excels at capturing crisp details at close miking distances and is a great technique for recording spot sfx.
X-Y stereo recordings use a matched pair of cardioid microphones angled at 90° with their capsules overlapping, one above the other.
To slightly raise one microphone up so the capsules don’t hit each other when crossed, a stereo riser is used and is a common accessory included with most stereo bars.
For X-Y stereo you’ll need:
matched pair of cardioid microphones
stereo riser
ORTF Stereo
ORTF stereo attempts to replicate the natural spacing and arrival time differentials of our own ears, but without the hassle of constructing a dummy head.
ORFT accomplished this by spacing a matched pair of cardioid microphones about 7” apart and at an angle of 110°.
In my opinion, ORTF is good for close miking with a wider stereo image than X-Y.
When used for wide ambient spaces, like nature soundscapes, I find the center rather empty…almost hollow sounding.
For ORTF stereo you’ll need:
matched pair of cardioid microphones
measurement tools for precise spacing and angle
Binaural Stereo
Binaural stereo is the closest thing to how our ears actually perceive the world.
With a dummy head outfitted with realistic, silicone ears with microphones embedded in the ear canals, recordings made with binaural head microphones sound extremely realistic and are a true three-dimensional listening experience.
Perhaps motivated by the astronomical price of dummy head microphones (nearly $10,000), the SASS binaural array was created.
SASS microphones also recreate the acoustics of our ears and heads, sound great, and are relatively easy to make.
Mid-Side Stereo
Mid-side is an extremely flexible stereo technique when it comes time for post production.
Using a front-facing cardioid microphone above a figure-8 mic, mid-side recordings capture soundscapes with infinitely adjustable stereo width.
Another benefit of mid-side is that, although capturing 3 directions of sound, only requires 2 microphone inputs.
This is possible because the “side” channel captured by the figure-8 mic records both left and right audio at the same time. To separate them, duplicate the track, pan them hard left and right, and reverse the polarity of the right channel.
To adjust stereo width, simply increase or decrease the volume of the side channels.
For mid-side stereo you’ll need:
Support Acoustic Nature
If you enjoyed this post and would like to help support Acoustic Nature, please consider "buying me a coffee" or becoming a Patreon with the buttons below.
As a thank you for your support, Patreon supporters receive a copy of Field Recording For Beginners, exclusive access to the full Behind The Sounds video series, nature sound library downloads, and more.
If you are unable to support the site financially, please share this post with others, or leave a comment below letting me know you enjoyed this post! Both are free and help the website grow. Thank you ♫
Thanks for reading,
-Jared


When I first started recording nature sounds, it was very difficult to find quiet. Time after time, I went out and came home empty handed. Almost all of my audio was polluted with noise. Cars, trucks, people, planes…