How to Record Better Water Sound Effects (With Video)
In this field recording experiment, I test 3 different distances to find the best one!
Hey everyone! Recently, I learned a new technique for recording water sounds and I want to share it with you. This technique will help you get more detailed and more interesting recordings of water. Watch the video above or continue reading to learn how to record the best water sound effects.
The Technique
I have found that the closer you get to water, the better recordings you will capture. Now this sounds pretty obvious but every inch counts! Push yourself to get close, and then closer to your subject and you will not be disappointed.
Prior to learning this, I would set my tripod up about 1 foot away from a bubbling stream and be quite satisfied with the results. Last week, while hiking a remote creek, I did exactly that.
For some reason, when I was done recording, I removed my field recorder from the tripod and held it directly in front of the bubbling part of the stream. I was amazed with the result! I couldn’t believe how much difference that last foot made.
When you are this close to your subject, a small change in angle can dramatically affect the sound. To achieve the best balance, use headphones that block out the ambient water sounds so you can really dial in the best microphone angle. If you’re in the market for new headphones, check out my buyer’s guide here.
At this distance, you are so close to the water you can feel it. I love the difference between left and right ear audio, as it really helps to paint the picture of the stream. Water recordings like this are among my favorite sounds to meditate to.

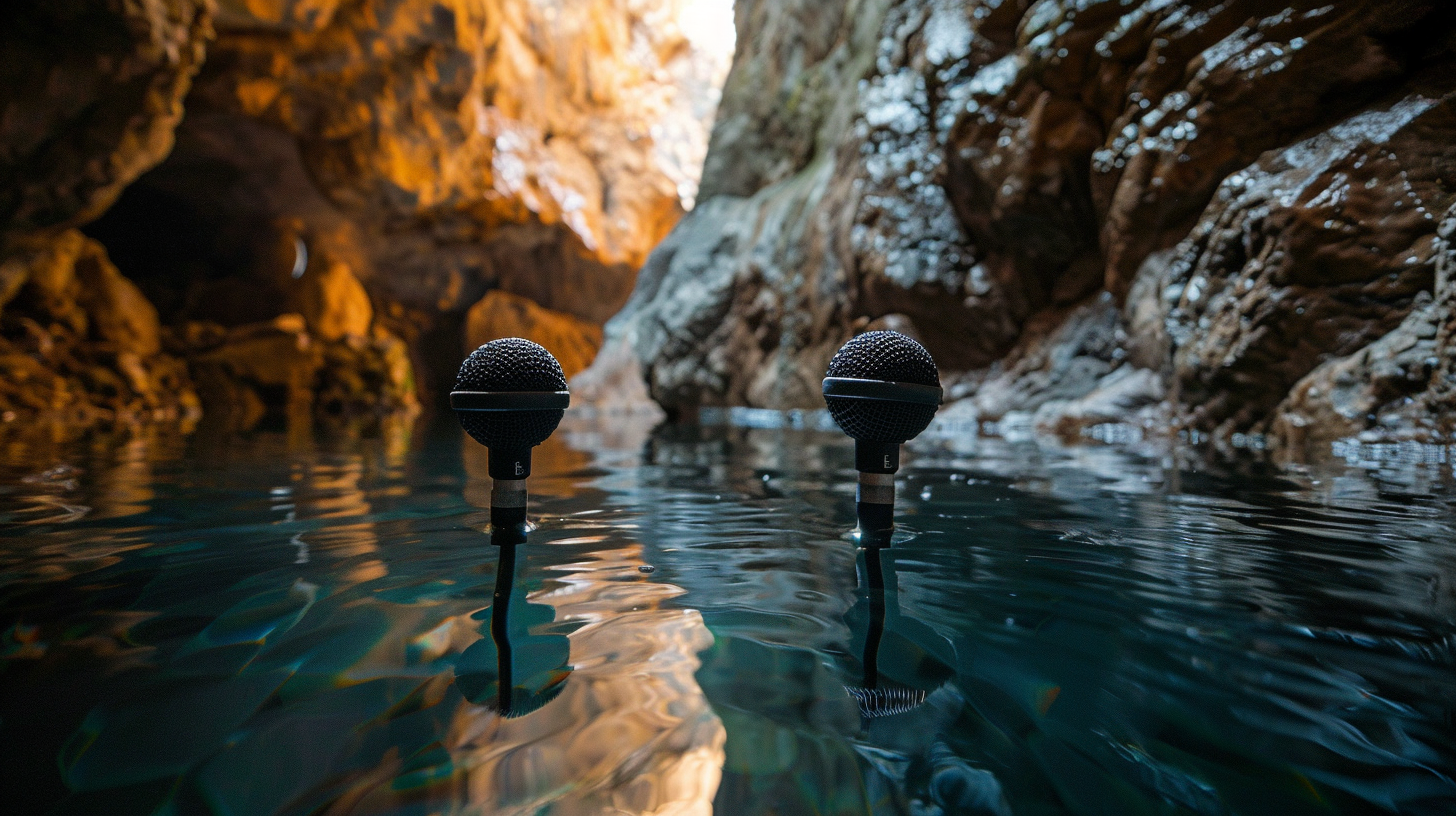
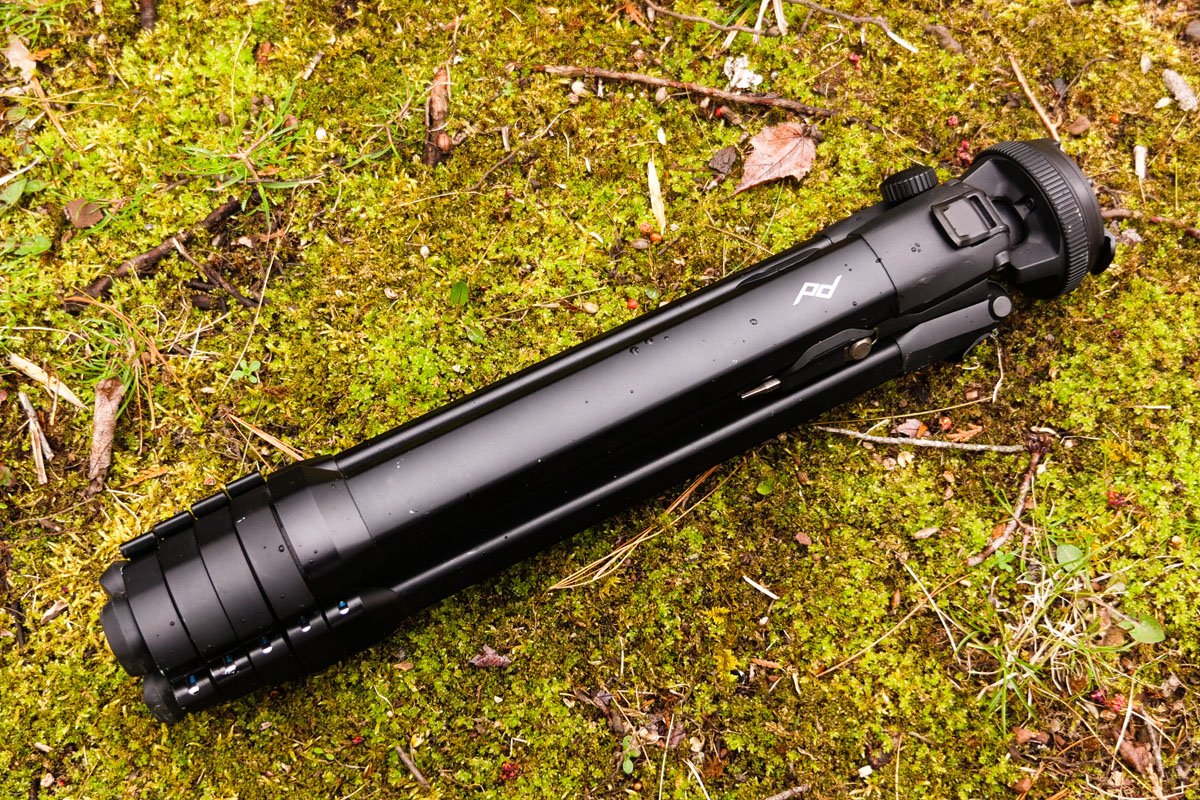
You know you’ve gotten close enough when your recorder looks like this.
As an added bonus, getting so close to your subject overpowers any background noise. This can be really useful for recording at locations with lots of noise pollution. People talking, passing cars and even airplanes can be drowned out by the water.
To highlight this difference, I used three distances between my D100 and the stream. I made three different recordings at 15 feet, 5 feet and 0 feet away from the water. Hear the difference for yourself below!
RELATED: Best Handheld Field Recorder
What the Spectrogram Says
By analyzing the spectrogram data for each recording, we can see the difference in sound. I have posted a spectrogram image for each recording.
Similar to a painting or drawing, a blurry spectrogram lacks acoustic detail. These sounds tend to be very monotonous like white noise or wind. In contrast, a spectrogram with well-defined shapes and colors indicates sonic detail.
Each recording has two spectrograms, one for the left channel, and one for the right. The left channel audio is on top and the right is on bottom.
Loudness is measured in color and is represented by a purple to white gradient. From low to high volume the colors are as follows, purple, red, orange, yellow and white.
Frequency is measured on the y-axis and ranges from 0Hz to 30kHz.
Time is measured on the x-axis and, in these examples, goes from 0 to 10 seconds.
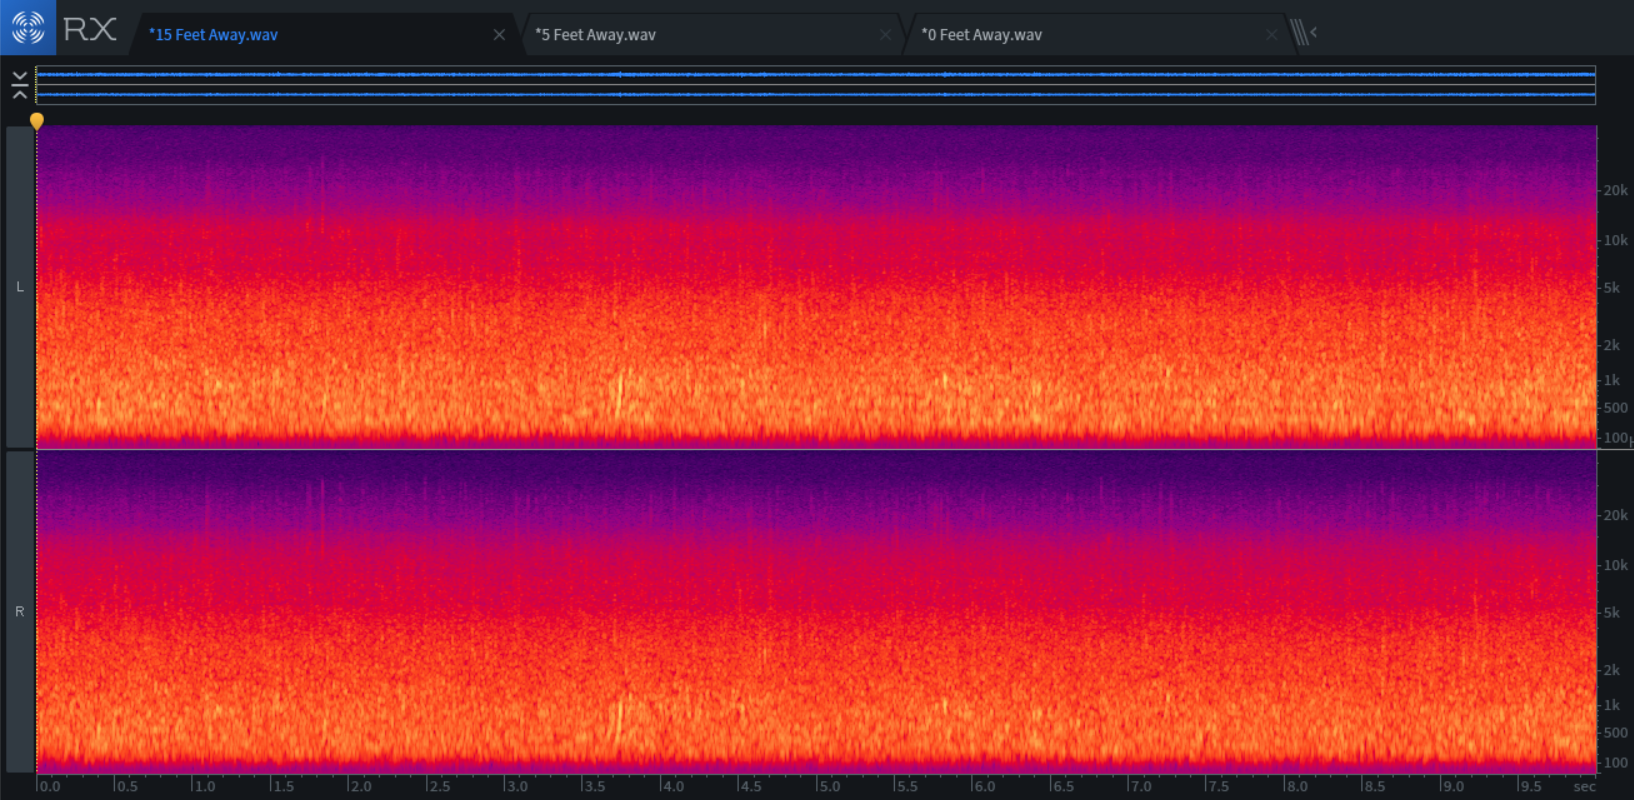
15 Feet Away: Notice how the spectrogram seems blurred in comparison to the two others. That is because from this distance, the recorded water lacks definition and can be compared to white noise.
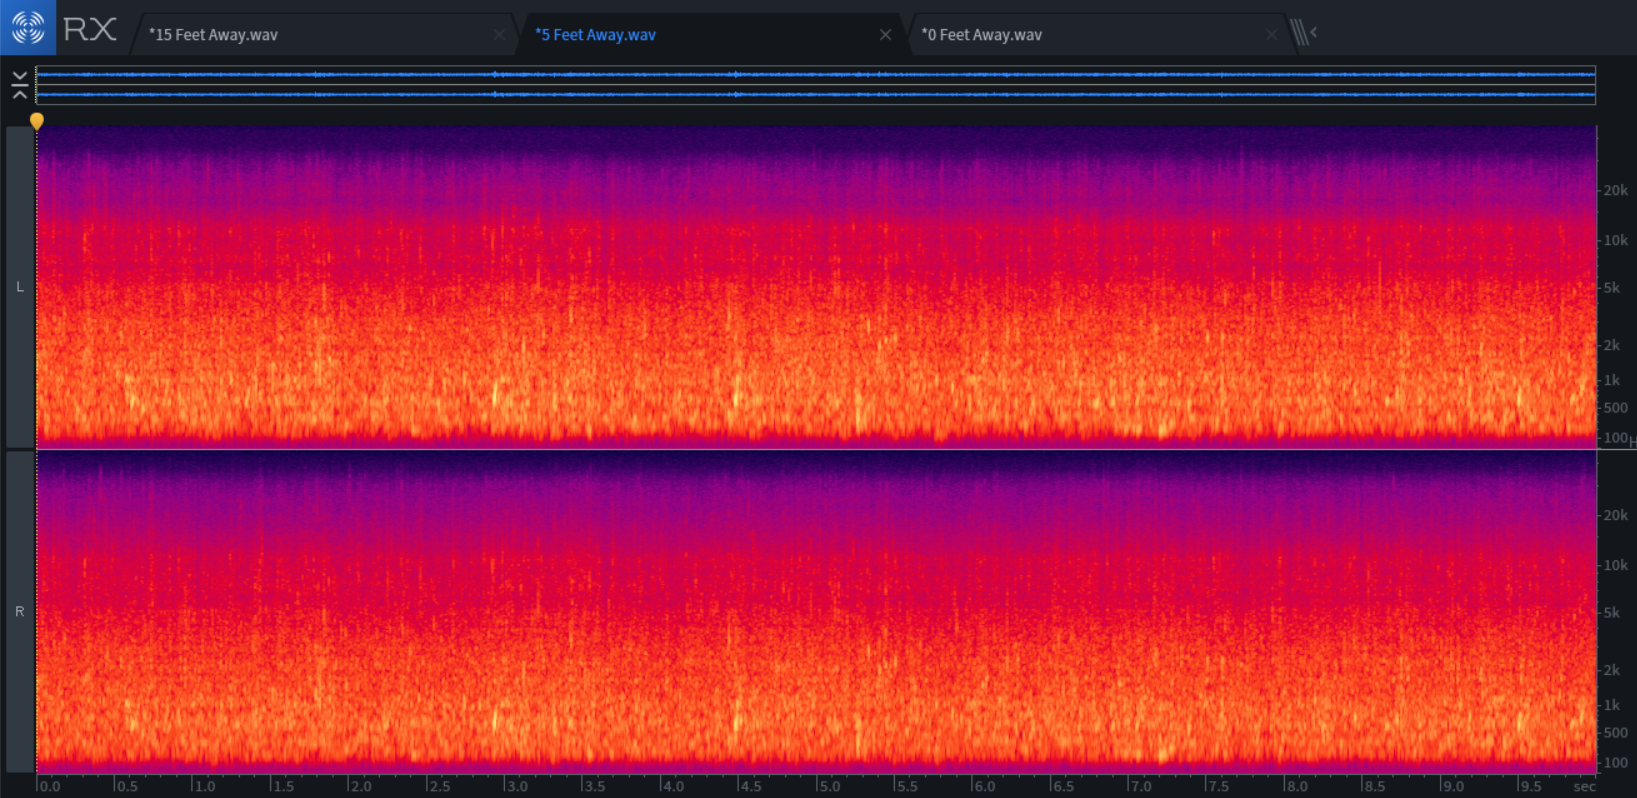
5 Feet Away: This recording has much more definition, especially in the lower frequency range from 100-2000Hz. The higher frequencies are also more defined, but not by much.
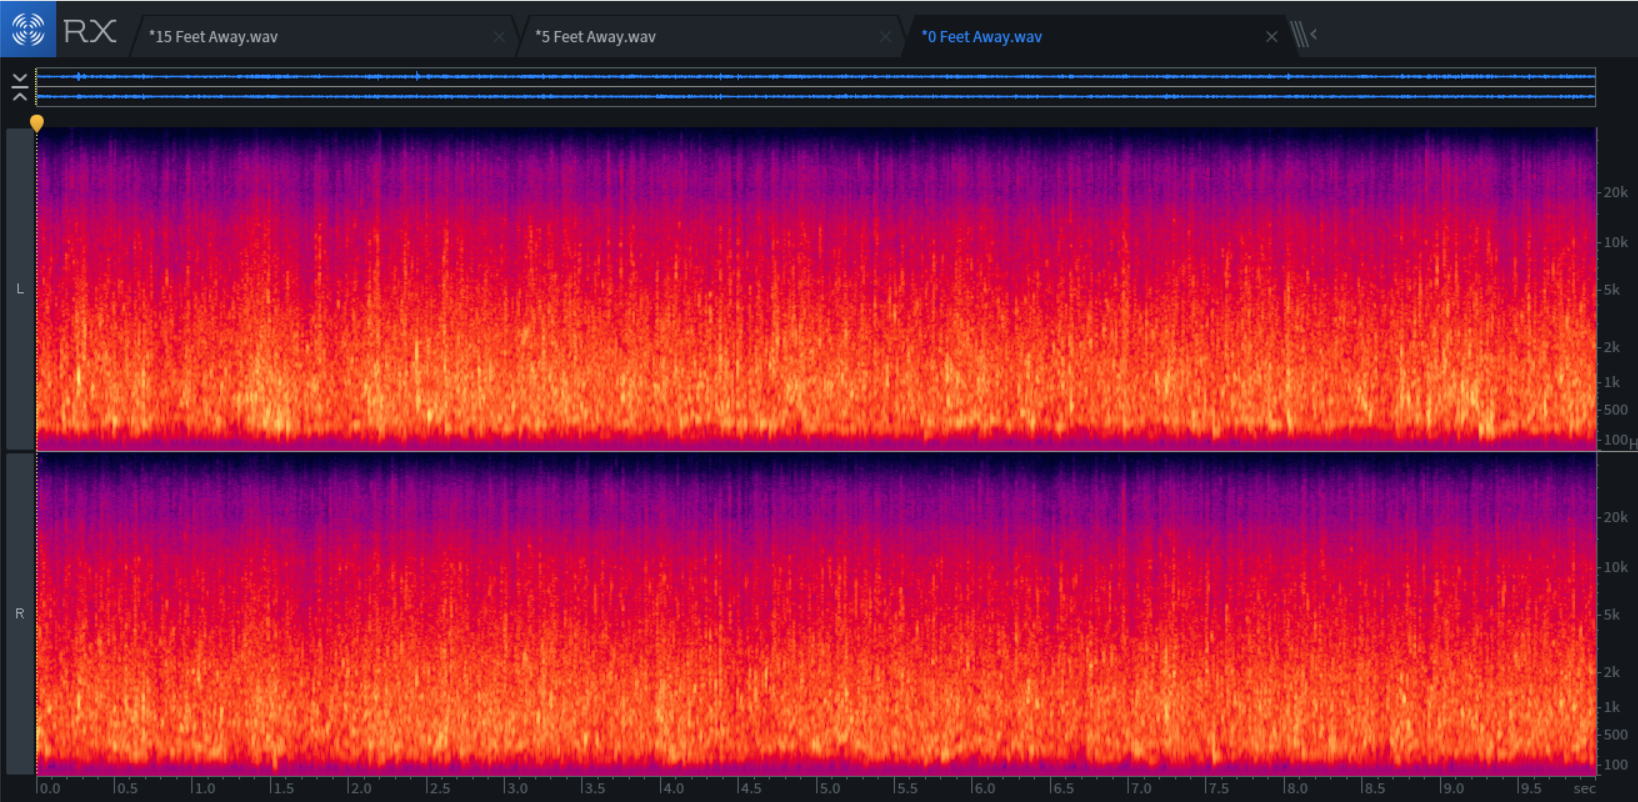
0 Feet Away: In this spectrogram, the water is clearly defined across all frequencies. It is the only spectrogram with detailed information above the 5kHz mark.
When it Doesn’t Work
There is a limit to this technique. It only works well for low to medium flow sources. Trying this technique at a waterfall or a very turbulent stream will not yield detailed recordings. No matter how close you get to very loud water, it will always sound like white noise and will lack the binaural effect.
Summary
Select a gentle to medium flowing body of water
For the most detailed water sfx, get as close as possible!
A small change in microphone direction will greatly impact the balance of your recording
Use headphones to determine the best microphone angle
That’s all everyone! I hope you learned something from this article and are inspired to try this technique the next time you’re out in the field.
Support Acoustic Nature
If you enjoyed this post and would like to help support Acoustic Nature, please consider "buying me a coffee" or becoming a Patreon with the buttons below.
As a thank you for your support, Patreon supporters receive a copy of Field Recording For Beginners, exclusive access to the full Behind The Sounds video series, nature sound library downloads, and more.
If you are unable to support the site financially, please share this post with others, or leave a comment below letting me know you enjoyed this post! Both are free and help the website grow. Thank you ♫
Thanks for reading,
-Jared